如何在已破解的Wii U上安装游戏:完全指南
了解在 2026 年如何通过四种逐步教程在已破解的 Wii U 上安装游戏,包括 NUSspli、Wii U Downloader、光盘提取和 UWUVCI。
2026年4月14日
本指南仅用于个人和学习用途。我们反对盗版及任何侵犯版权的行为。
已经有破解版 Wii U 了?接下来该做什么?
在已软破的 Wii U 上安装游戏比简单地将文件拖入文件夹要麻烦得多。主要有四种方法。有些方法速度较快,但技术门槛较高;而另一些方法则更稳定,但耗时更长。没有通用的解决方案;这取决于你的硬件、耐心以及想玩的游戏类型。
在本指南中,我们将分步介绍四种在 Wii U 上安装游戏的方法,以便您选择最适合您的方法。
注意:对Wii U进行破解或修改确实存在一定风险。每次对系统进行更改时,都有可能造成无法修复的变砖。如果您的主机已完成破解且运行稳定,那么您可以继续操作。否则,您应该先完成系统破解再继续。

如何下载WUP Installer GX2:
无论您决定选择哪种方法,都需要用到WUP Installer GX2。这是因为每种方法的最终步骤都是使用WUP Installer GX2将游戏安装至Wii U主机。
所以,请从下载该软件开始。
点击链接:https://github.com/Fangal-Airbag/wup-installer-gx2/releases
下载 wup_installer_gx2.wuhb 文件
插入 Wii U SD 卡,打开 Wii U 文件夹,创建一个名为install的文件夹。(之后,将所有已下载的游戏拖入该文件夹以进行安装。)
打开apps文件,将wup_installer_gx2.wuhb文件拖放至其中里面。
方法一:使用 NUSspli 直接在 Wii U 上安装游戏
NUSspli 是什么
NUSspli 是一款自制应用,可直接从任天堂官方服务器下载并安装 Wii U 游戏。无需电脑,也无需使用 SD 卡中转(若安装至 USB 设备)。
这是最方便的选择,如果你想要的游戏可用。
步骤 1:安装 NUSspli
关闭 Wii U 电源并取出 SD 卡。
在您的电脑上,从其 GitHub 页面下载 NUSspli。
解压文件后,请将它们复制到 Wii U SD 卡的指定文件夹中。
将SD卡重新插入Wii U并启动电源。确保你的主机已连接到互联网。
打开 Homebrew Launcher(自制程序启动器)并运行 WUP Installer GX2。
从列表中选择 NUSspli,并将其安装到 USB 存储设备(推荐使用)。
安装完成后,退出应用程序。如果设置无误,NUSspli 将出现在您的 Wii U HOME 菜单中。
步骤 2:下载并安装游戏
从 Wii U 主菜单启动 NUSspli。
前往下载中心,在此您可以浏览所有可用内容。
使用肩部按键在不同类别之间切换,包括:游戏、更新、DLC 和演示版。
选择一款游戏,选择安装位置,即可开始安装。
常见错误与技巧
- 如有可能,尽量使用有线连接
为获得更快、更稳定的下载体验,建议使用USB以太网适配器。Wi-Fi连接可能偶尔会出现错误或中断。 - 修复 Homebrew Launcher 崩溃问题
如果您的 Wii U 在打开 Homebrew Launcher 时自动关机,请尝试先启动“健康与安全信息”应用。等待几秒钟,然后退出并重试。 - 如有需要,请更新提拉米苏
如果您看到提示Tiramisu系统版本过时的错误,请下载最新版本并将文件复制到SD存储卡中,覆盖现有文件。
方法 2:Wii U Downloader / USB Helper:利用电脑加速下载
此方法使用电脑下载游戏,速度比直接在 Wii U 上使用 NUSspli 快得多。不过,此方法涉及的步骤会稍多一些。
开始之前,请确认您已安装WUP Installer GX2,因为最终安装会用到它。安装说明见上方。
步骤1:下载并设置Wii U Downloader
访问 GitHub 的 Releases 页面:https://github.com/Xpl0itU/WiiUDownloader/releases
下载 WiiUDownloader-Windows.zip,然后解压并运行其中的可执行程序。
如果您看到 Windows 安全警告,请点击“更多信息” → “仍要运行”。
步骤 2:选择并将游戏加入队列
打开 WiiUDownloader 并搜索您要的游戏。
选择游戏,然后确保底部已勾选了“解密内容”。
下一步:
- 转到 更新点击标签页,并选择更新
- 前往 DLC(可下载内容)切换至标签页并选择DLC(如有)
所有选定的项目(基础游戏、更新和 DLC)将出现在左侧边栏的下载队列中。
点击 下载队列,然后选择文件保存位置。
下载完成后,您将获得三个文件:
- 游戏本体
- 更新
- 可下载内容
步骤 3:将文件传输到您的 SD 卡
将您的 Wii U SD 卡插入 PC。
将所有三个文件拖放到install文件夹中。
如果安装文件夹不存在,请手动创建。
步骤 4:在 Wii U 上安装游戏
将SD卡插回你的Wii U。
从 Homebrew Launcher 启动 WUP Installer GX2。
你应该能看到刚刚添加的游戏文件。
请按以下顺序安装:
- 本体
- 更新
- DLC(可下载内容)
每次安装时,请选择 USB 存储设备(推荐)。
安装完成后,退出应用程序。
您的游戏会在Wii U主界面上显示。
官方指南
您也可以参考WiiUDownloader 指南。
常见错误与建议
1. USB 连接中断 / 安装过程中失败
如果安装中途失败,通常是 USB 设备供电不足所致。
Wii U 的 USB 端口供电能力有限,可能不足以驱动外部存储设备,特别是在进行大型数据安装时。
如何修复:
- 使用一个USB Y 形线从两个USB口取电
- 或使用外接电源硬盘
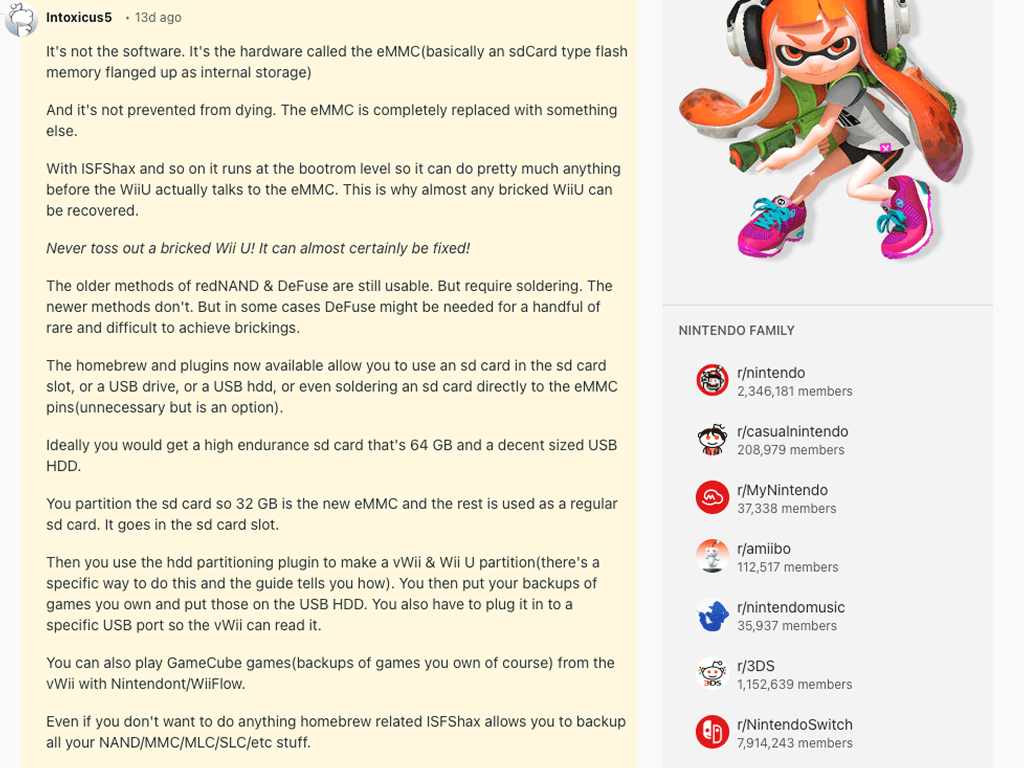
2. 系统内存错误
如果您看到类似 160-0103 的错误,提示系统存储器存在问题,这通常表明 Wii U 的内部存储(eMMC)存在硬件故障。
此问题并非由软件或安装问题导致,无法通过常规排查手段解决。
如何修复
- 对于大多数用户:退回或更换游戏机
- 高级用户须知:您无法修复损坏的内部存储,但可以通过使用外部存储(如 SD卡或U盘)作为替代方案。详细步骤请参阅本文 Reddit 评论:
3. WiiUDownloader 下载中断
如果您的下载中途停止(例如,在 30–40MB 左右)且无法恢复,问题通常是由于网络不稳定导致的,而非软件本身。
这可能是由于连接不稳定或任天堂内容服务端出现临时问题所致。
如何修复:
- 请重试下载(几次尝试后可能就会成功)
- 切换到更稳定的网络
- 在低峰时段(如深夜)下载
速度较慢,且数据需经过SD卡和Wii U的安装程序。
方法 3:备份你自己的游戏光盘
步骤 1:从光盘提取游戏镜像
将光盘放入Wii U主机,从主菜单启动Wii U光盘导出器,选择导出格式.app进行转储。
出现提示时,选择尺寸较大的分区(单位为 GB),然后按 A 键开始。请按照屏幕提示操作。完成后,退出并返回菜单。
备份将保存在您 SD 卡的 `wudump` 文件夹中。
步骤 2:准备 SD 卡中的文件
将SD卡插入您的电脑并打开wudump文件夹。您会看到一个游戏文件夹,可以将其重命名为您想要的游戏名称。
然后前往 SD 卡根目录,创建一个名为 install(小写)的文件夹,并将游戏文件夹移动进去。
步骤 3:在 Wii U 上安装游戏
将SD卡重新插入您的Wii U并启动主机。启动WUP Installer GX2(WUP安装工具GX2),从安装目录中选择游戏选项并进行安装。
完成后,按下Home键,游戏就会显示在主菜单上。
完成之后,按下Home键(主页按钮),即可在Wii U主界面找到游戏。
常见错误与小贴士
- Wii U 无法读取光碟
请检查光盘是否损坏或有污渍。若外观无异常,问题可能出在光驱本身。此外,请检查光盘标签面是否有损伤或异常纹路。
如果光盘表面没有明显的霉斑,请注意 Wii U 的光头比较挑剔,即使是干净的光盘也可能难以读取。在这种情况下,建议使用兼容 Wii U 的光头清洁碟或清洁套件。
- 读取光盘时发出撞击声,读取失败
此问题通常是由光驱或激光故障引起的,而非游戏光盘本身。
如果您不想切换到 USB 加载或更换整个主机,可以订购一个备用光驱,并按照本 指南来更换损坏的 DVD 驱动器。
方法 4:UWUVCI(终极 Wii U Virtual Console 注入工具)
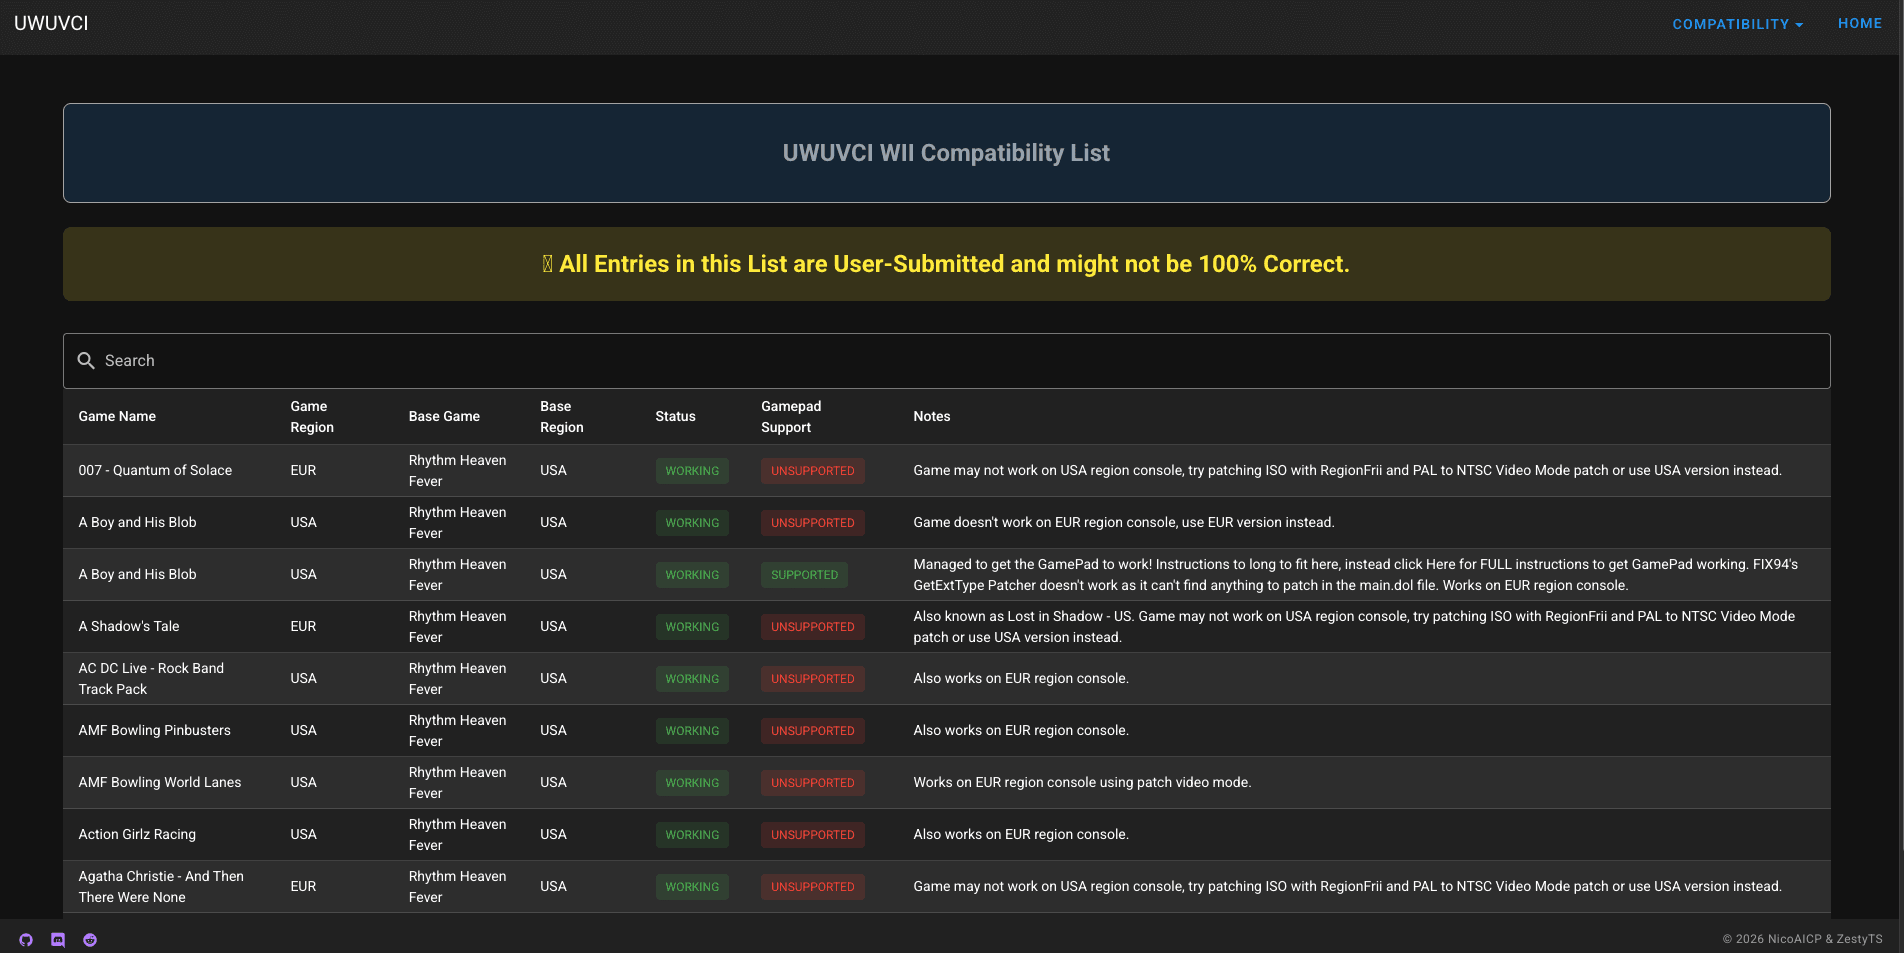
注意:并非所有游戏都受支持。您可以在UWUVCI 网页的早期版本中查看兼容性。
第 1 步:下载并安装配置 UWUVCI 工具
访问 GitHub 链接:https://github.com/stuff-by-3-random-dudes/UWUVCI-AIO-WPF/releases
下载并解压文件,然后运行安装程序并按照说明操作。
(如果弹出安全警告,请点击“详细信息”并选择“仍然运行”。)
安装完成后,运行 UWUVCI AIO.exe 以启动程序。
退出初始教程后,您将在左侧边栏看到支持的游戏机列表。
您也可以参考官方指南,了解每种控制台类型。
下面我们以GBA VC Inject为例。
步骤 2:选择基座并输入所需键值
首先,选择一个基础(一个现有的 Virtual Console 游戏,用作运行您注入游戏的容器)。
接下来,您需要输入一个标题键和通用键。
您可以在诸如wiiuemulator或wiiutitlekey等网站上找到它们。
我们推荐第二个选项,因为它同时提供了公共密钥。
将密钥复制并粘贴到相应的输入框中,然后点击验证按钮进行验证。
验证通过后,您可以下载基础包。
步骤 3:选择您的游戏文件(ROM)并自定义设置
紧邻 ROM 路径,点击“Select File”并选择您的游戏文件(.iso、.wbfs、.nkit.iso 或 .nkit.gcz)。
这是您想要嵌入的实际游戏。
然后您可以添加一个图标和一个电视图标。您可以从服务器下载这些图像,也可以自行创建。
步骤 4:构建并安装游戏
点击 WUP 安装包,然后打开输出文件夹以查找已生成的文件。
最后,将生成的文件夹拖动到 Wii U 的 SD 卡根目录下的 install 文件夹内。
将 SD 卡插回 Wii U,打开 WUP Installer GX2 软件,选择游戏并安装。
选择安装位置(推荐使用 USB)。
完成流程后,游戏就会显示在你的Wii U主界面上。
常见错误与建议
- 标题关键字 “too long” 错误
如果您使用网站的复制按钮复制标题密钥,但UWUVCI(工具名称)提示密钥过长,请尝试手动选中并复制密钥。这通常能解决该问题。 - 应用卡在“正在下载需要的文件”状态
如果应用在下载过程中显示为无响应,该应用可能并非真正卡死。
如果您使用的是社区维护的版本(而非 Zesty 官方原始版本),下载进度可能无法正确显示,这可能会让人感觉卡住或异常缓慢。
简要对比:我的已破解 Wii U 应选择哪种方法?
方法 | 优缺点 | 适用场景 |
方法1:NUSspli | ✔ 下载游戏无需电脑 | 想要最简单安装配置的初学者 |
方法 2:Wii U 工具 | ✔ 下载速度大幅提升 | 需要高速下载大量或大型游戏且追求效率的PC电脑用户 |
方法 3:从光盘提取 | ✔ 使用您的游戏光碟 | 拥有实体版游戏并希望制作数字备份的用户 |
方法 4:UWUVCI 注入 | ✔ 支持更多游戏类型(如复古或VC游戏) | 追求更高灵活性的高级用户 |
从玩家到创作者:使用 Triverse AI 生成您自己的游戏素材
是否钟情于你最爱游戏中的某个物品或角色?想将其带入现实世界,甚至创造属于你自己的吗?
借助 Triverse AI,您只需几次点击即可将创意转化为 3D 资产。从文本生成图像、从图像生成 3D、从文本到 3D,以及 AI 纹理贴图和重网格化,所有功能均旨在让创作过程快速且直观。
开始设计专属资产,将创意变为现实,无论是用于游戏、项目,还是自娱自乐。
如果您希望进一步深入,例如按照自己的需求重新纹理化资产、重新网格化模型,甚至设计自己的3D资产,接下来可以采取哪些步骤?
这是许多用户心之所向却常难企及的。
传统的3D工具,例如 Blender 和 Maya,学习曲线陡峭,诸如重拓扑等技能无法一蹴而就,需要长期练习。同时,稳定可靠的免费替代方案也很少。
这正是 Triverse AI 量身打造的工具。 Triverse AI 让用户通过输入文本提示或上传参考图,仅需一键即可创建 3D 模型,将创意在数秒内转化为即用的 3D 资产,无需任何 3D 制作经验。它是适用于游戏开发与 3D 打印领域的强大 AI 3D 生成工具。
示例:
如果你想改善 Wii U 游戏中损坏或质量不佳的贴图,可以:
- 截取原始资源
- 使用 Triverse 的图像到 3D 流程
- 使用内置的重新拓扑和 AI 纹理工具来细化细节
- 请以兼容您工作流的格式导出模型
Triverse 让初学者更易于上手游戏素材创作,帮助他们跳过长达数月的复杂 DCC 工具学习过程。它并非旨在取代专业软件,而是为了降低玩家自定义游戏体验的门槛。
如果您已经熟悉 Wii U 的改装,Triverse AI 可以帮助您将创造力提升到新的高度。
结论
在破解的Wii U上安装游戏起初可能让人感到不知所措,但一旦你理解了操作流程,它就会变得简单许多。无论你选择操作简便的NUSspli、使用基于PC的Wii U Downloader方法来追求速度、通过自行从光盘中提取游戏以获得怀旧体验,还是采用UWUVCI来玩复古游戏和获得定制体验,每种方法都能满足不同的需求。
关键在于选择适合你当前配置和顺手程度的方法,而不是试图一次性尝试所有方法。从简单入手,熟悉流程后,再根据需要探索更高级的方案。
只要拥有合适的工具并稍加耐心,您的 Wii U 就能成为一台扩展性更强、性能更强劲的游戏主机。
关于在破解版 Wii U 上安装游戏的常见问题
没有 SD 卡可以破解 Wii U 吗?
几乎所有 Wii U 破解方法在初始设置时都需要一张 SD 卡。虽然一些高级配置在后期可以减少对 SD 卡的依赖,但入门阶段仍需使用。
下载 Wii U 游戏合法吗?
这取决于您所在的地区。下载您未拥有的游戏通常违反版权法。备份您自己的光盘通常更为稳妥,但请务必查阅当地法规。
我可以将游戏安装到内部存储吗?
可以,但主机内置存储空间有限(视型号而定为 8GB 或 32GB)。大多数用户会选择安装到 USB 存储设备以获取更多空间和灵活性。
我需要多大容量的 USB 存储设备?
对于一般用途,128GB 的 USB 存储设备已足够。如果您计划安装大量游戏,建议使用 256GB 或更大容量的设备,以便更好地满足长期存储需求。
这样操作会导致 Wii U 变砖吗?
虽然始终存在一定风险,但只要严格遵循操作说明,风险很低。请避免在安装过程中中断操作或使用不可靠的文件。
我需要解除主机的区域限制吗?
通常不需要。大多数现代工具会自动处理区域差异,不过根据具体游戏的不同,仍可能出现一些兼容性问题。
破解后的 Wii U 可以联网游玩吗?
可以,一般仍可正常联机游玩。但是,使用破解系统始终存在一定的风险,具体取决于您的配置方式。
安装后如何更新游戏?
游戏更新和 DLC 的安装方式与游戏相同,通常可以使用相同的工具完成。
Tiramisu 和 Aroma 有什么区别?
Tiramisu 较旧且更简单。Aroma 更新、更灵活且仍在积极维护中,因此是大多数用户的首选方案。