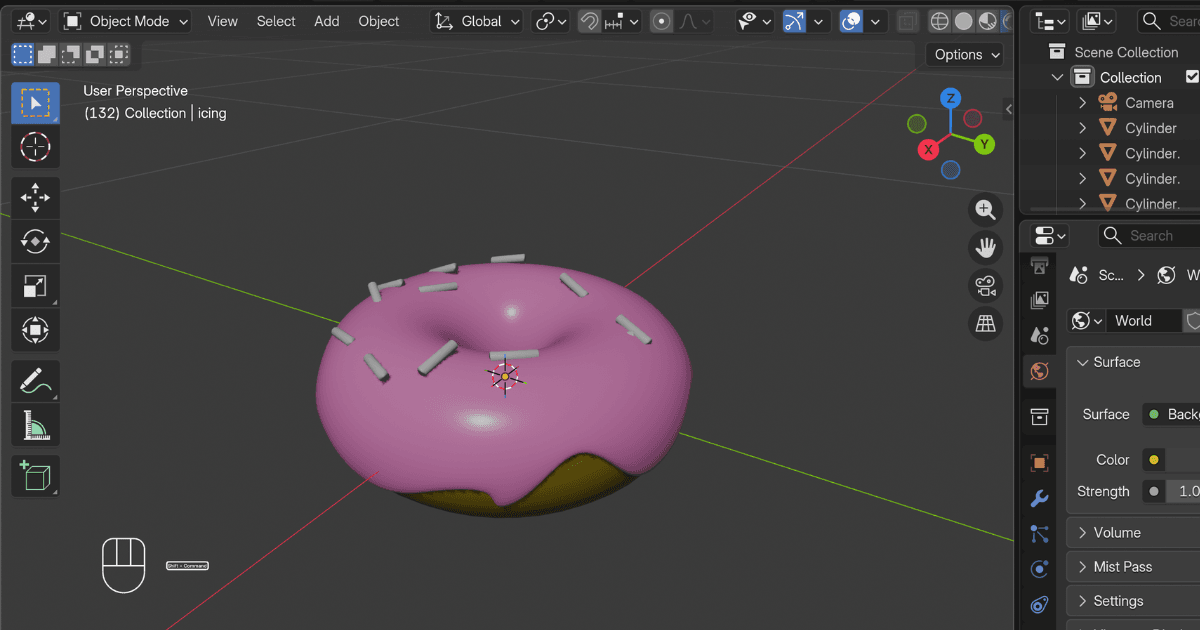
How to Clean Up an AI Model in Blender: Decimate, Remesh, and Texture Bake
Two methods to clean up AI-generated 3D models in Blender: quick decimate or quality voxel remesh with texture baking. Reduce poly count, fix topology, and make your model game-ready or print-ready.
You just generated a 3D model with an AI tool. It looked great in the preview. You download it, open it in Blender, and switch to wireframe view. The mesh is chaos. 500,000 triangles. Textures stretched across weird seams. Floating vertices. The model that looked perfect five minutes ago now looks unprintable, un-animate-able, and kind of broken.
This is normal. AI-generated models prioritize visual output over clean topology. The good news is Blender has built-in tools to fix almost all of it. This guide walks through two complete workflows: a fast decimate method that gets you a usable mesh in under a minute, and a quality remesh method that preserves detail and lets you bake textures properly. By the end, your AI model will be clean, optimized, and ready for games, rendering, or 3D printing.
What's Wrong with AI-Generated Models? (And Why You Need to Clean Them Up)
Every AI-generated model you download has the same three problems. It has too many triangles, the geometry is non-manifold, and the UV map falls apart the moment you try to simplify the mesh. Understanding these issues helps you pick the right fix.
The Three Problems You'll See in Every AI Mesh
Too many triangles. AI tools optimize for visual detail, not polygon efficiency. A character that should have 50,000 triangles comes out with 500,000. This crashes some slicers, bogs down game engines, and makes the file huge for no reason.
Non-manifold geometry. Holes, inverted normals, floating pieces that aren't connected to anything. These don't affect rendering much, but they break 3D printing completely. Your slicer will either fail or produce a file that doesn't print right.
Broken UVs after modification. The textures look fine when you first open the file. But as soon as you simplify the mesh or run a remesh operation, the UV map stops matching the geometry. Textures stretch, seam, or disappear entirely.
When to Use Each Cleanup Method
Blender gives you two main paths. Picking the right one saves you time.
Use Decimate If... | Use Voxel Remesh If... |
|---|---|
You need a fast fix (under 30 seconds) | You need clean quad topology |
The model is for background use or props | You want to animate or sculpt further |
You're 3D printing and just need it manifold | You need to bake textures properly |
You don't care about animation | You're willing to spend 5 minutes for quality |
Most people start with decimate, realize the result isn't good enough, then come back and learn the voxel remesh method. You can skip that loop by picking the right method upfront.
Before You Start: Import and Diagnose Your AI Model in Blender
Importing Your Model
Most AI tools export in OBJ, GLB, or FBX. All three work in Blender. Go to File → Import and pick your format. The model loads into the viewport.
Switch to Material Preview or Rendered mode (Z, then select from the pie menu) to see the textures. If the model appears huge or tiny, press S to scale, move your mouse, and left-click to confirm.
Running Diagnostics: How to Check Polygon Count and Find Mesh Problems
Before you fix anything, you need to know what's broken. Turn on Statistics by clicking the dropdown in the top-right corner of the viewport and checking "Statistics." You'll see the vertex count, triangle count, and object count at the top of the screen.
Now switch to wireframe view (Z → Wireframe). This shows you the mesh density. AI models usually look like a solid wall of triangles, and that's the problem.
For a deeper check, tab into Edit Mode, press A to select everything, then go to Select → Select All by Trait → Non-manifold. If nothing gets selected, your model is already watertight. If faces or edges light up, those are problem areas you'll need to fix later.
Method 1. Decimate Modifier in Blender (The Quick Fix)
Before diving into Blender's tools, there's one shortcut worth mentioning. If you generated your model in Triverse Studio, the platform has a built-in Remesh function. Running it before export can reduce polygon count and clean up some geometry issues before you even open Blender. It's not a complete replacement for the steps below. Most models still benefit from at least one pass through decimate or voxel remesh, but it gives you a cleaner starting point and reduces the work you'll do in Blender.
The Decimate modifier is the fastest way to reduce polygon count. It works by collapsing edges, which keeps the overall shape but removes triangles.
How the Decimate Modifier Works
Find it under Modifier Properties (the wrench icon) → Add Modifier → Generate → Decimate. You'll see three modes: Planar, Unsubdivide, and Collapse.
Planar tries to simplify flat areas. Unsubdivide reverses subdivision. Neither of these is what you want for an AI model. Collapse is the one that works. It reduces triangles while trying to preserve the shape.
Step-by-Step: Decimating an AI Model
- Add the Decimate modifier.
- Select Collapse mode.
- Start with a Ratio of 0.1. This keeps 10% of your polygons. A 500,000-triangle model drops to 50,000.
- Watch the model in the viewport. If it still looks good, try lowering the ratio to 0.05 or even 0.01.
- Stop before the model gets blocky or loses important detail.
- Click Apply when you're happy with the result.
The whole process takes about 20 seconds.
What Decimate Gets Right (and What It Breaks)
Decimate is fast. The textures usually survive intact because the modifier doesn't change the UV map. It just reduces the number of faces, and that's the upside.
The downside is that the mesh stays triangulated. If you need to animate the model later, triangulated geometry deforms poorly. Edges do not flow in the direction of muscle or joint movement, so the model looks jagged when it bends.
For static models like props, background objects, and things that do not move, decimate is usually good enough. For 3D printing, it works, but you should still run a manifold check afterward.
Method 2. Voxel Remesh + Texture Baking in Blender (The Quality Fix)
Voxel remesh rebuilds your entire mesh from scratch. Instead of collapsing edges, it converts the model into a 3D grid of cubes (voxels), then extracts a new surface from that grid. The result is clean, quad-based topology that works for animation, sculpting, and games.
The catch is that voxel remesh breaks your UVs. Textures will look wrong until you bake them from the original model onto the new one. This takes a few extra minutes but gives you a much better result.
Why Voxel Remesh Gives Better Results
Voxel remesh produces quads instead of triangles. Quads subdivide cleanly, deform properly during animation, and work better with sculpting tools. The topology is more uniform, which makes the model easier to edit later.
If you're making something that needs to look good up close, or if you plan to rig and animate it, voxel remesh is worth the extra time.
Step-by-Step: Voxel Remesh in Sculpt Mode
- Switch to Sculpt Mode from the dropdown at the top of the viewport.
- Look for the Remesh section in the top toolbar.
- Hold Alt and drag your mouse left or right. You'll see a grid appear. This sets the voxel size. Smaller voxels mean more detail but more polygons.
- Aim for around 0.02 as a starting point. This gives a good balance of detail and polygon count.
- Press Ctrl+R to apply the remesh.
- Switch back to Object Mode and check the result.
Your mesh now has clean quads, but the textures probably look broken. That's expected. The next step is to bake them.
Preparing for Texture Baking
You need two versions of your model for this to work: the original high-poly version with correct textures, and the new low-poly version you just remeshed. Keep both in the scene at the exact same position. Don't move either one.
If you didn't save a copy of the original before remeshing, you'll need to import it again from your AI tool.
Creating a New UV Map
The low-poly model needs a fresh UV map that matches its new geometry.
- Select the low-poly (remeshed) model.
- Go to the Data Properties tab (the icon that looks like a triangle) and find the UV Maps section.
- Delete the existing UV map, then click the plus button to create a new one.
- Tab into Edit Mode, press A to select all, then press U and choose Smart UV Project.
- Set Island Margin to 0.02 and click OK.
This creates a clean UV layout for the new mesh.
Creating a New Material and Texture
- Open the Shader Editor (you may need to split your viewport and change one side to Shader Editor).
- With the low-poly model selected, create a new material.
- Add an Image Texture node (Shift+A → Texture → Image Texture).
- Click New in the image dropdown, name it something like "baked_texture", and set the resolution to 2048 or 4096.
- Connect the Color output of the Image Texture node to the Base Color input of the Principled BSDF.
The texture will look black for now. That's fine. You're about to fill it.
Baking Textures from High-Poly to Low-Poly
This is the step that makes the textures match the new mesh.
- Select the high-poly model first, then shift-click the low-poly model. The low-poly needs to be the active object (it should have the brighter orange outline).
- Switch the render engine to Cycles (top dropdown, usually set to Eevee by default).
- Go to Render Properties (the camera icon) and scroll down to the Bake section.
- Check the box that says "Selected to Active." This tells Blender to bake from the high-poly onto the low-poly.
- Set Bake Type to Diffuse.
- Under Influence, uncheck Direct and Indirect. You only want the color data, not the lighting.
- Set Extrusion to 0.05. This pushes the bake rays slightly outward so they don't collide with the low-poly surface. Without this, you'll get black spots and artifacts.
- Click Bake.
Blender will render for a few seconds to a few minutes depending on your model and resolution. When it finishes, your new texture will have the colors from the original model, properly mapped to the new UV layout.
Troubleshooting Common Baking Issues
The texture is still black. Make sure the Image Texture node is selected (click it so it has a white border), and double-check that your new UV map is the active one in the Data Properties.
There are weird seams or stretched areas. Increase the Extrusion value to 0.1 and try again. This usually happens when the high-poly and low-poly are too close together.
Some details are missing. Your voxel size was probably too large. Go back, try a smaller voxel size (like 0.01), remesh again, and rebake.
Cycles isn't available. Make sure you're not in Sculpt Mode. Cycles only appears as an option in Object Mode.
A Cleaner Starting Point with Triverse Artistic Mesh
If you work with AI-generated models in game engines, XR applications, or real-time pipelines, there's a new option coming to Triverse that changes the workflow for the better.
Triverse's Artistic Mesh feature takes a different approach. Instead of generating a high-detail mesh and requiring you to simplify it afterward, it produces clean, low-poly topology designed for real-time engines in about 20 seconds. The geometry is built for Unity and Unreal pipelines from the start. Think triangles, clean edge flow, and optimized polygon counts.
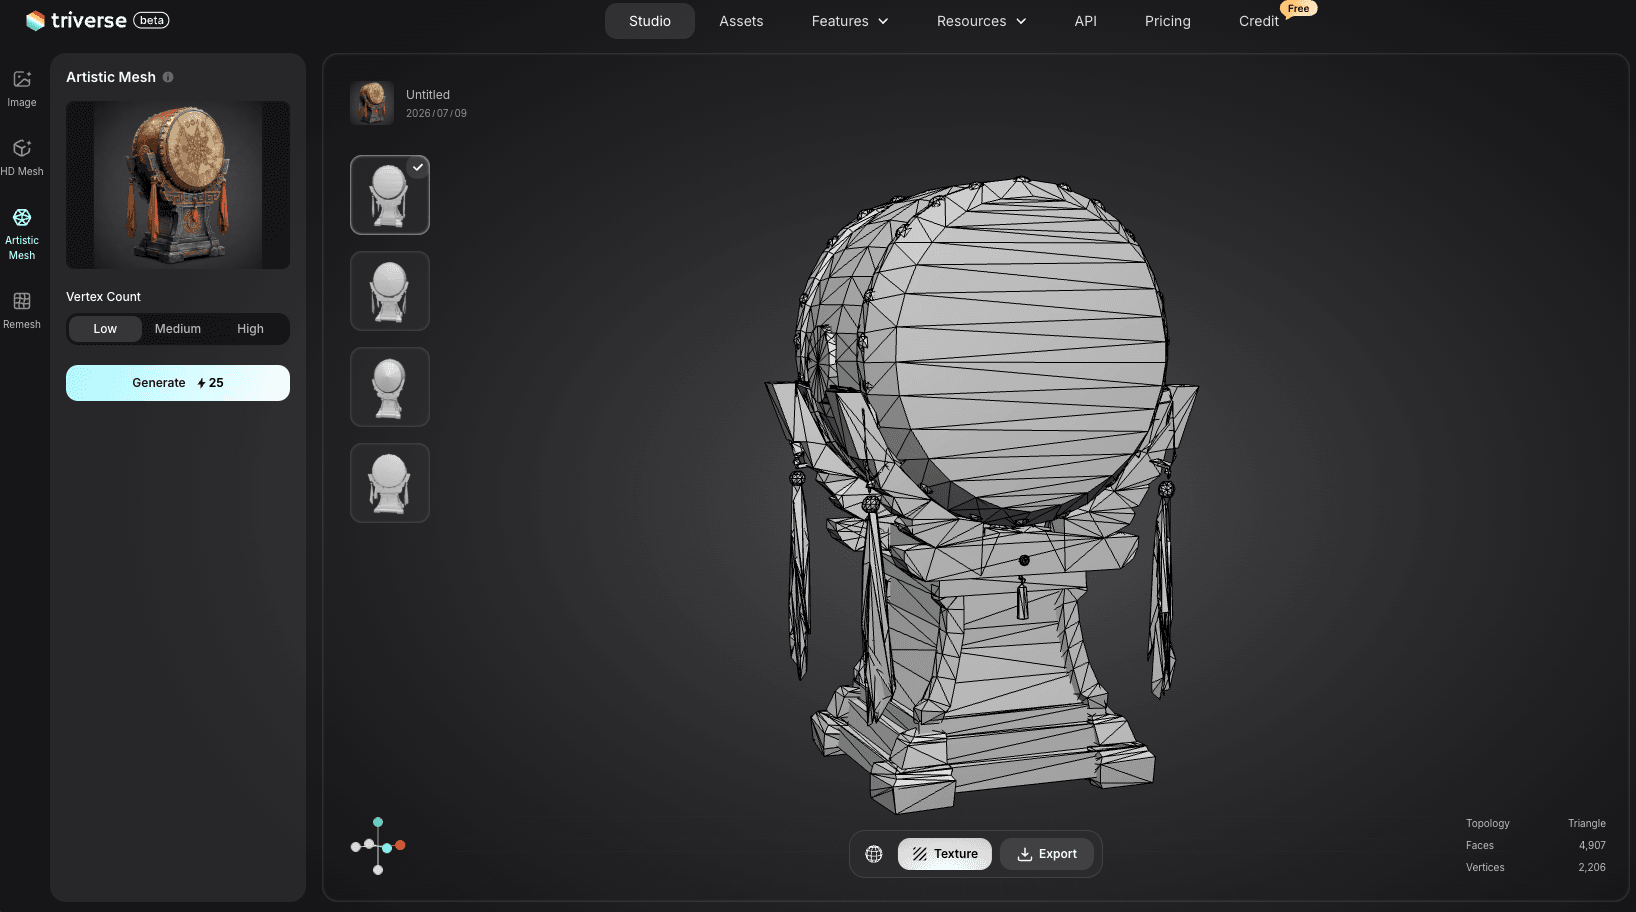
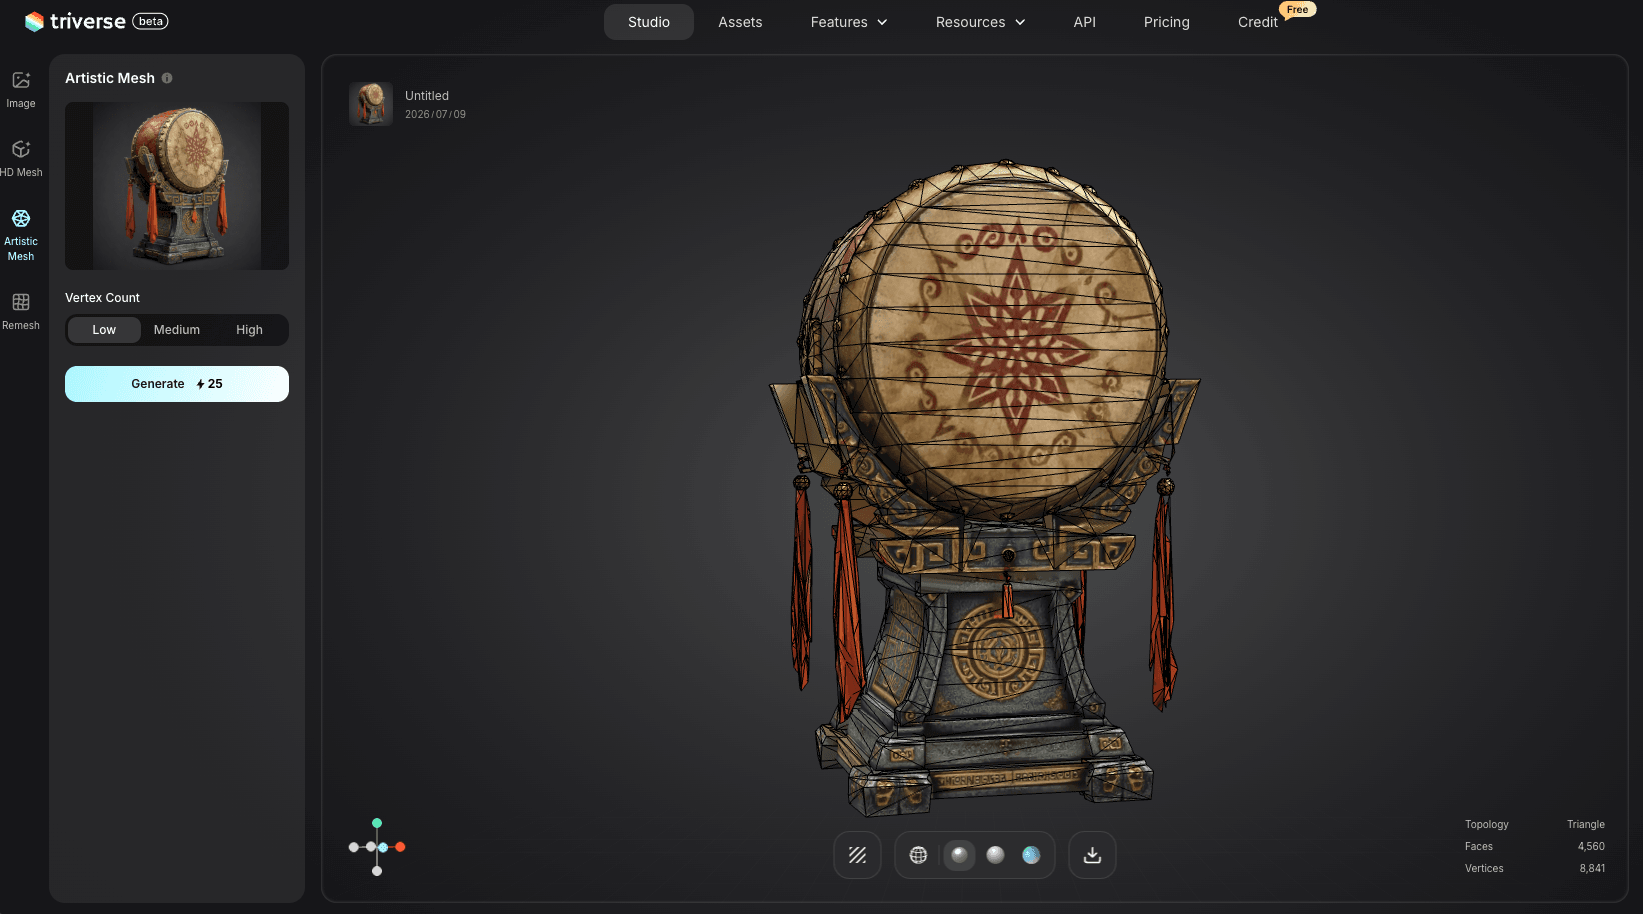
This doesn't replace the Blender workflow covered in this article. If you already have a model that needs cleanup, the decimate and voxel remesh methods above are still your best options. But if you're starting from scratch and need game-ready assets without the cleanup middle step, Artistic Mesh offers a faster path. It's aimed at game developers, 3D artists, and anyone building scalable asset libraries for interactive applications.
Making Your AI Model 3D-Print Ready: Manifold and Watertight
If your goal is 3D printing, you need one more step. The model has to be manifold: no holes, no floating pieces, no inverted normals.
How to Check for Non-Manifold Geometry in Blender
- Tab into Edit Mode.
- Go to Select → Select All by Trait → Non-manifold.
- If nothing is selected, your model is already watertight.
- If faces or edges light up, those are the problem areas.
How to Fix and Make the Mesh Watertight
For most AI models, the main issues are duplicate vertices and small holes.
- With everything selected in Edit Mode, go to Mesh → Clean Up → Merge by Distance. Leave the distance at the default and confirm. This merges any vertices that are in the same spot.
- Go to Mesh → Clean Up → Fill Holes. This closes any gaps in the mesh.
- Run the non-manifold check again. If you still have issues, fix them manually or use a dedicated repair tool like Meshmixer.
For a final check, export as STL and open it in Meshmixer or Windows 3D Builder. Both tools confirm whether the mesh is printable.
Quick Reference: Keyboard Shortcuts and Settings
Action | Shortcut / Setting |
|---|---|
View wireframe | Z → Wireframe |
View statistics | Top-right dropdown → Statistics |
Add Decimate modifier | Modifier Properties → Add Modifier → Generate → Decimate |
Adjust voxel size (sculpt) | Alt + drag |
Apply voxel remesh | Ctrl + R |
UV unwrap | U → Smart UV Project |
Select non-manifold | Edit Mode → Select → Select All by Trait → Non-manifold |
Merge by distance | Mesh → Clean Up → Merge by Distance |
Fill holes | Mesh → Clean Up → Fill Holes |
Frequently Asked Questions about Clean Up AI 3D Models
Bottom Line
Cleaning up AI-generated models is now a standard part of the workflow. Decimate for speed, voxel remesh for quality, texture baking when you need to preserve materials. Both methods take under five minutes once you've done them a few times.
If you're generating models regularly, cleanup is easier when the source geometry starts cleaner. Triverse AI produces models with more consistent topology, which reduces the time you spend fixing broken meshes. Export as STL or OBJ, bring it into Blender, and in most cases, a quick decimate pass is all you need.
For more on getting printable geometry from the start, see our guide on how to create 3D models for printing. If you run into mesh issues during cleanup, our mesh repair guide covers the most common fixes.