Blender 5 Tutorial for Beginners: Make a Realistic Donut in 5 Minutes
Learn how to make a 3D donut in Blender from scratch in this beginner-friendly tutorial. Plus, discover a faster way to generate donut models with Triverse AI.
April 23, 2026
If you scroll through Blender tutorials from many creators, you will quickly notice that a lot of them start with a 3D donut. This is because it looks simple enough—just a torus with some icing and scattered toppings. But in reality, it teaches the core skills every 3D artist needs, such as modeling, texturing, shading, lighting, camera setup, and rendering. The best part? You can make one in about five minutes.
Blender Basics
What Is Blender Used For?
Blender is a free, open-source 3D creation suite. People use it to create 3D objects for everything from 3D printing and game development to architectural visualization. In simple terms, instead of working with a flat surface, you are building objects in three dimensions.
Understanding the Blender Interface
The first time you open Blender, the interface can feel like a cockpit with too many buttons. Here are the basics you should know before starting any modeling:
- 3D Viewport: Your main workspace and where your model lives. You'll spend most of your time here.
- Outliner (top right, by default): Shows every object in your scene. Think of it as a file folder for everything you've created.
- Object Mode and Edit Mode:
- Object Mode: Used for selecting and moving entire objects. This is the default mode when you add new objects.
- Edit Mode: Used for editing the geometry of an object (vertices, edges, and faces).
- Several Basic Controls:
- Move (G): Press G, then move your mouse. You can also use the Move tool from the left toolbar (arrow icon) and drag the object.
- Rotate (R): Press R, then move your mouse. Alternatively, use the Rotate tool from the left toolbar (circular icon) and drag the rotation rings.
- Scale (S): Resizes the object. Press S and move your mouse to scale up or down. You can also use the Scale tool from the left toolbar (square icon) and drag outward or inward.
- Orbit (Middle Mouse Drag): Rotates the camera around your scene. If you don’t have a middle mouse button, you can use the orbit tool from the right-side navigation gizmo.
- Zoom (Scroll Wheel): Zooms in and out. You can also use the zoom buttons on the right-side navigation controls.
- Add Object (Shift + A): Opens a menu to add new objects (mesh, light, camera, etc.). You can also click Add in the top menu bar and choose an object from the dropdown.
- Delete (X or Delete): Removes the selected object or geometry. You can also right-click the object and choose delete, or use the Object menu at the top.
With these, you already know how to create, delete, and modify objects. That is enough to make a donut. Everything else can be learned along the way.
Basic Keyboard Shortcuts in Blender
Before touching your donut, take a moment to get familiar with these shortcuts. You will use them constantly.
Shortcut | Action |
G | Grab (move) the object |
S | Scale (resize) the object |
R | Rotate the object |
Tab | Switch between Object Mode and Edit Mode |
Shift + A | Opens the Add menu for adding a shape (like that torus for your donut base) |
X | Removes the selected object or geometry |
For a full list of shortcuts, you can refer to this guide.
How to Make a Donut in Blender 5 (Step-by-Step Guide)
This is it. Your first 3D model from scratch. We'll build the donut shape, add icing, and sprinkle bits for a finish.
Step 1: Create the Donut Base
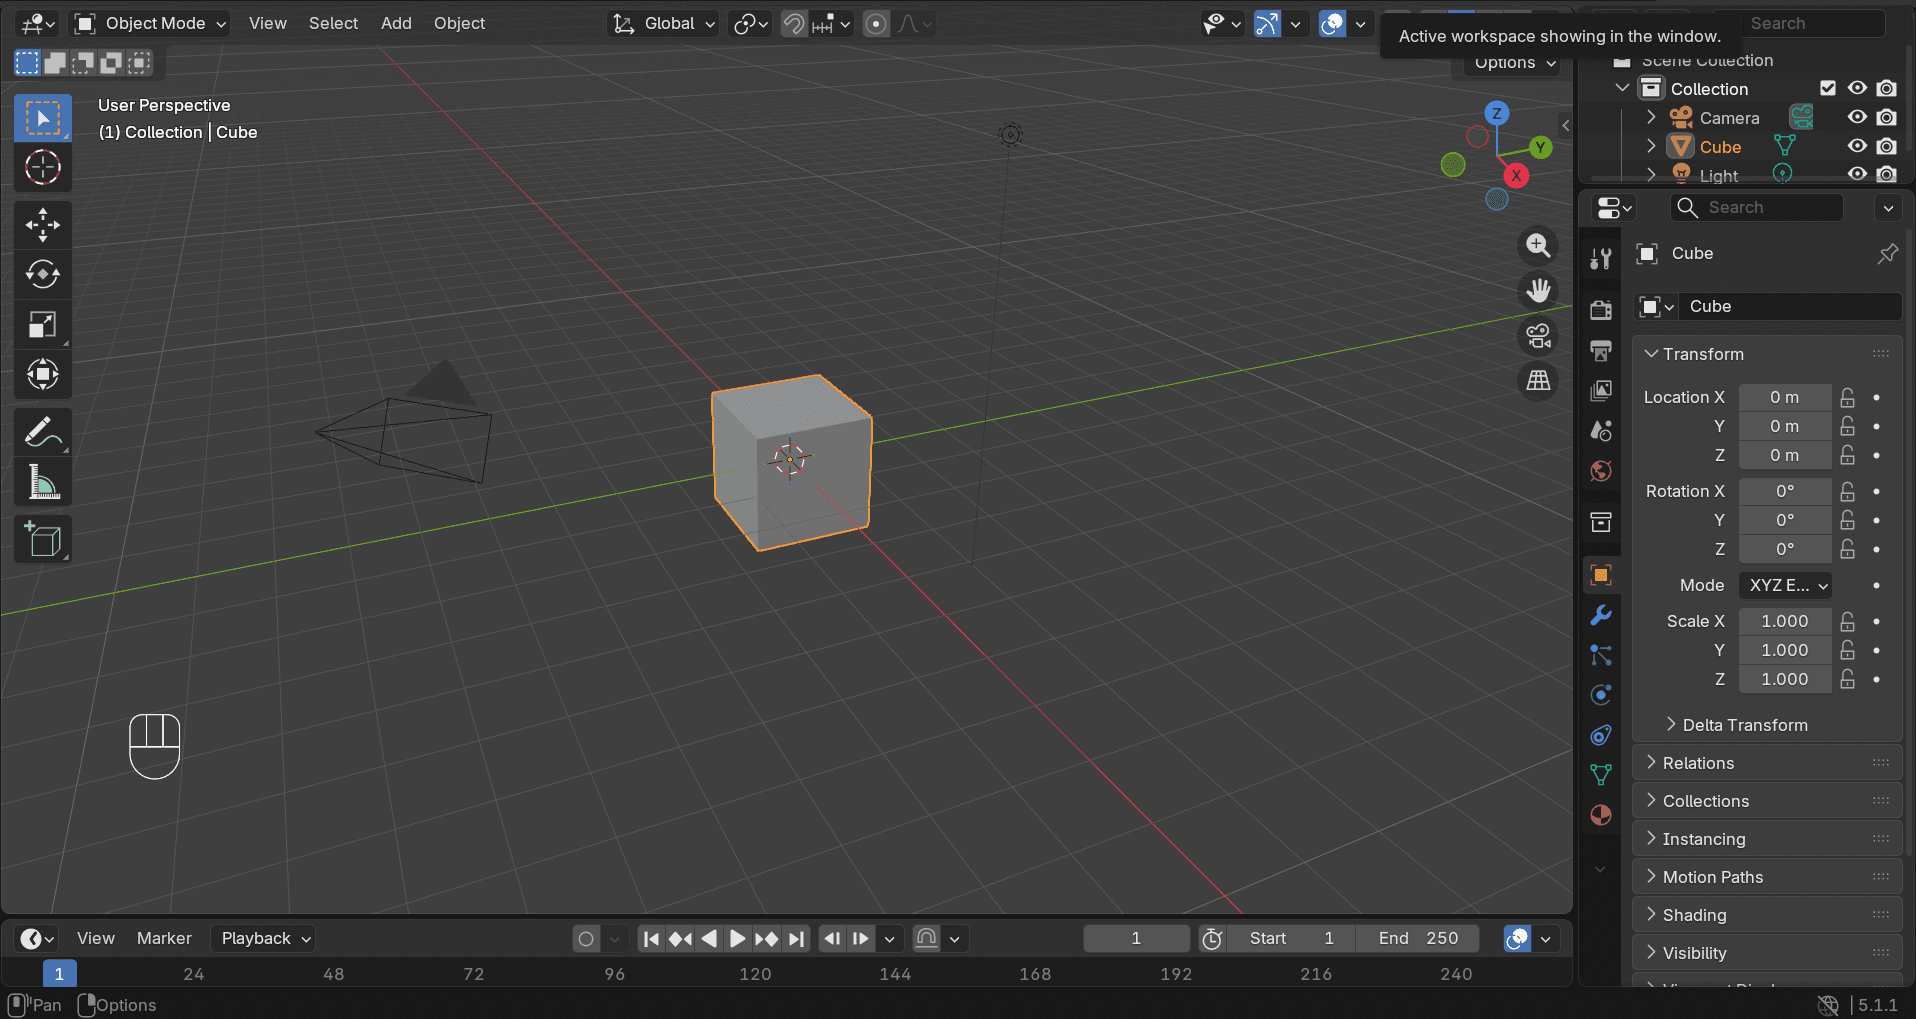
- Open Blender. Delete the default cube that appears in every new file.
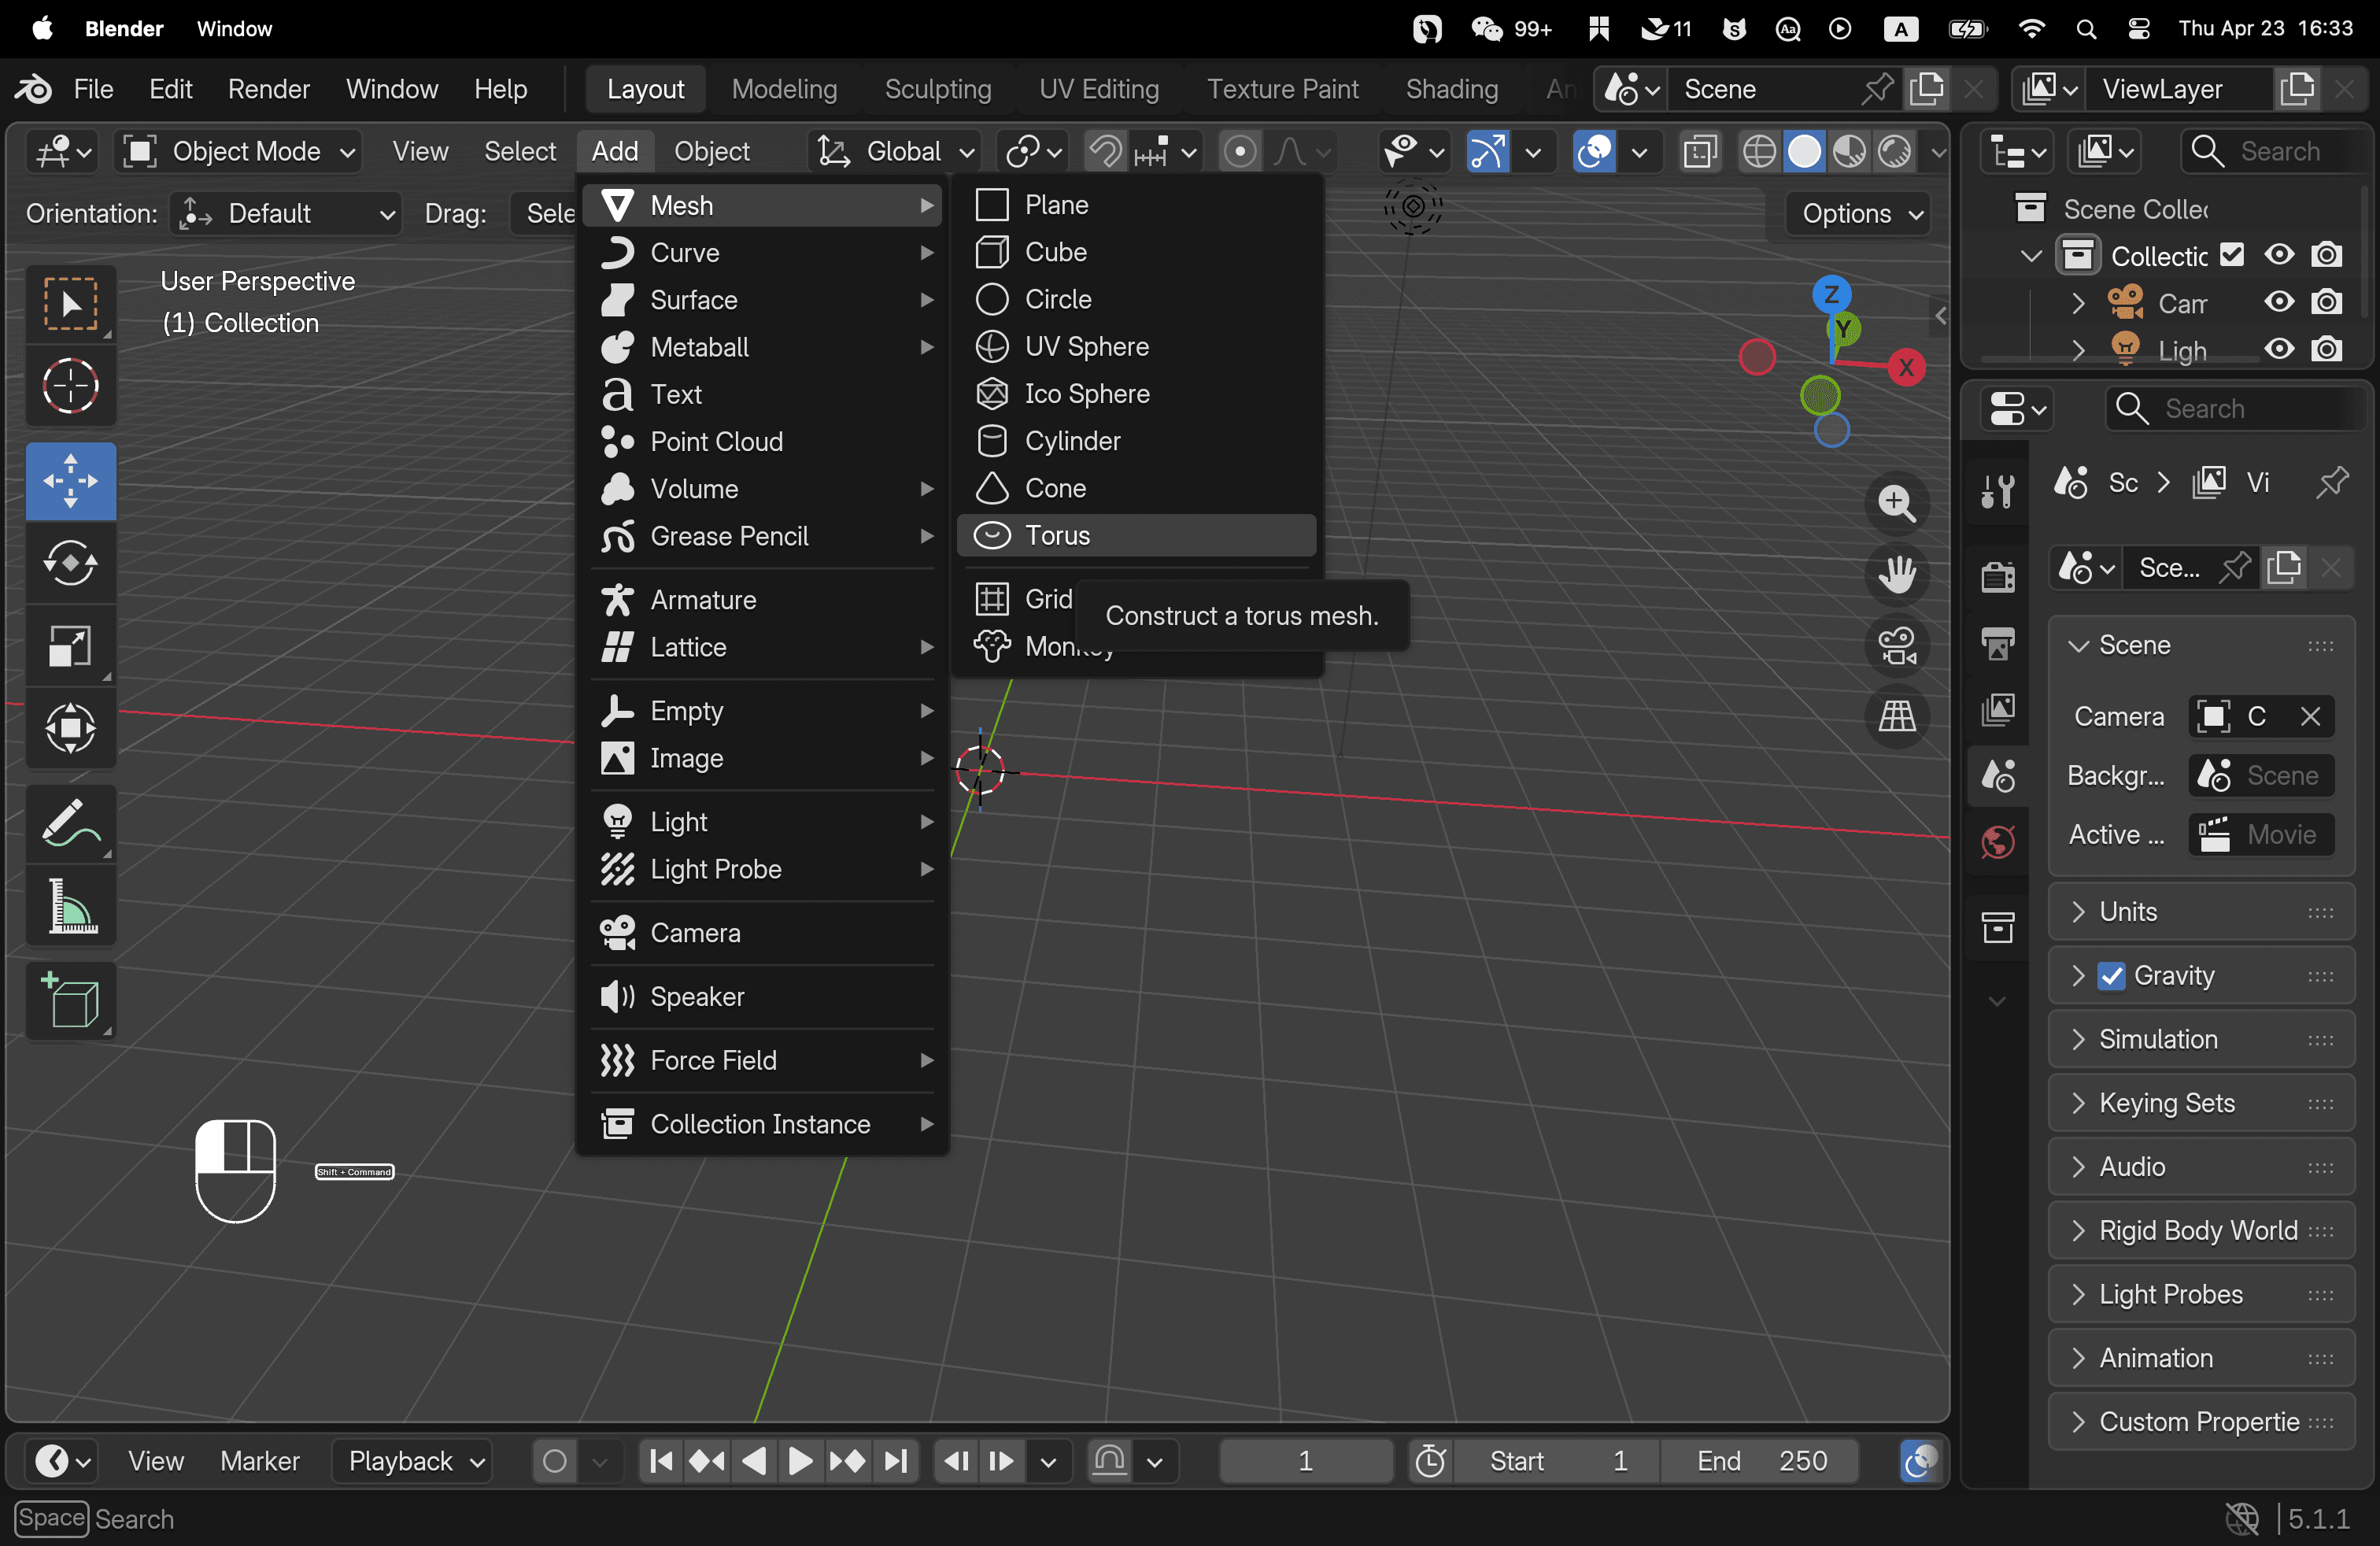
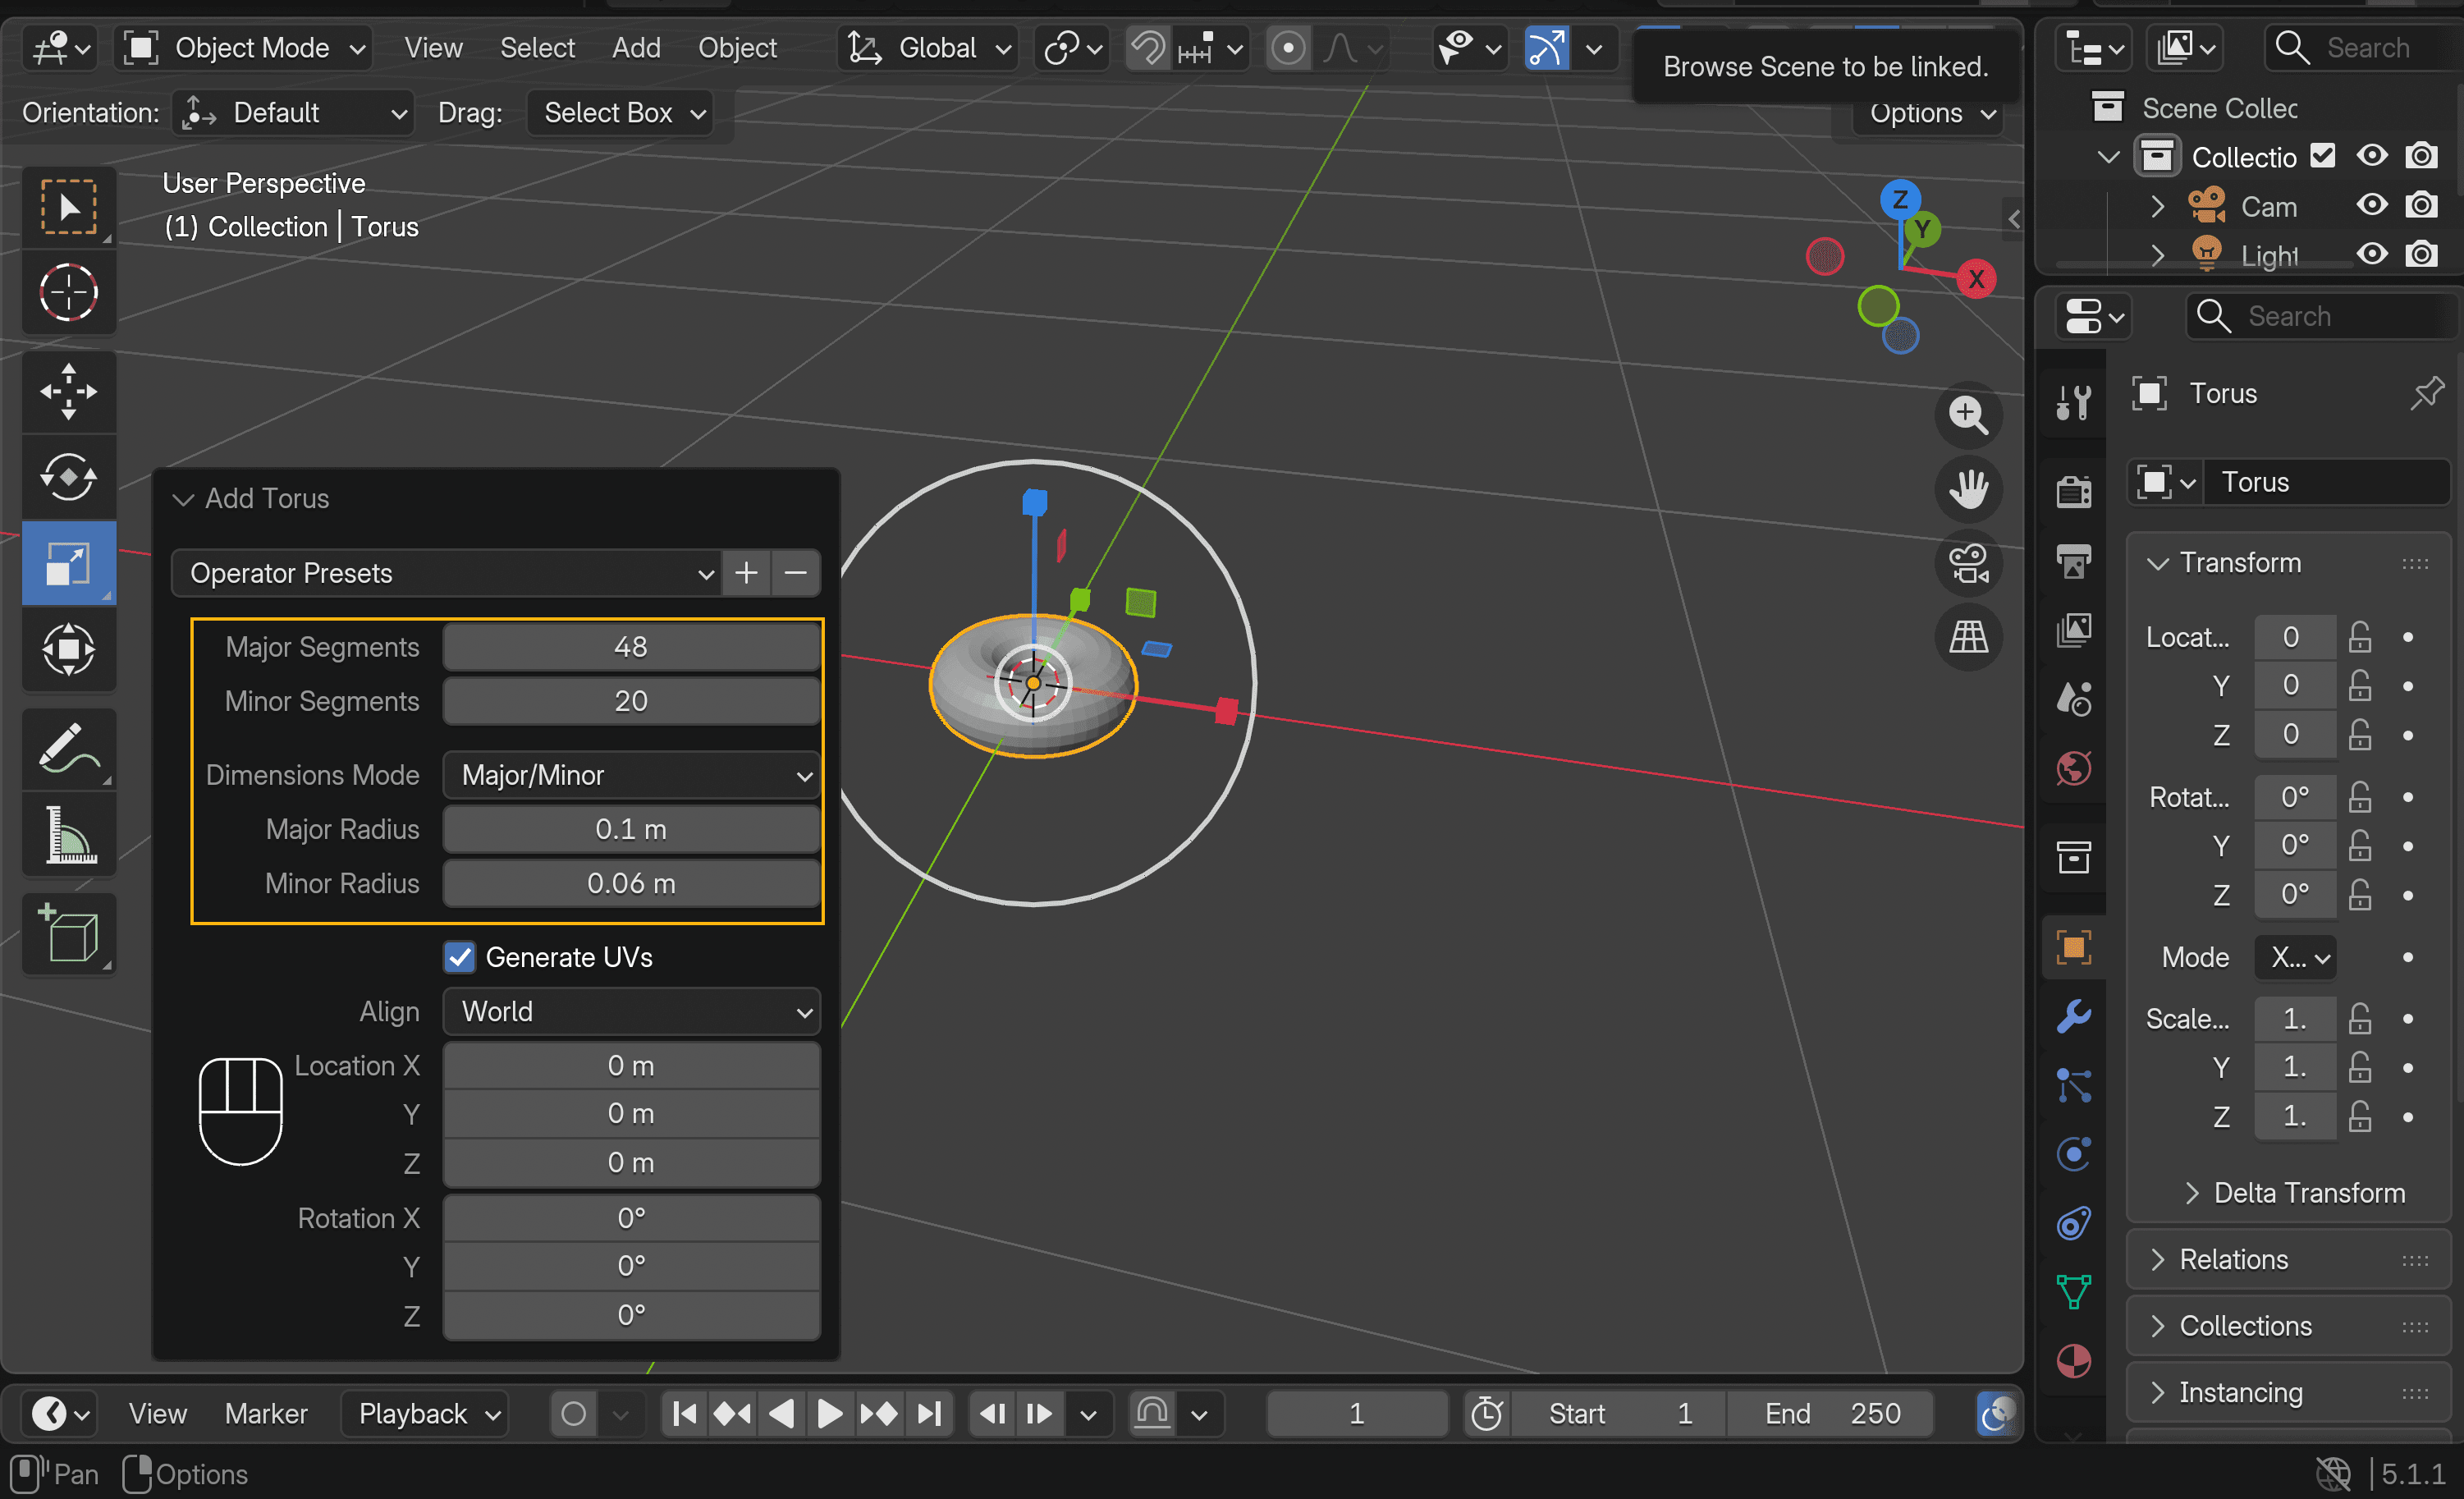
- Press Shift + A → Mesh → Torus. You now have a donut-shaped ring.
- In the bottom-left corner, open the Add Torus panel and adjust the major and minor radius to match the size of a real donut. You can also tweak the major and minor segments for smoother geometry later.
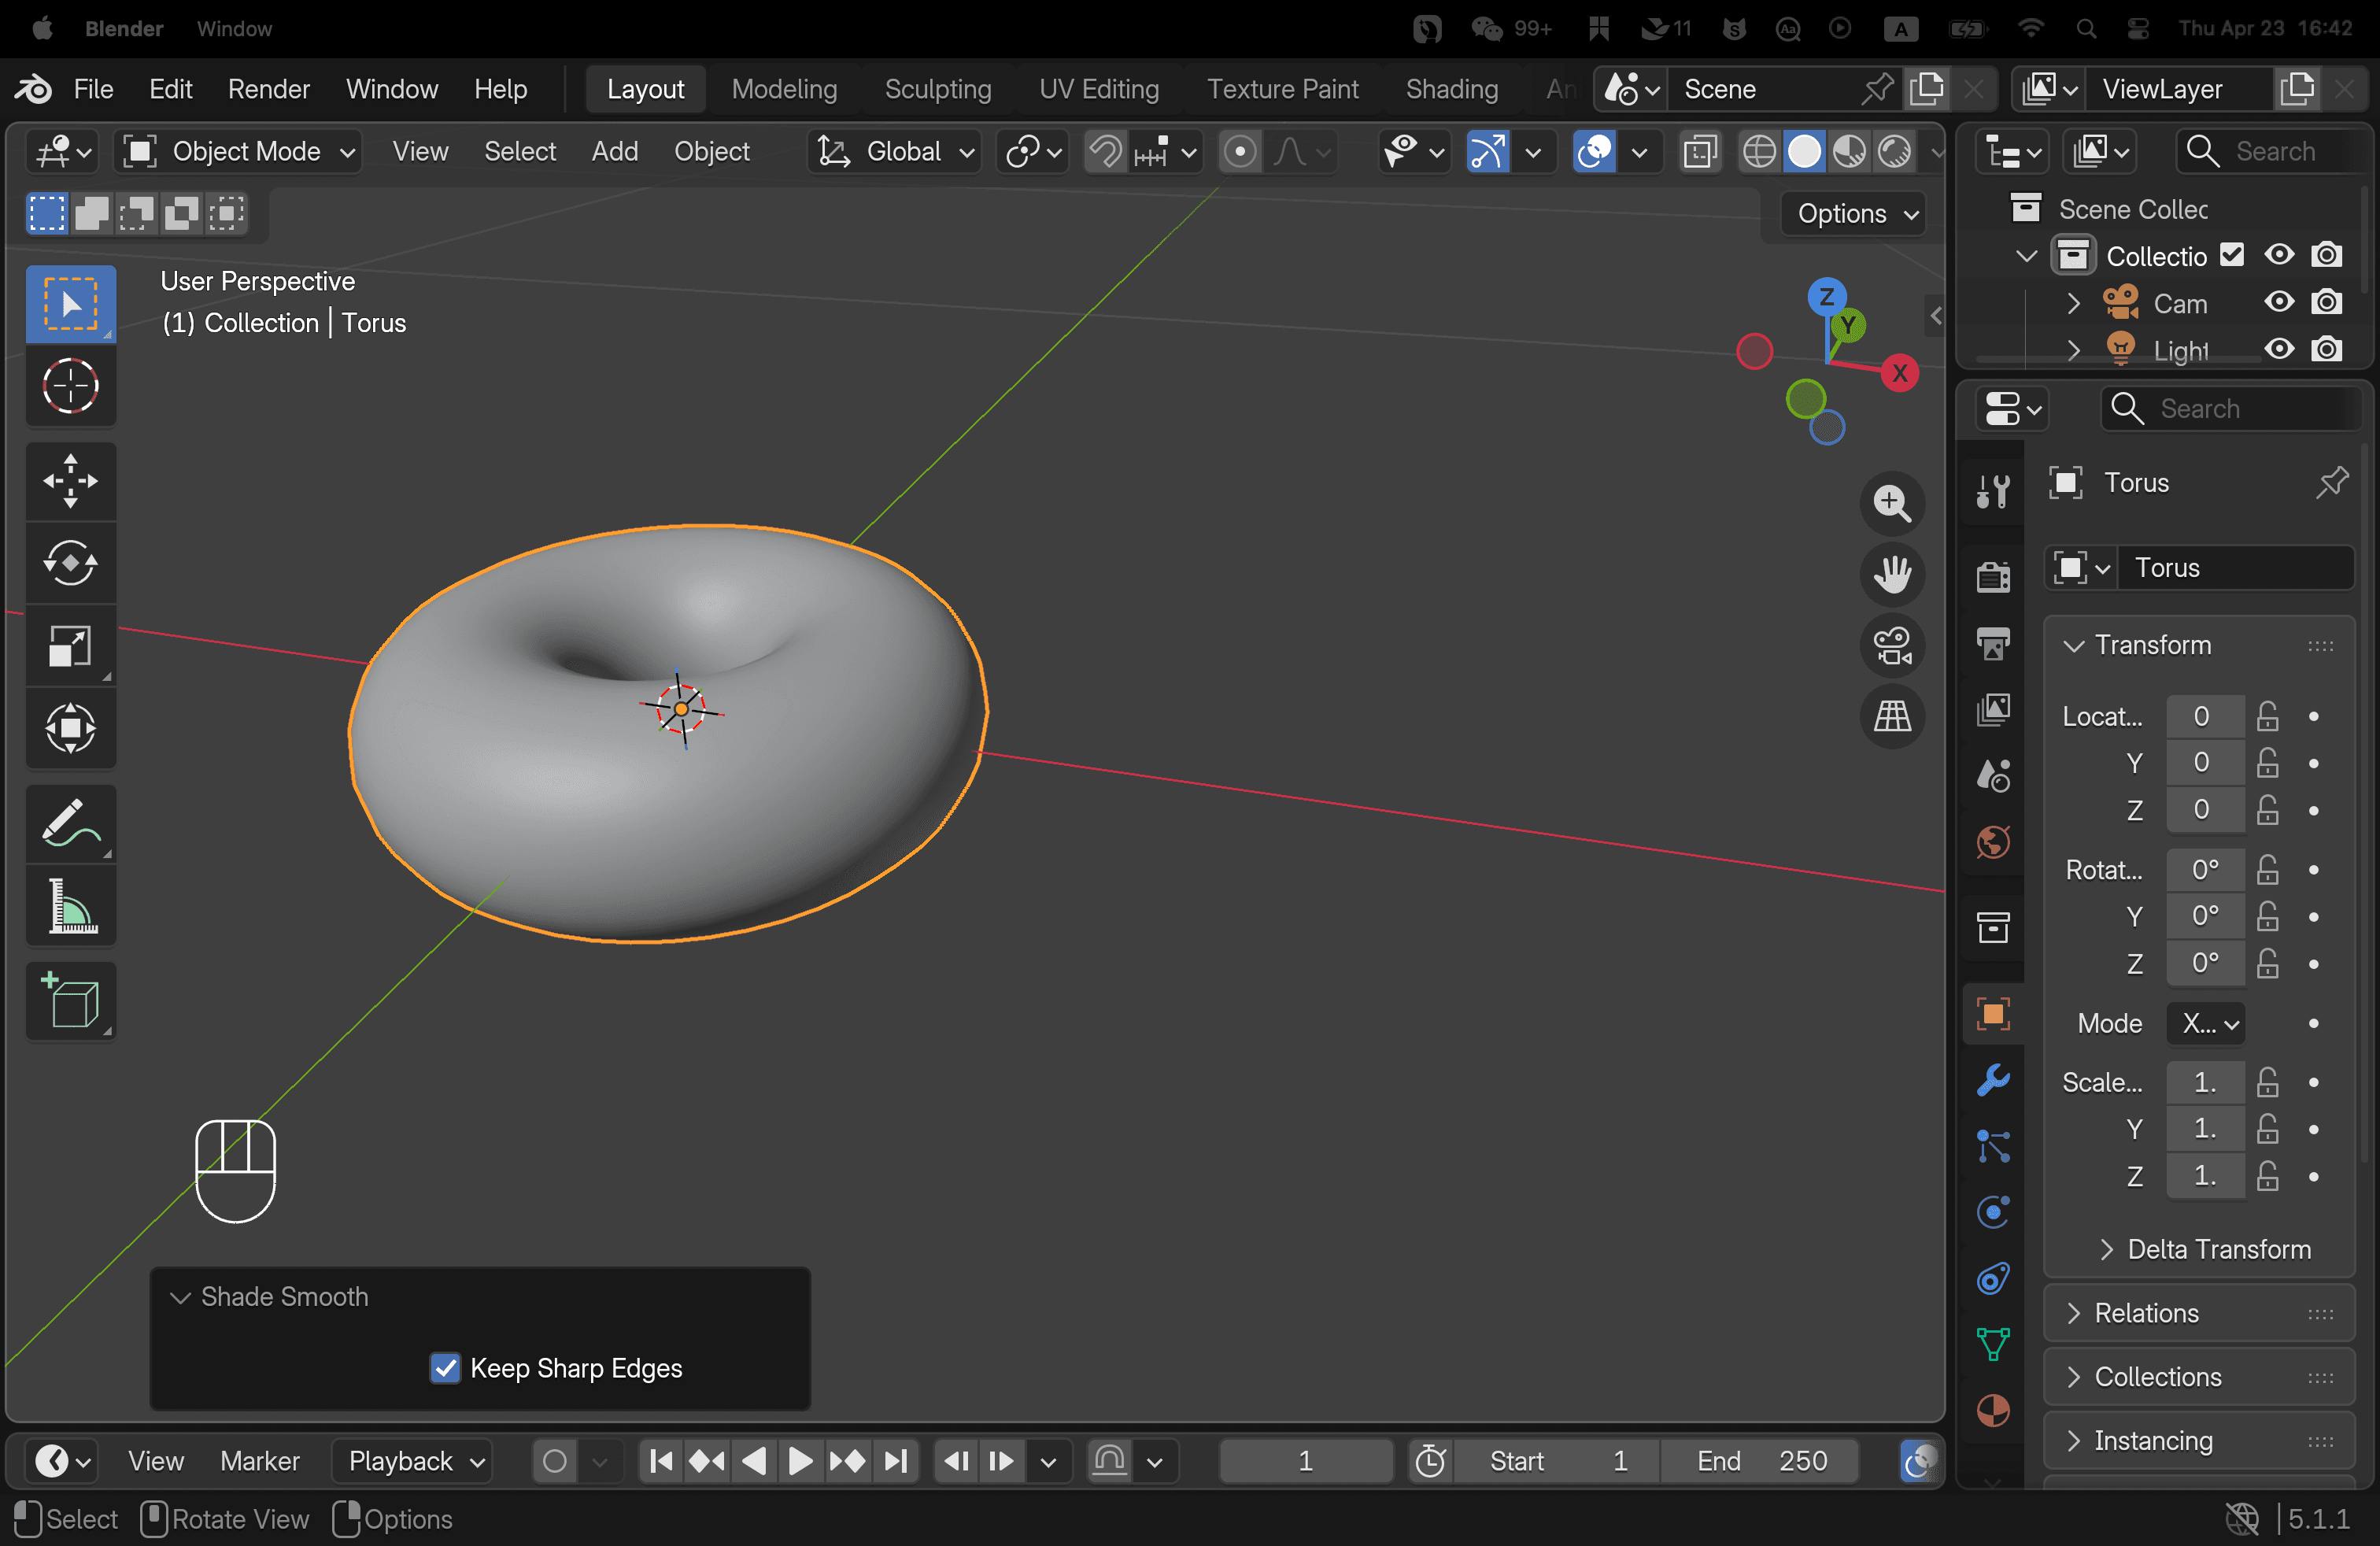
- Right-click the torus and choose Shade Smooth. This removes the faceted, low-poly look.
Step 2: Add the Icing
This step creates a second mesh that sits on top of the base donut.
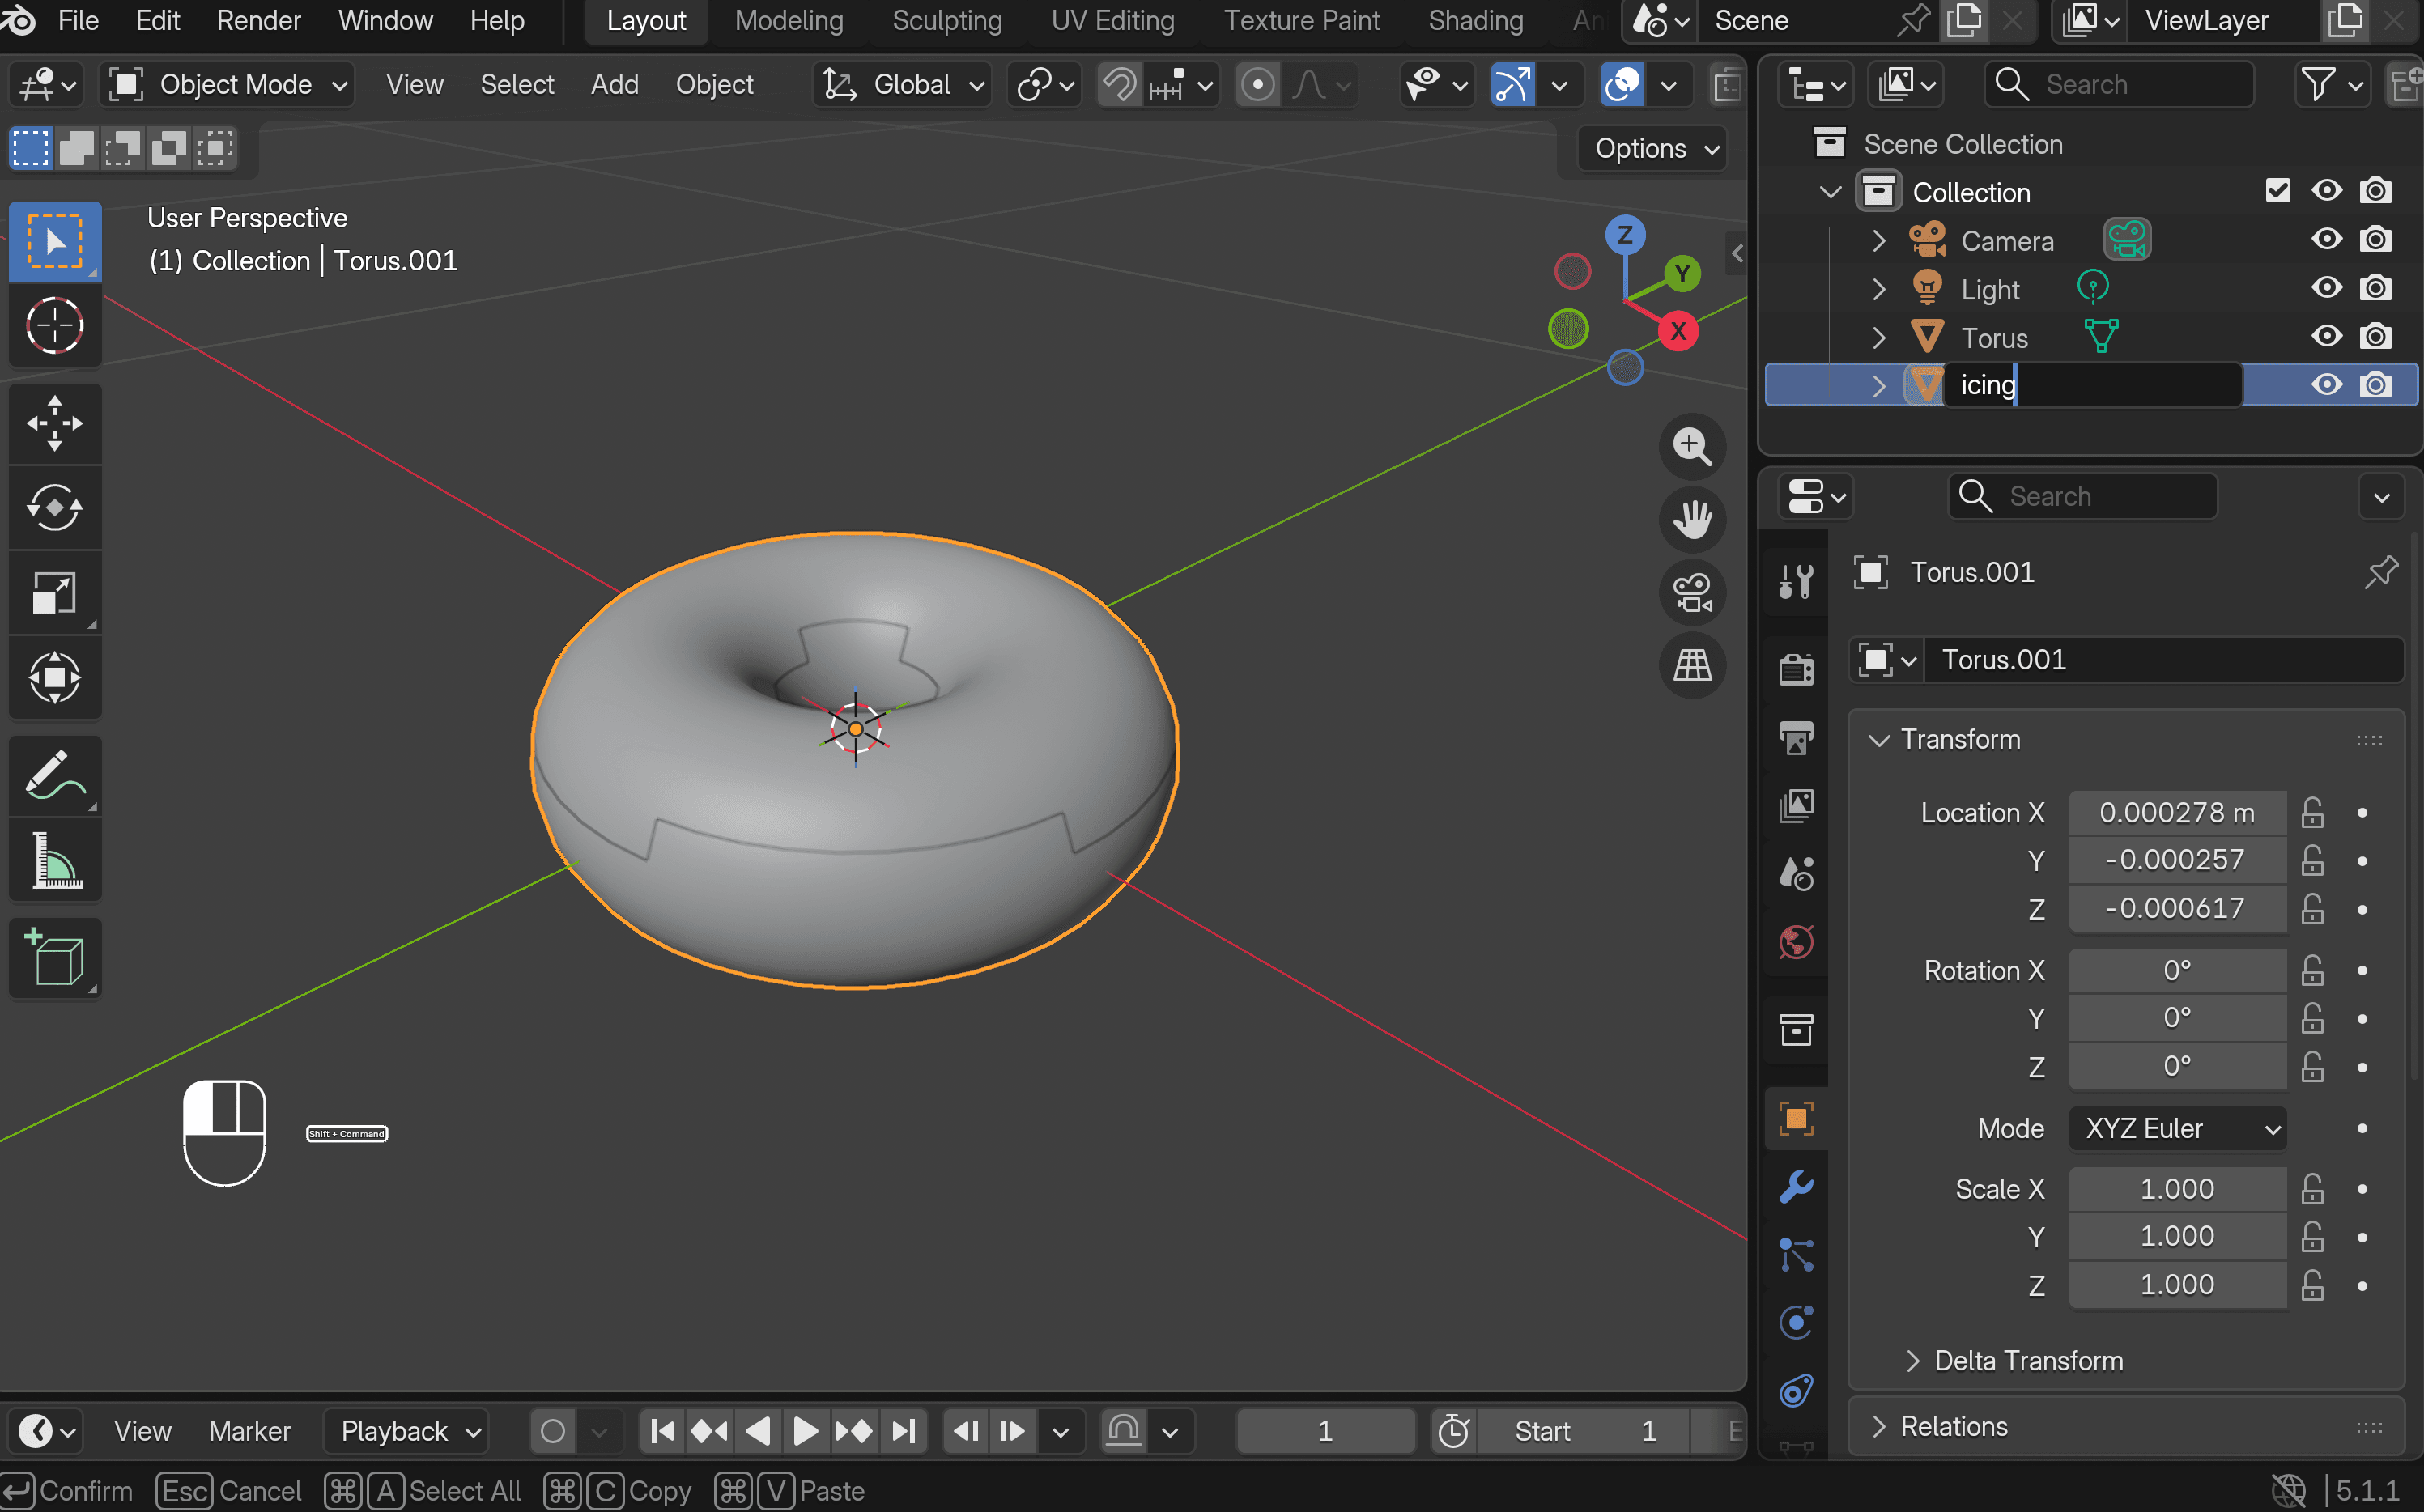
- With the torus selected, press Shift + D to duplicate it. Keep it in the exact same position as the base. In the Scene Collection panel on the right, you will see Torus and Torus.001. Rename Torus.001 to icing.
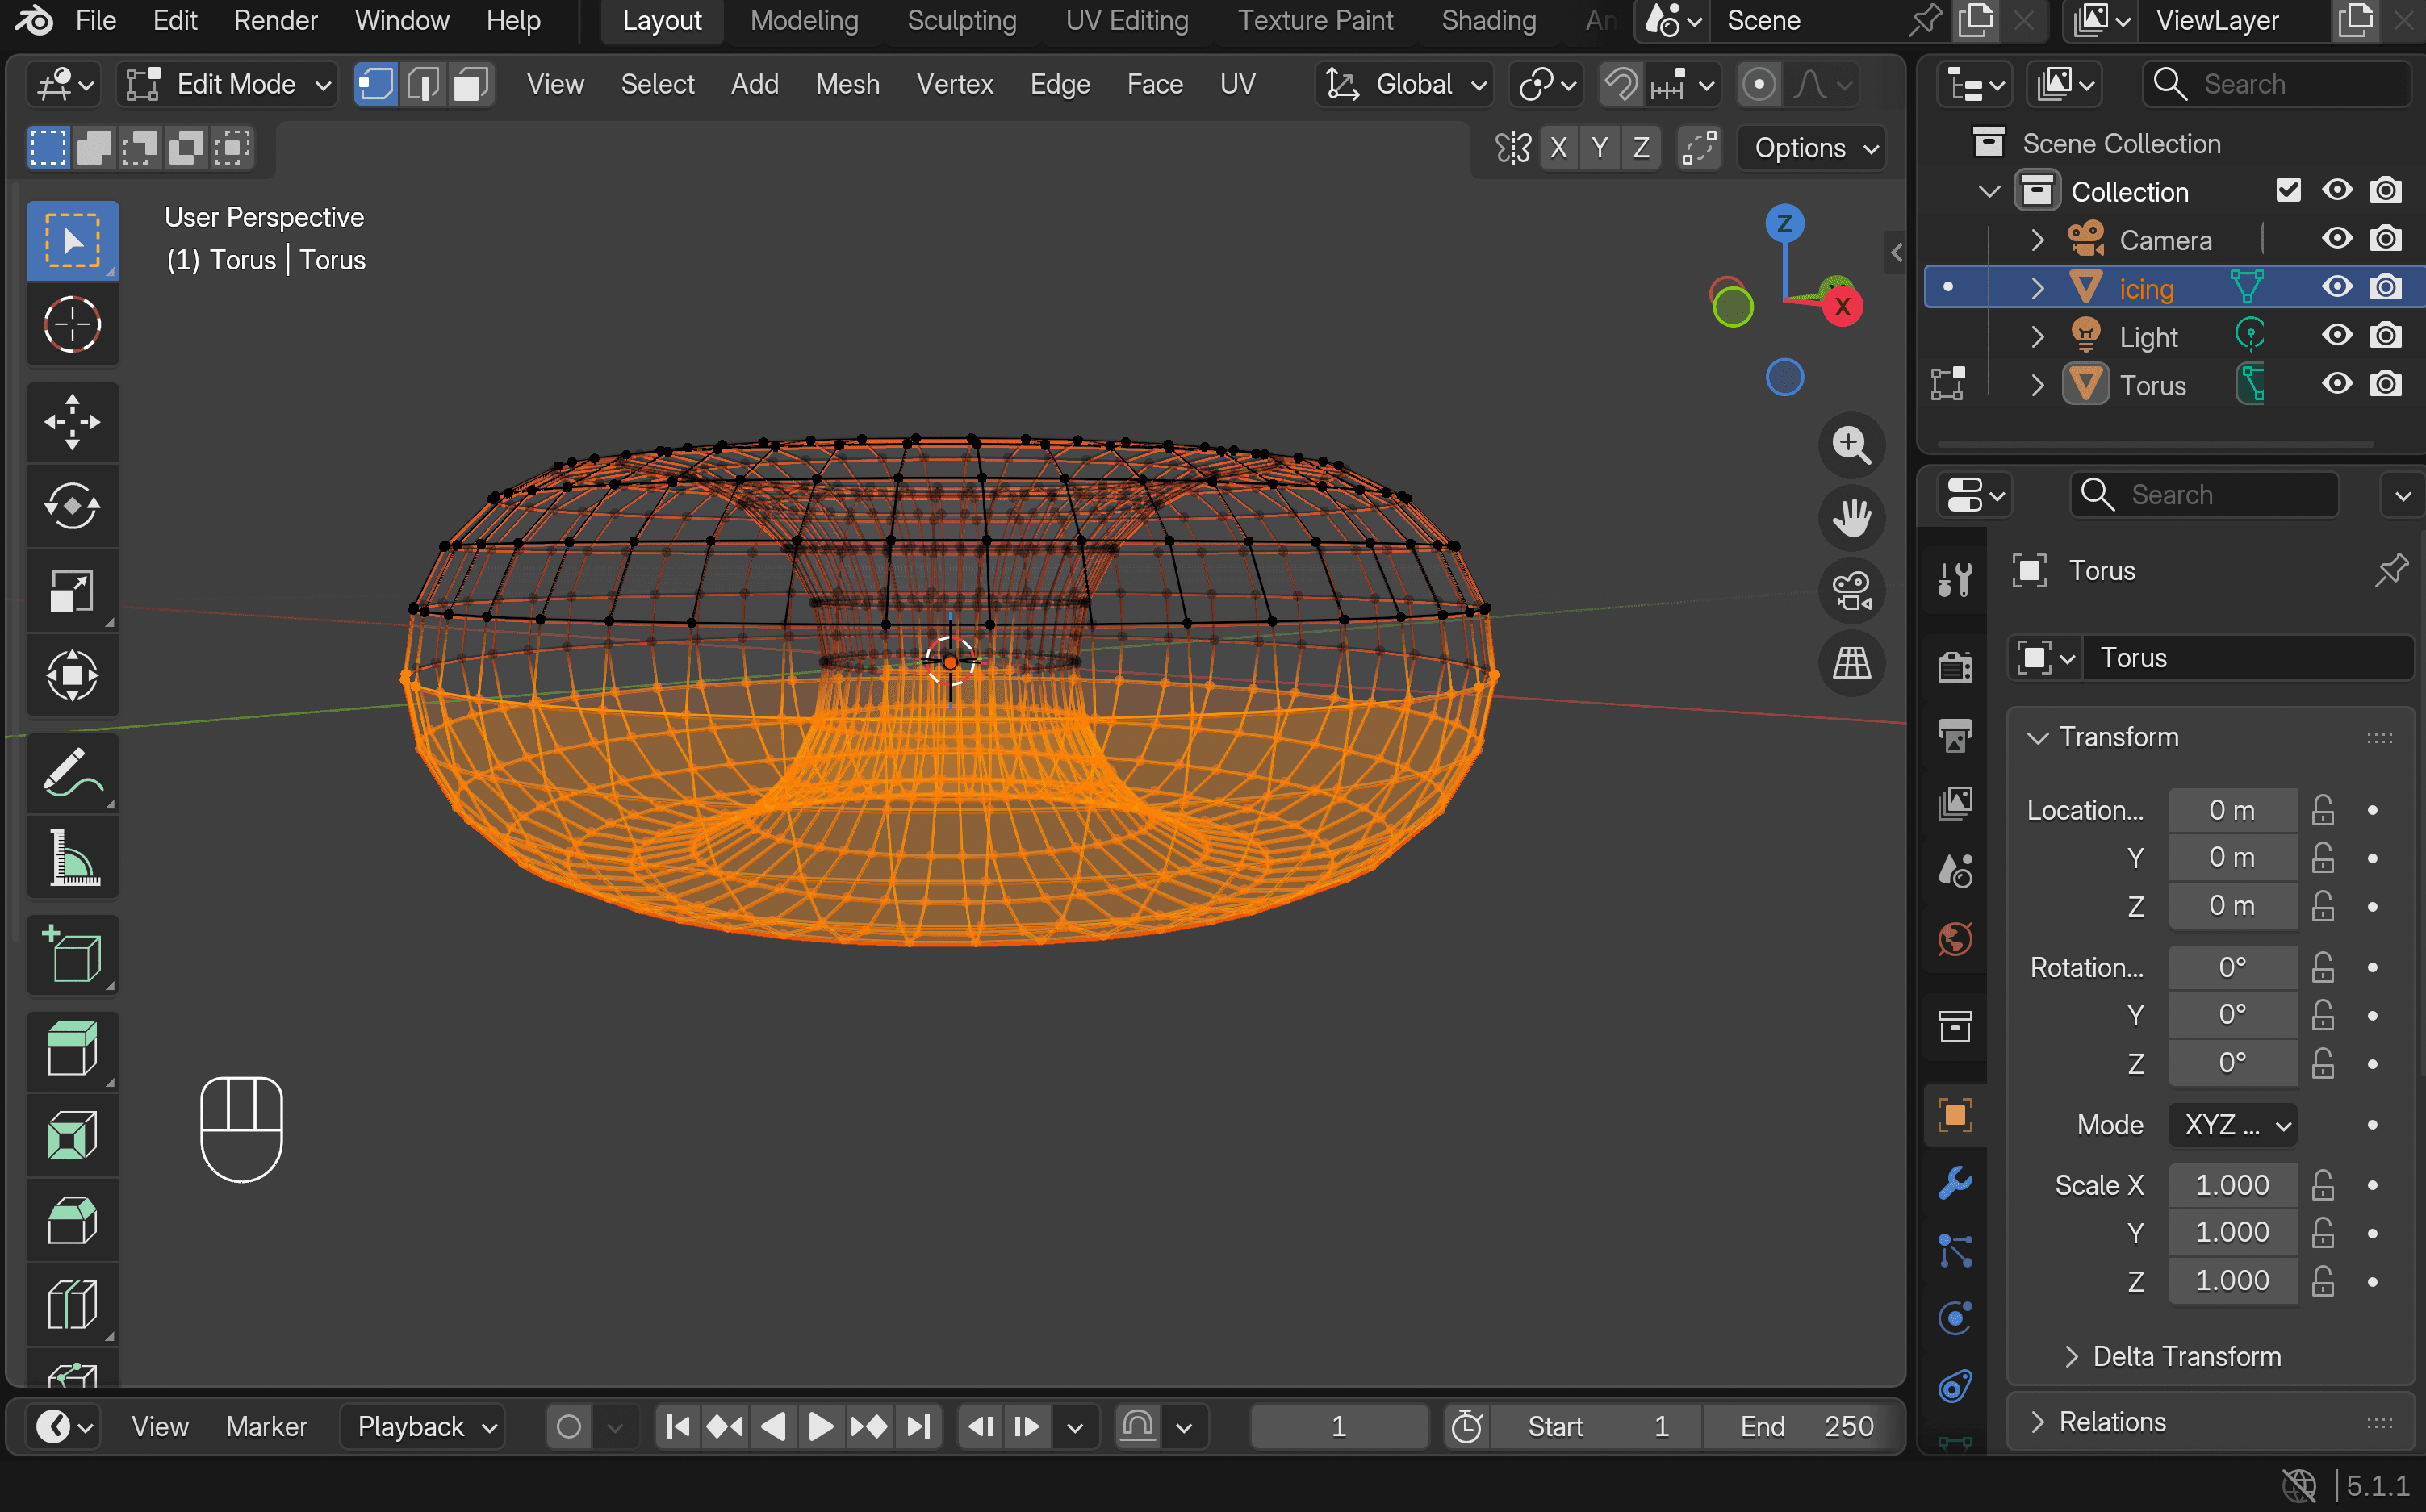
- Switch to Wireframe View (top right), then enter Edit Mode. Select the bottom half of the icing mesh, press X, and choose Faces to delete it. Switch back to Solid View. If only the top half remains, you did it correctly.
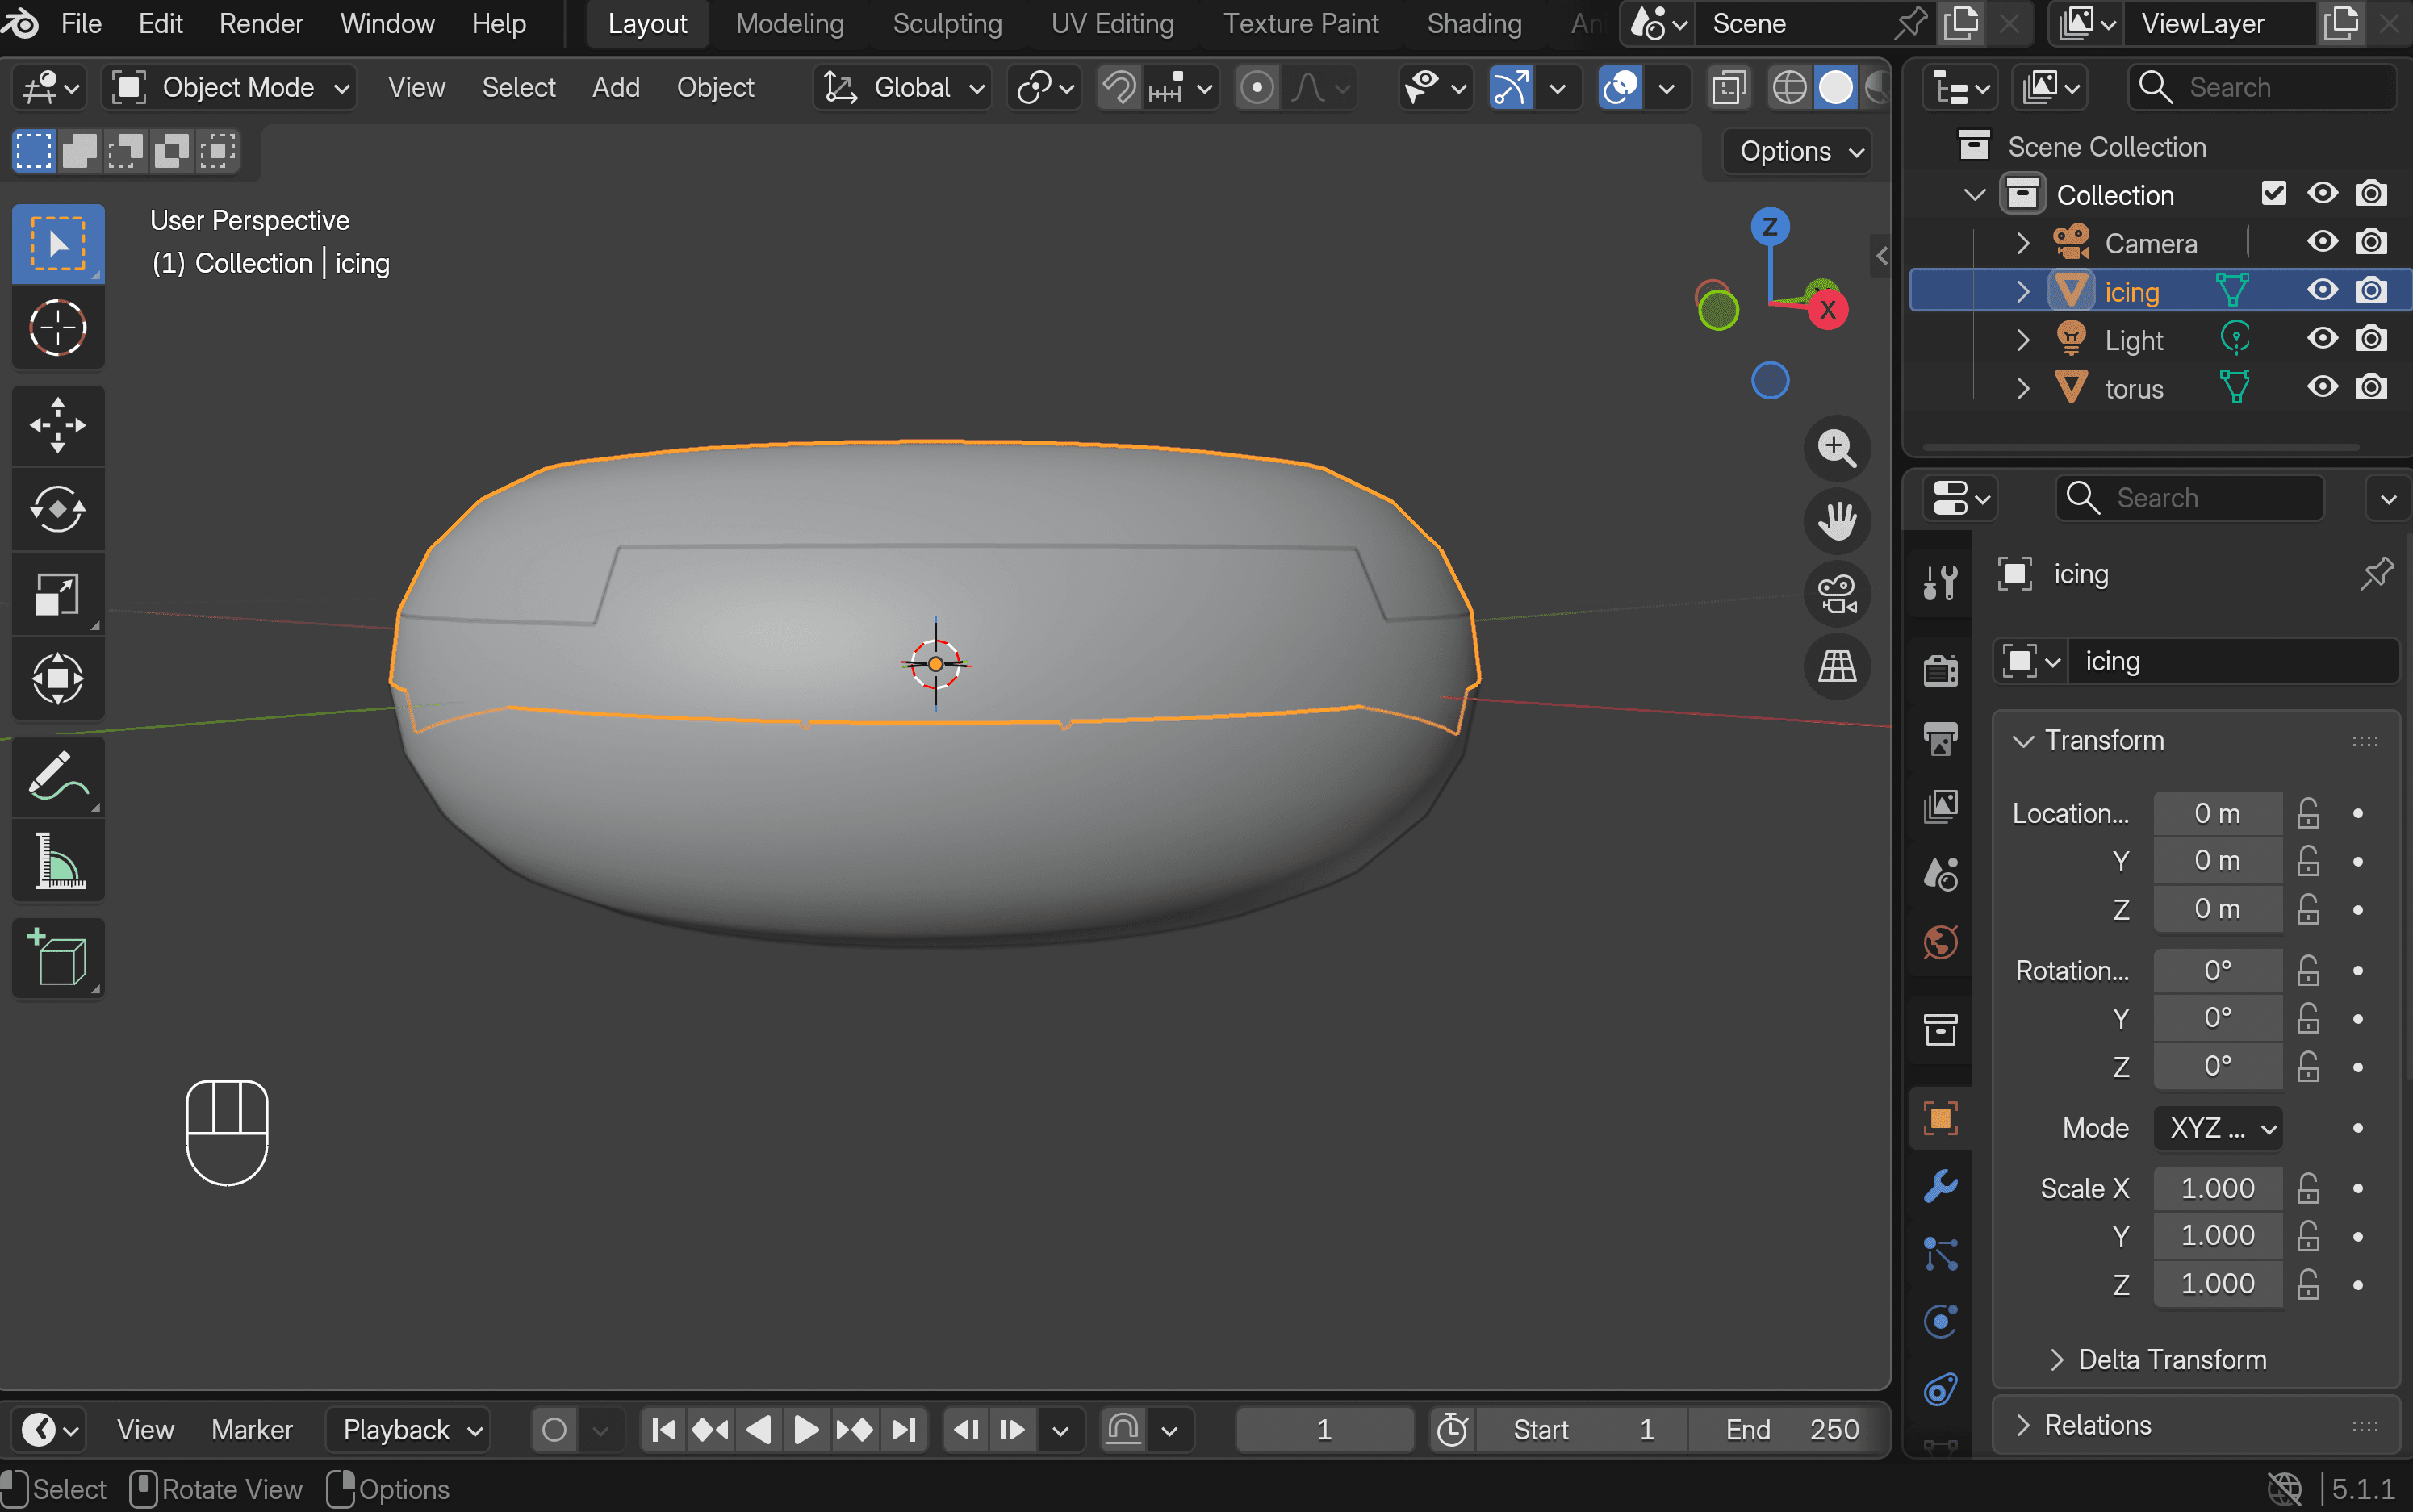
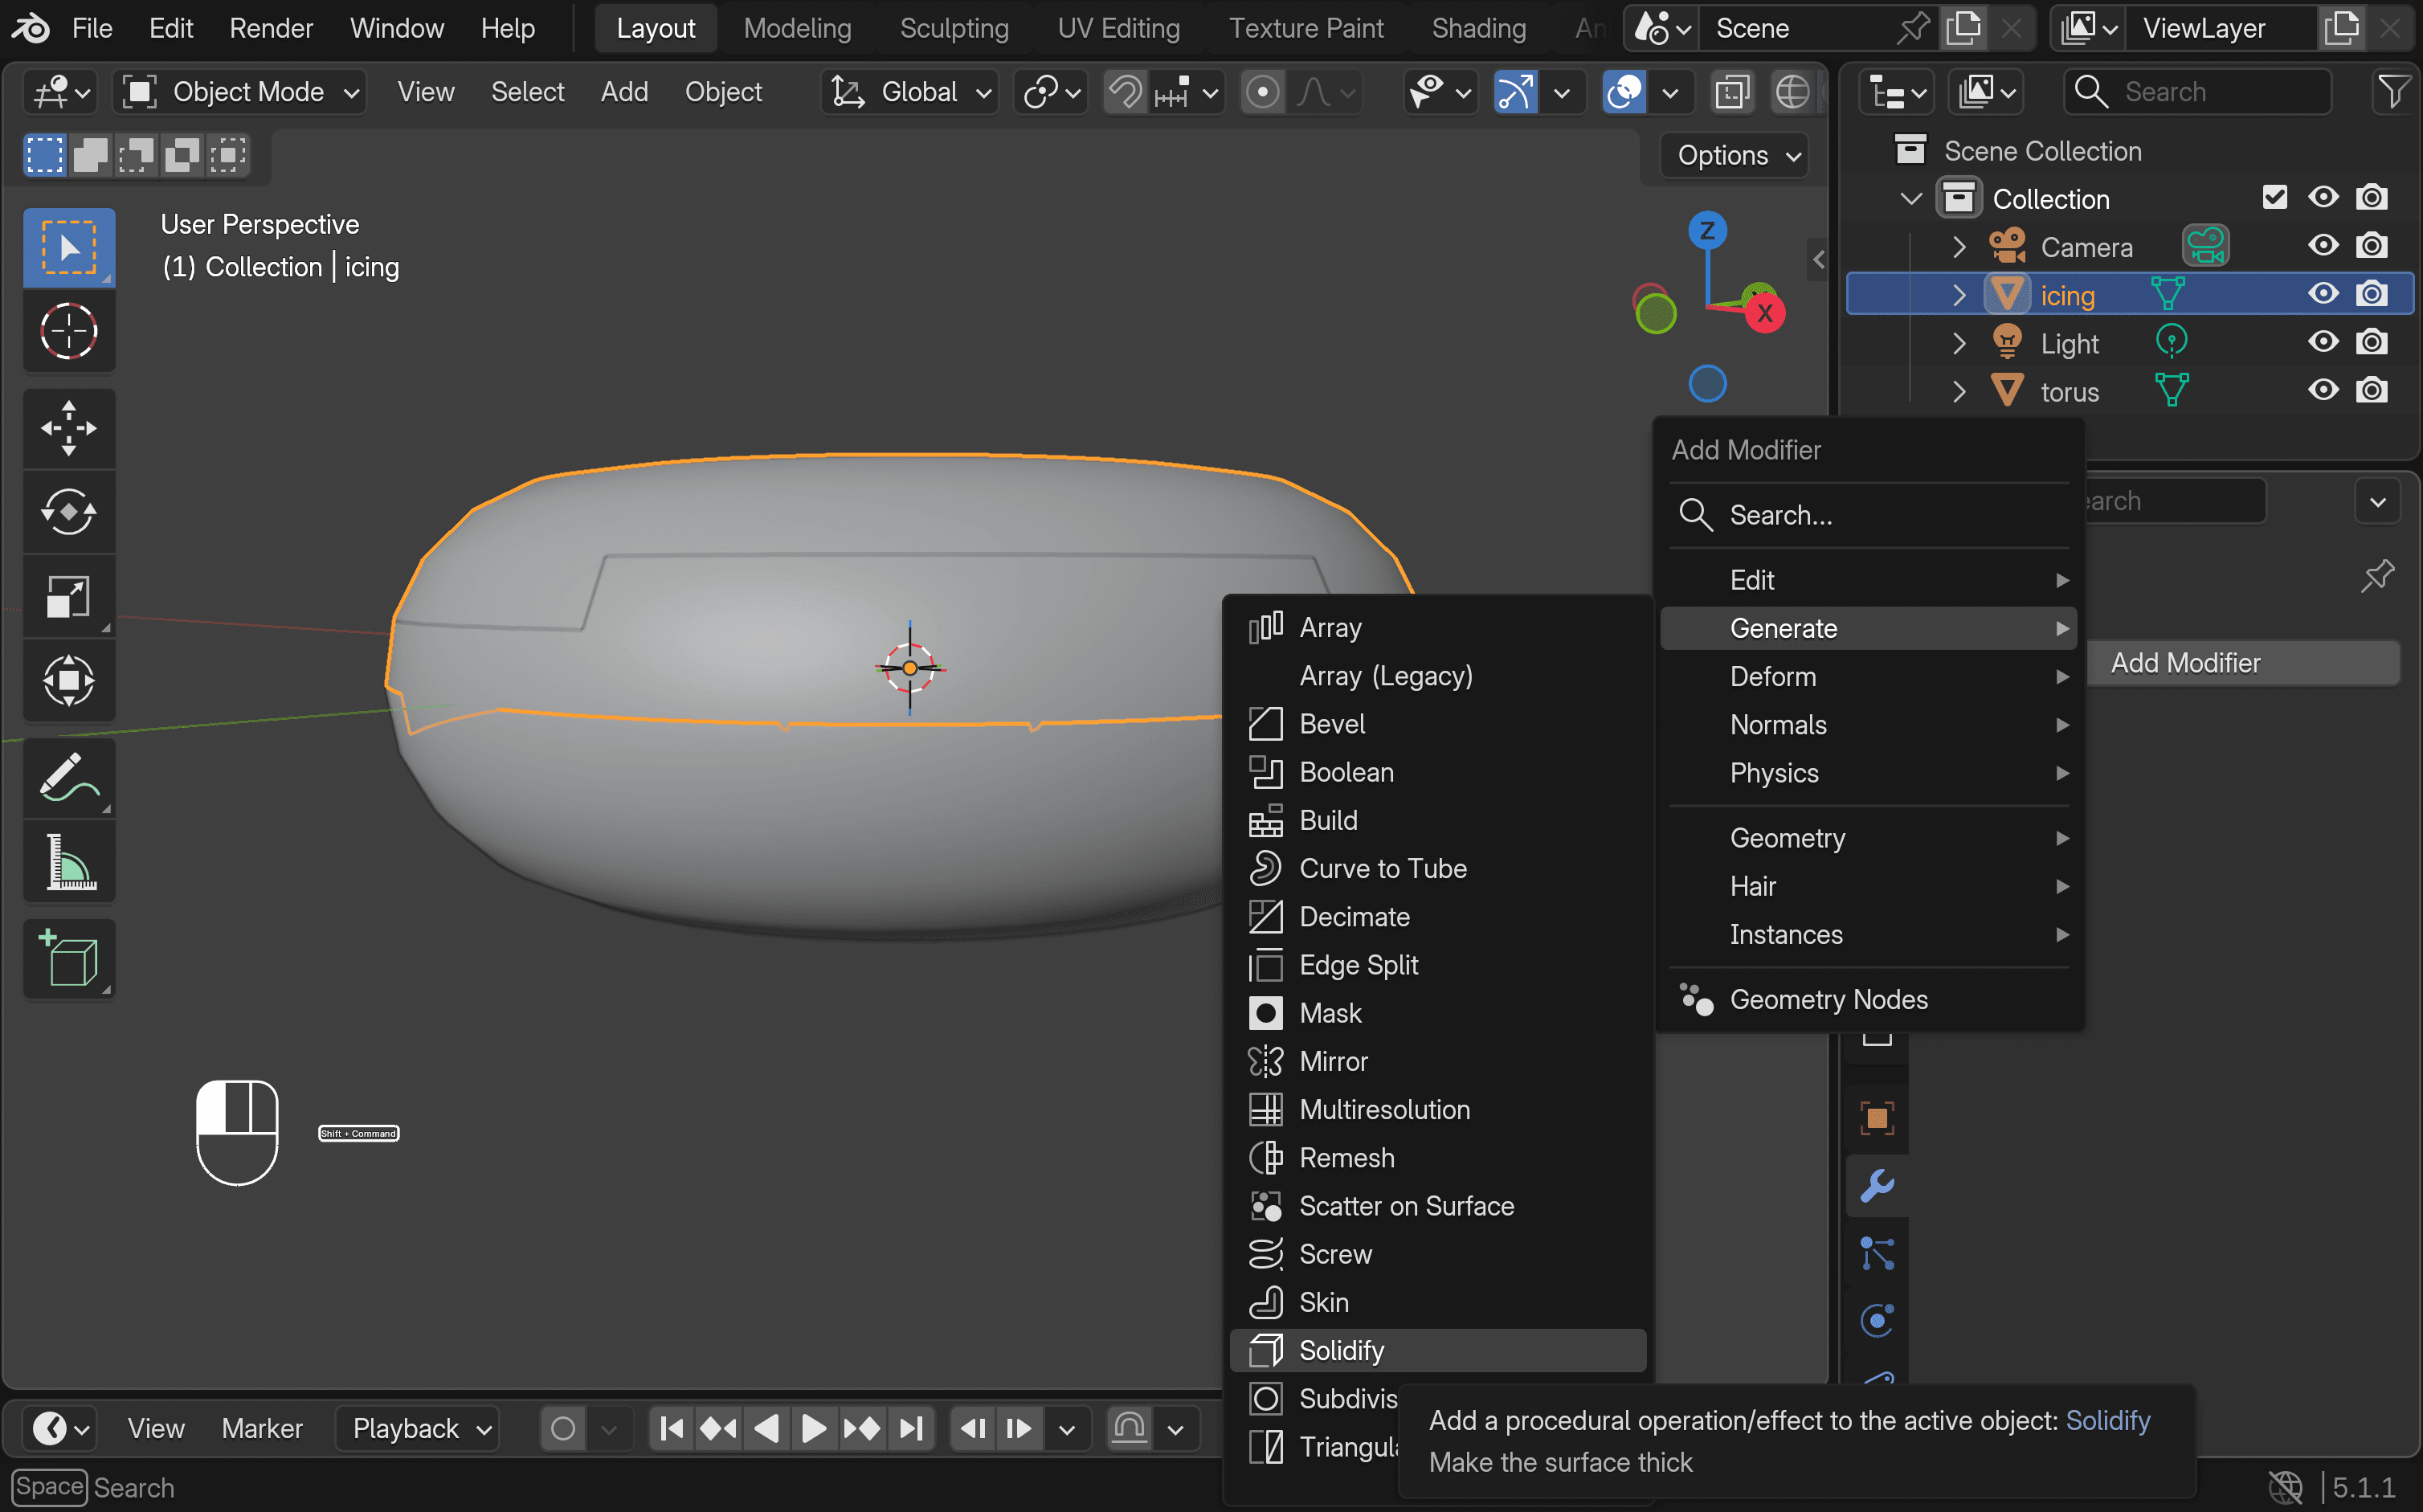
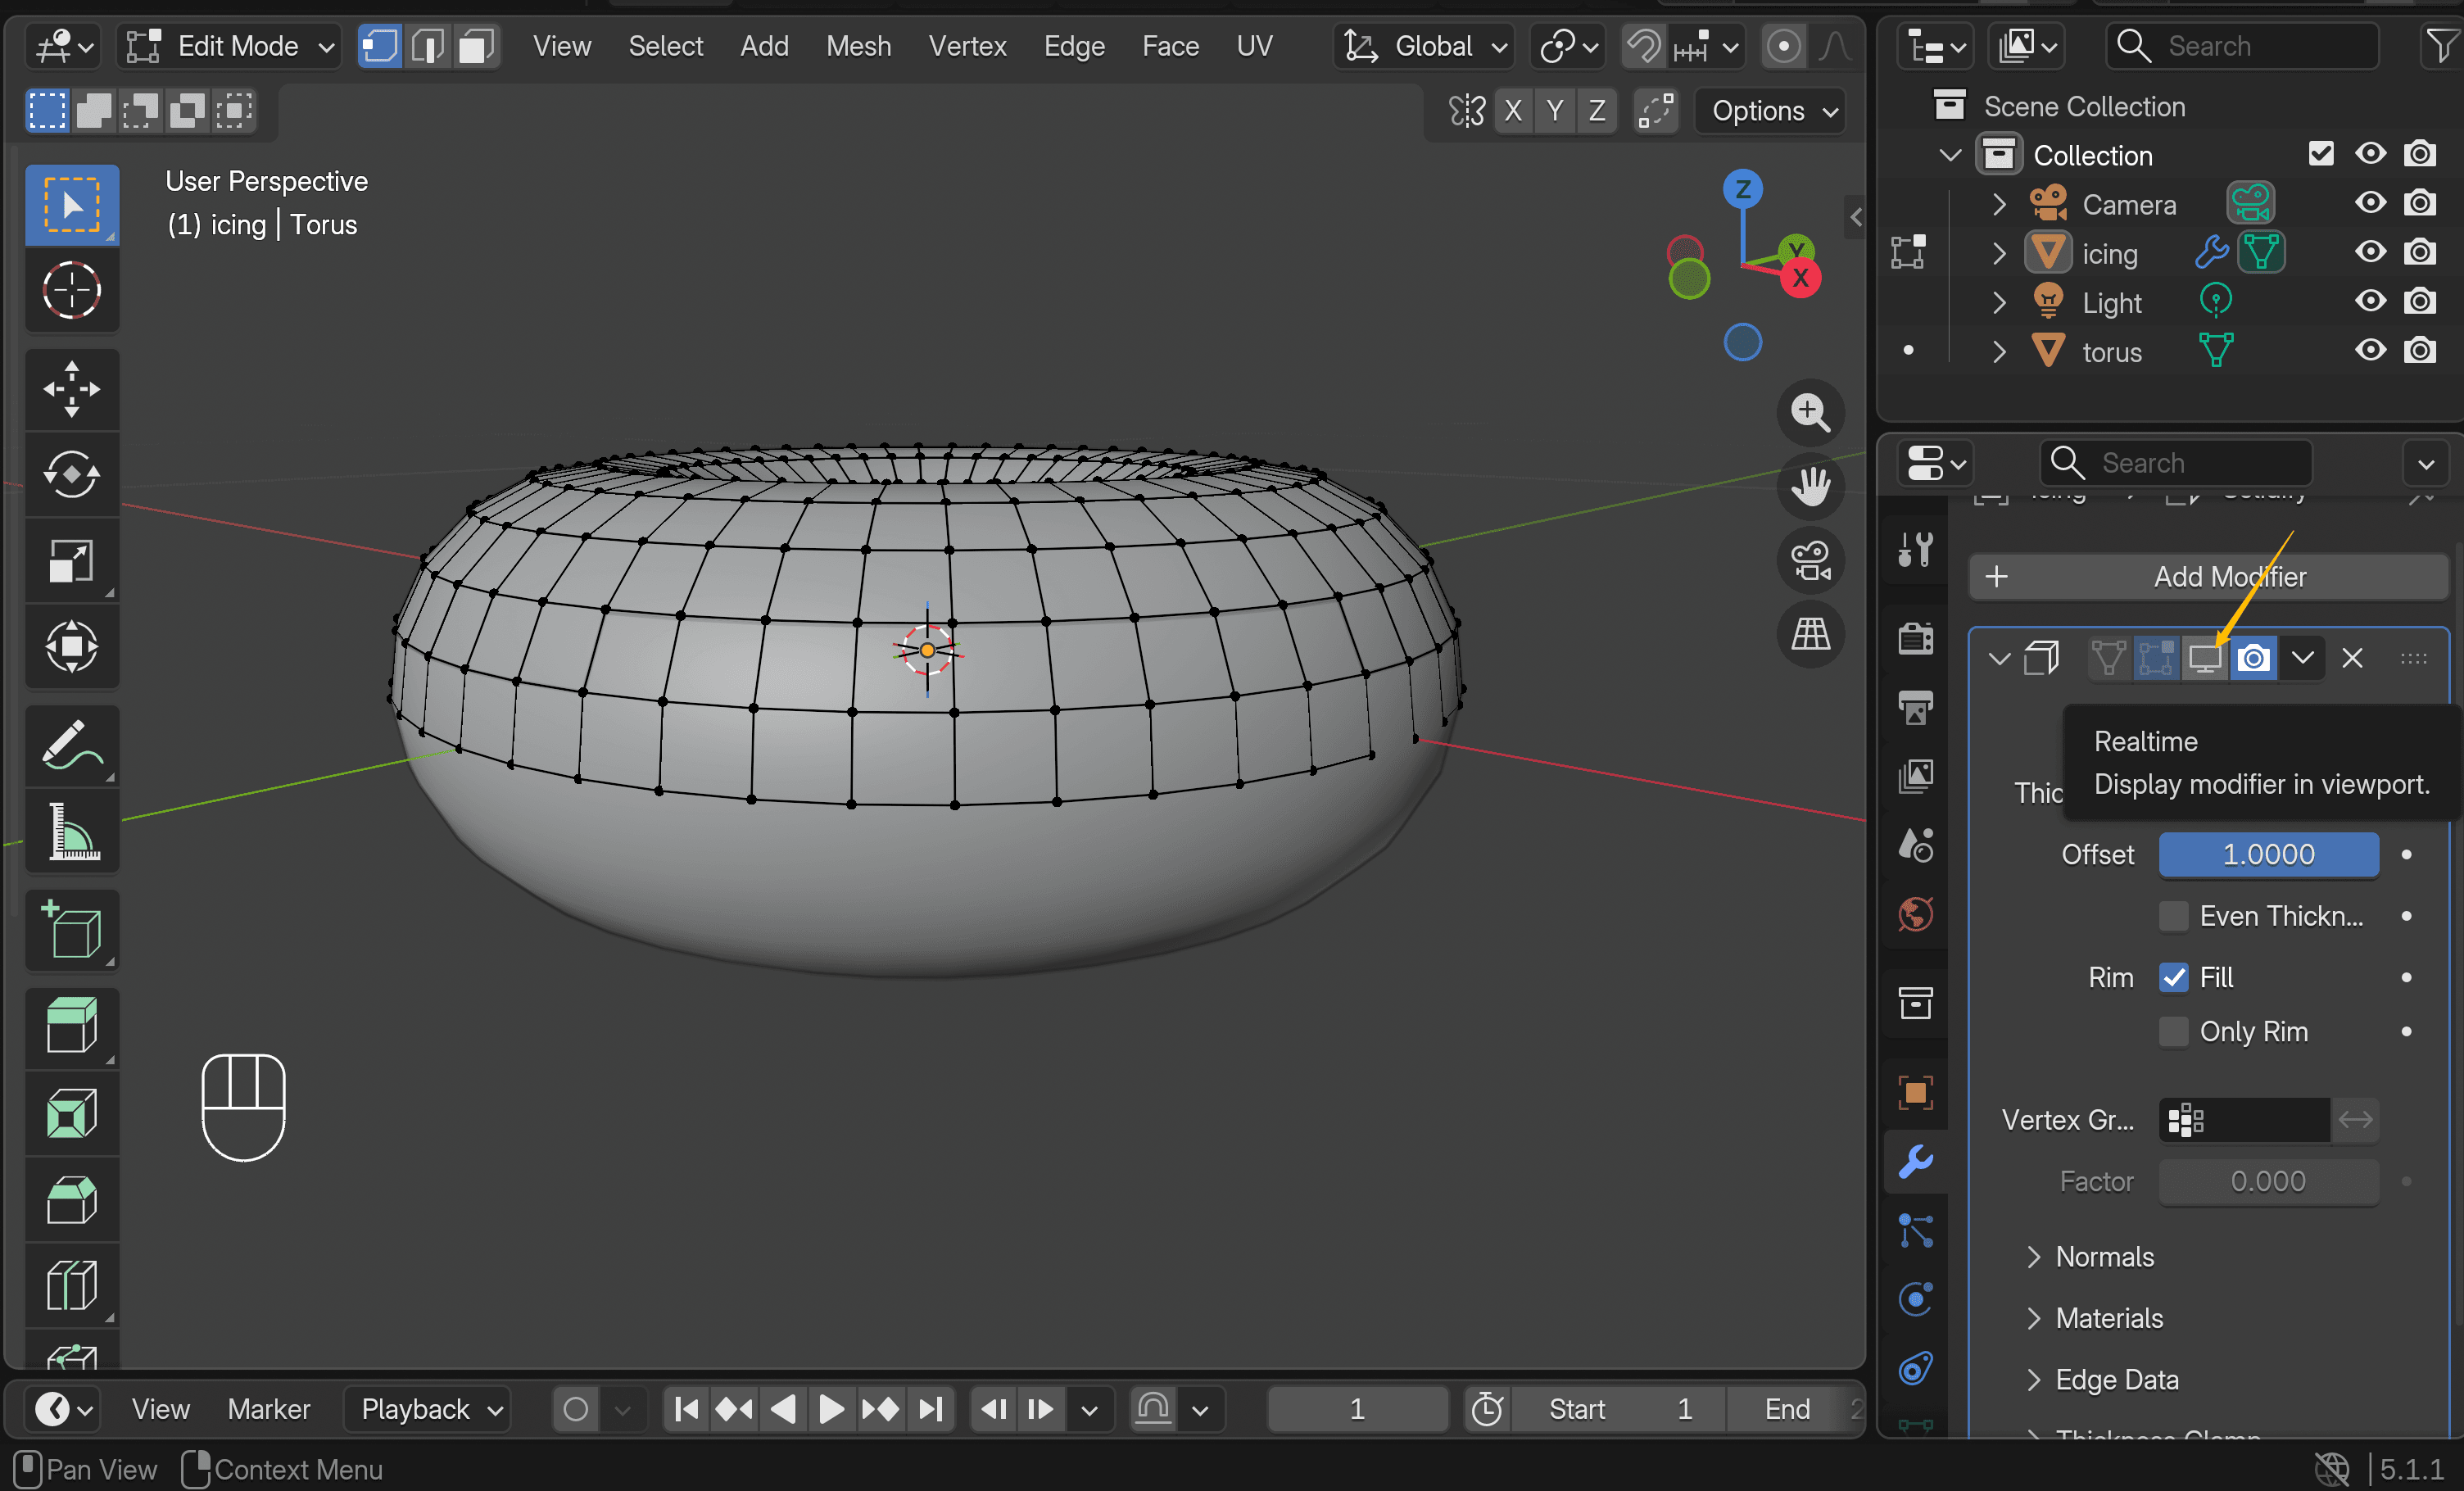
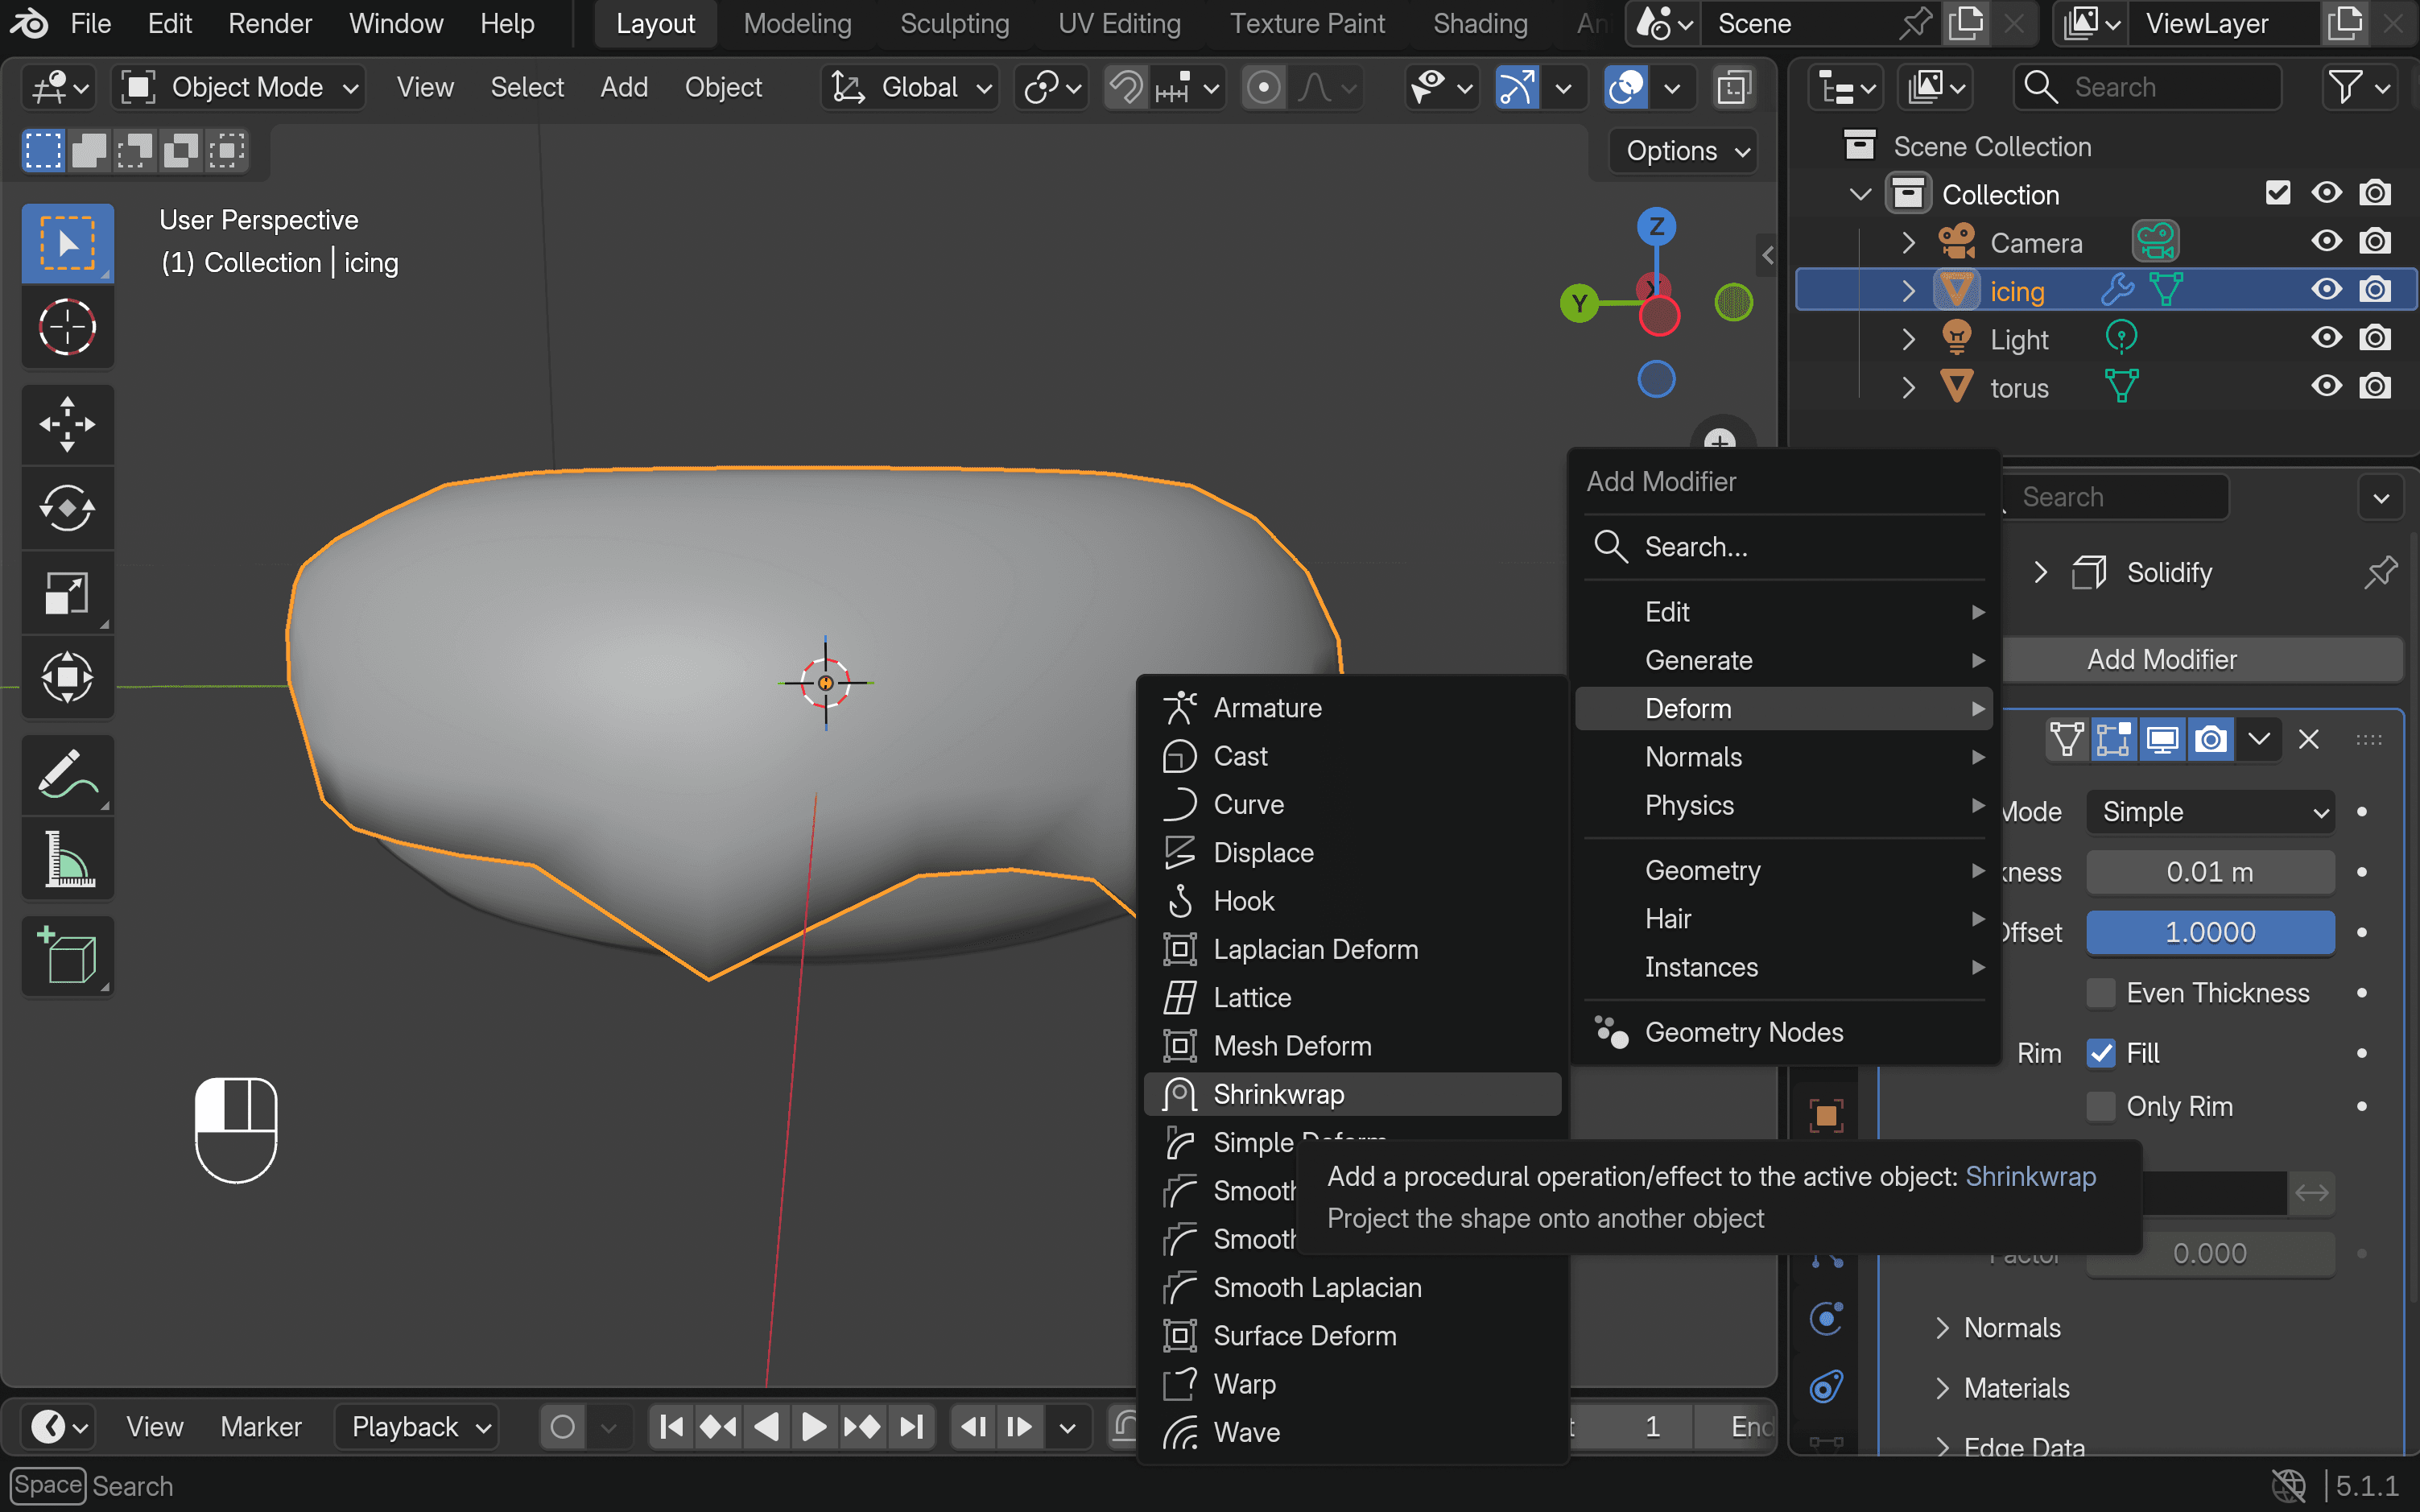
- Go back to Object Mode, then open the Modifiers panel on the right. Click Add Modifier → Generate → Solidify, and adjust the Offset to around 1.
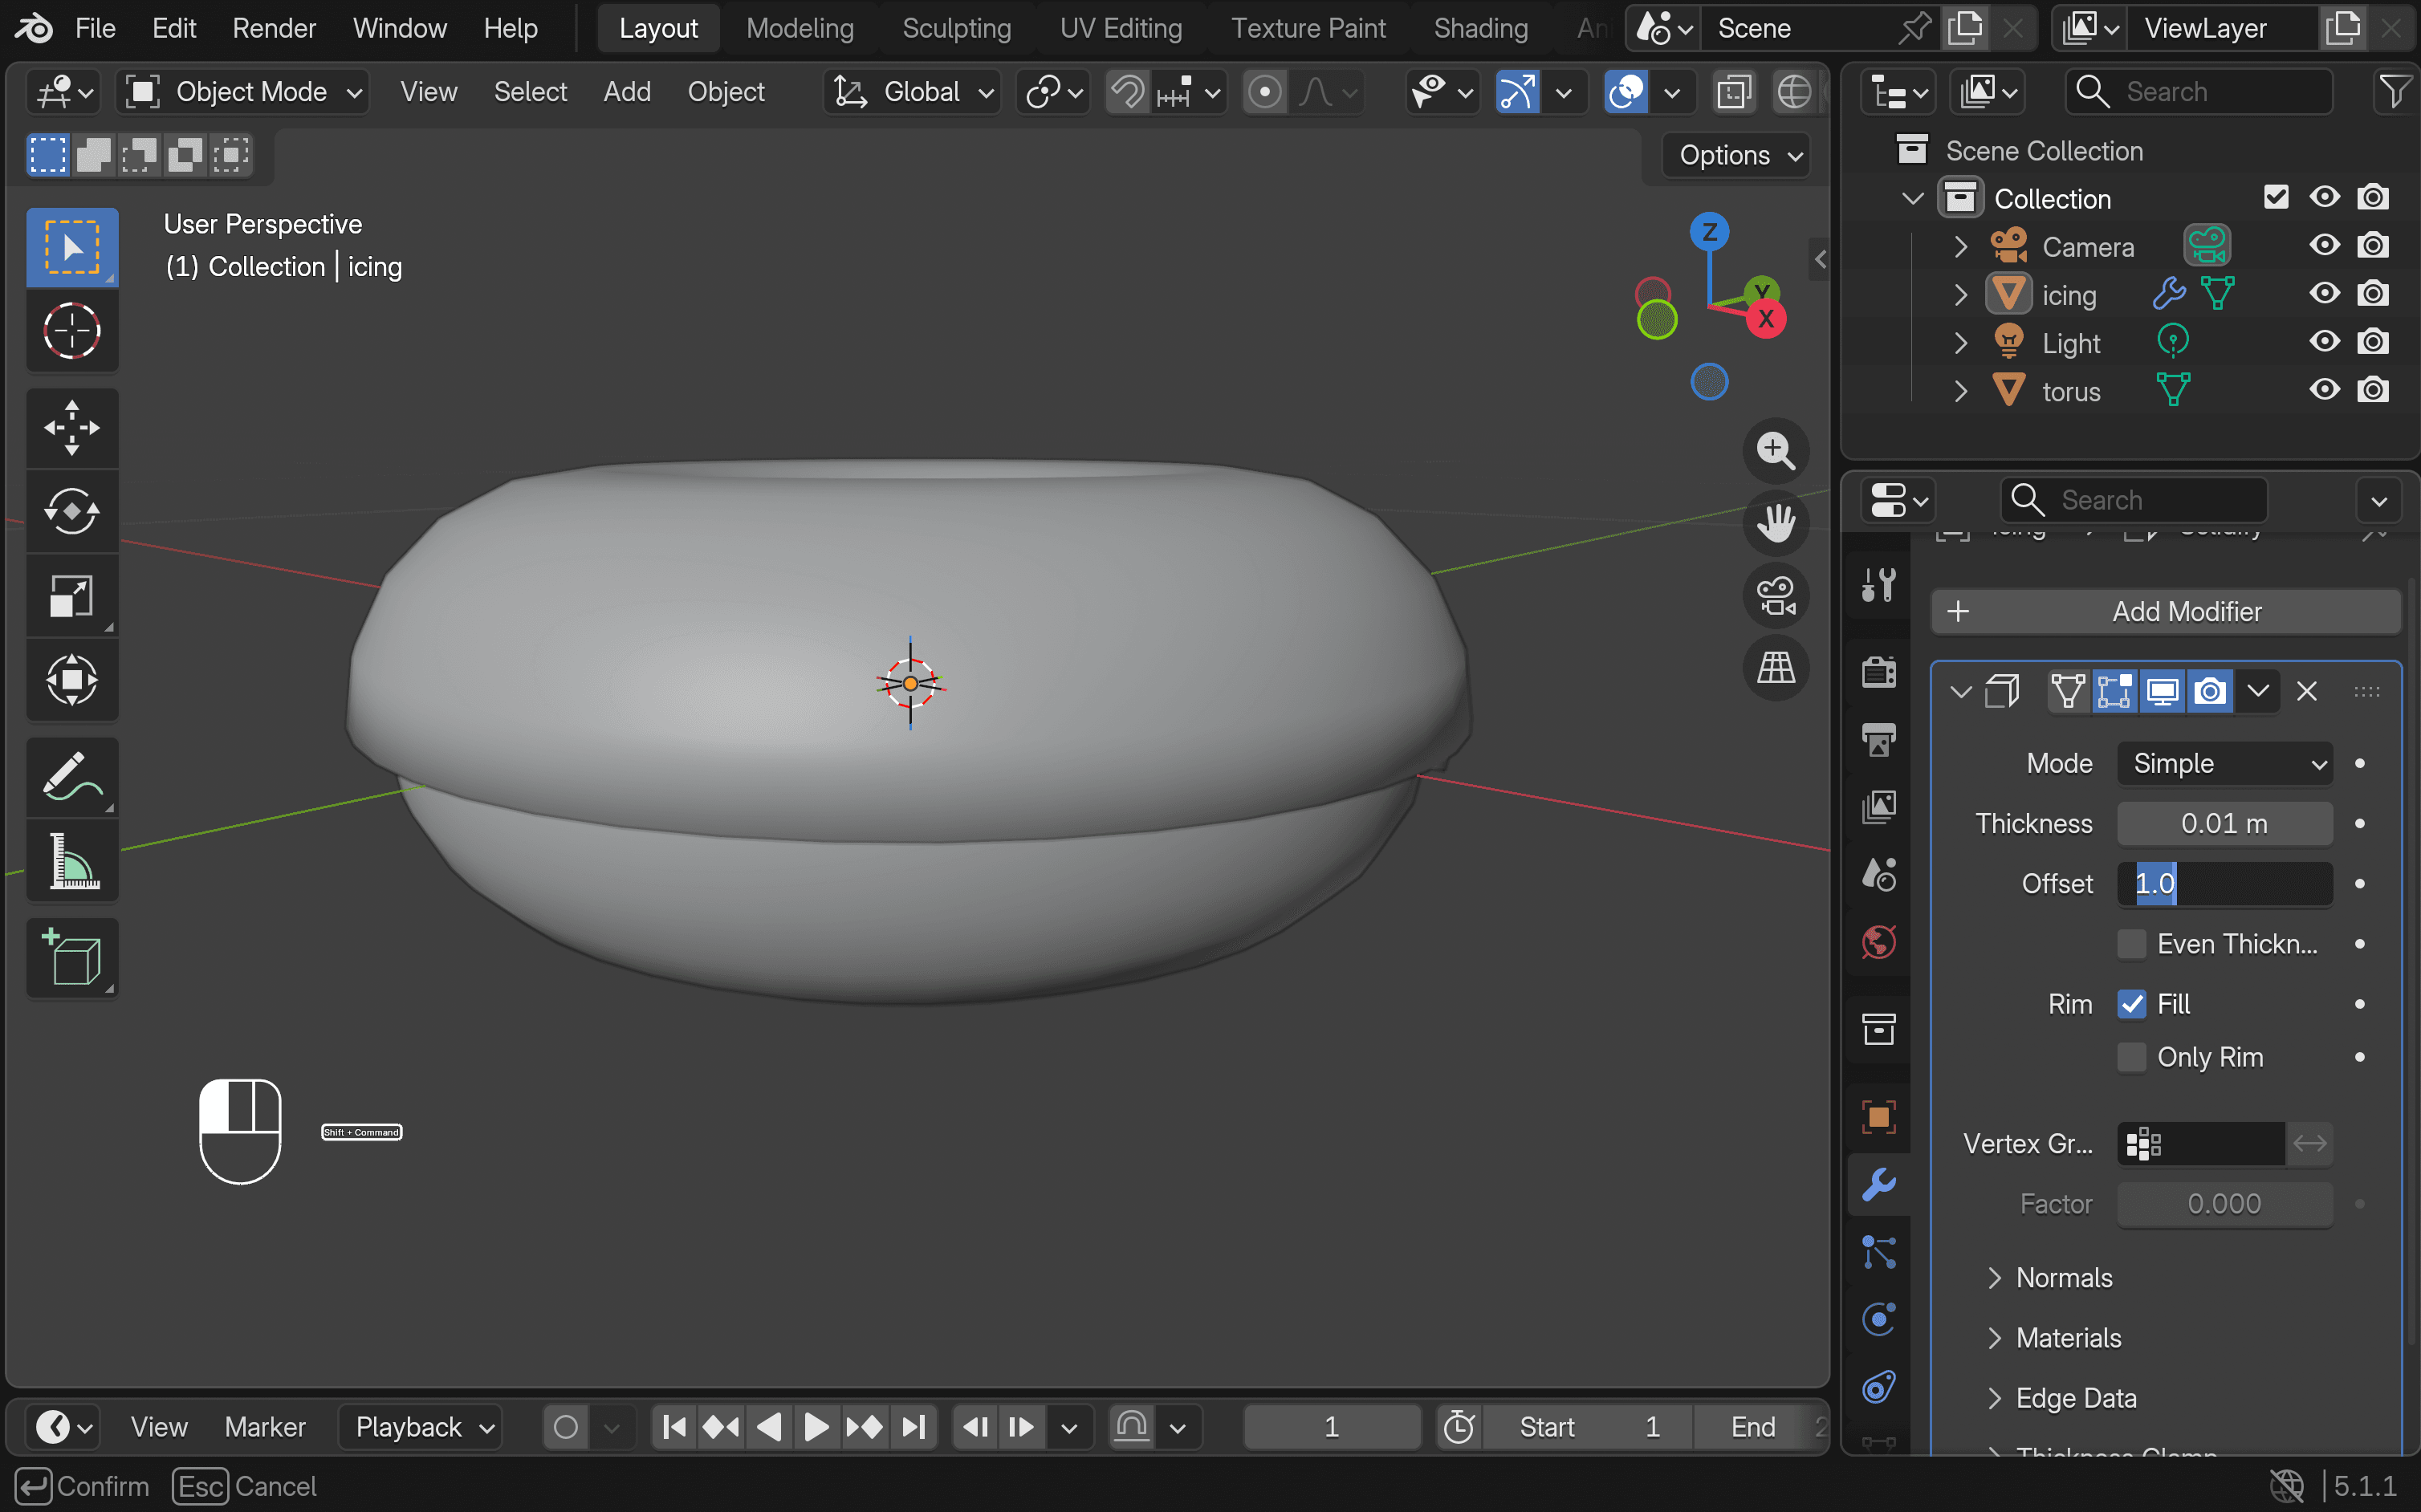
- Add a Subdivision Surface modifier to smooth the icing. You can then temporarily disable viewport visibility given that it could get in the way while further editing.
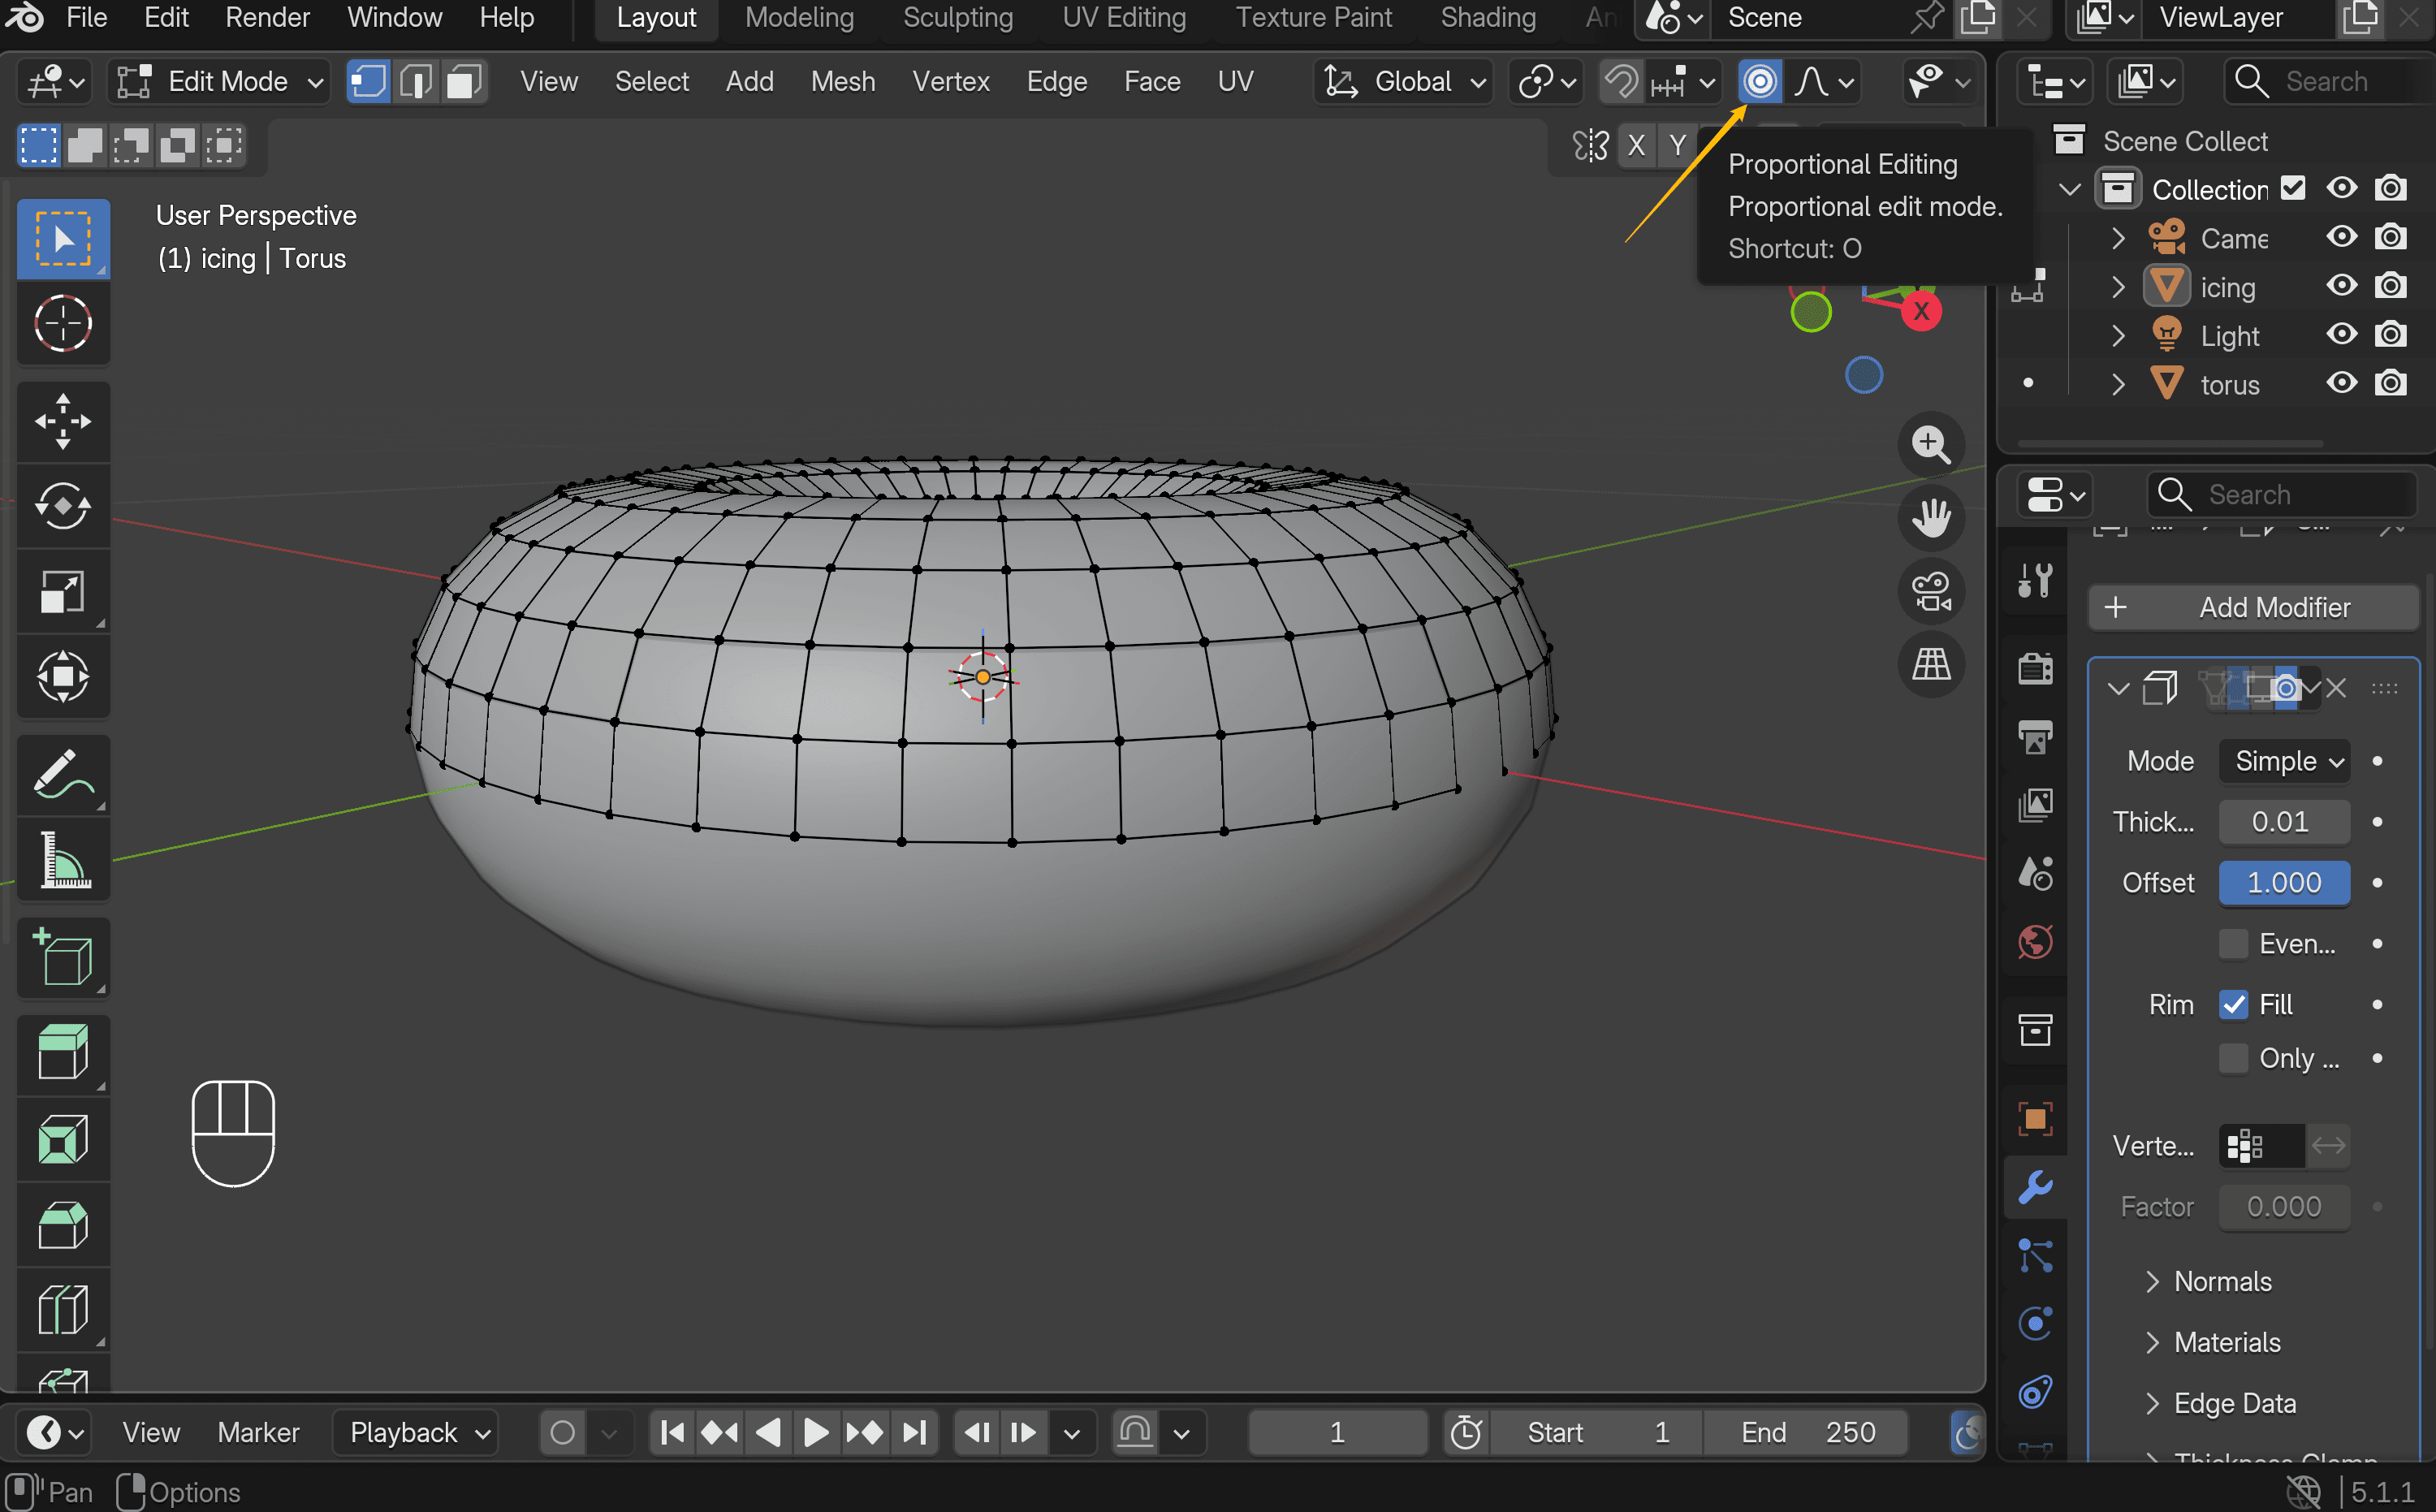
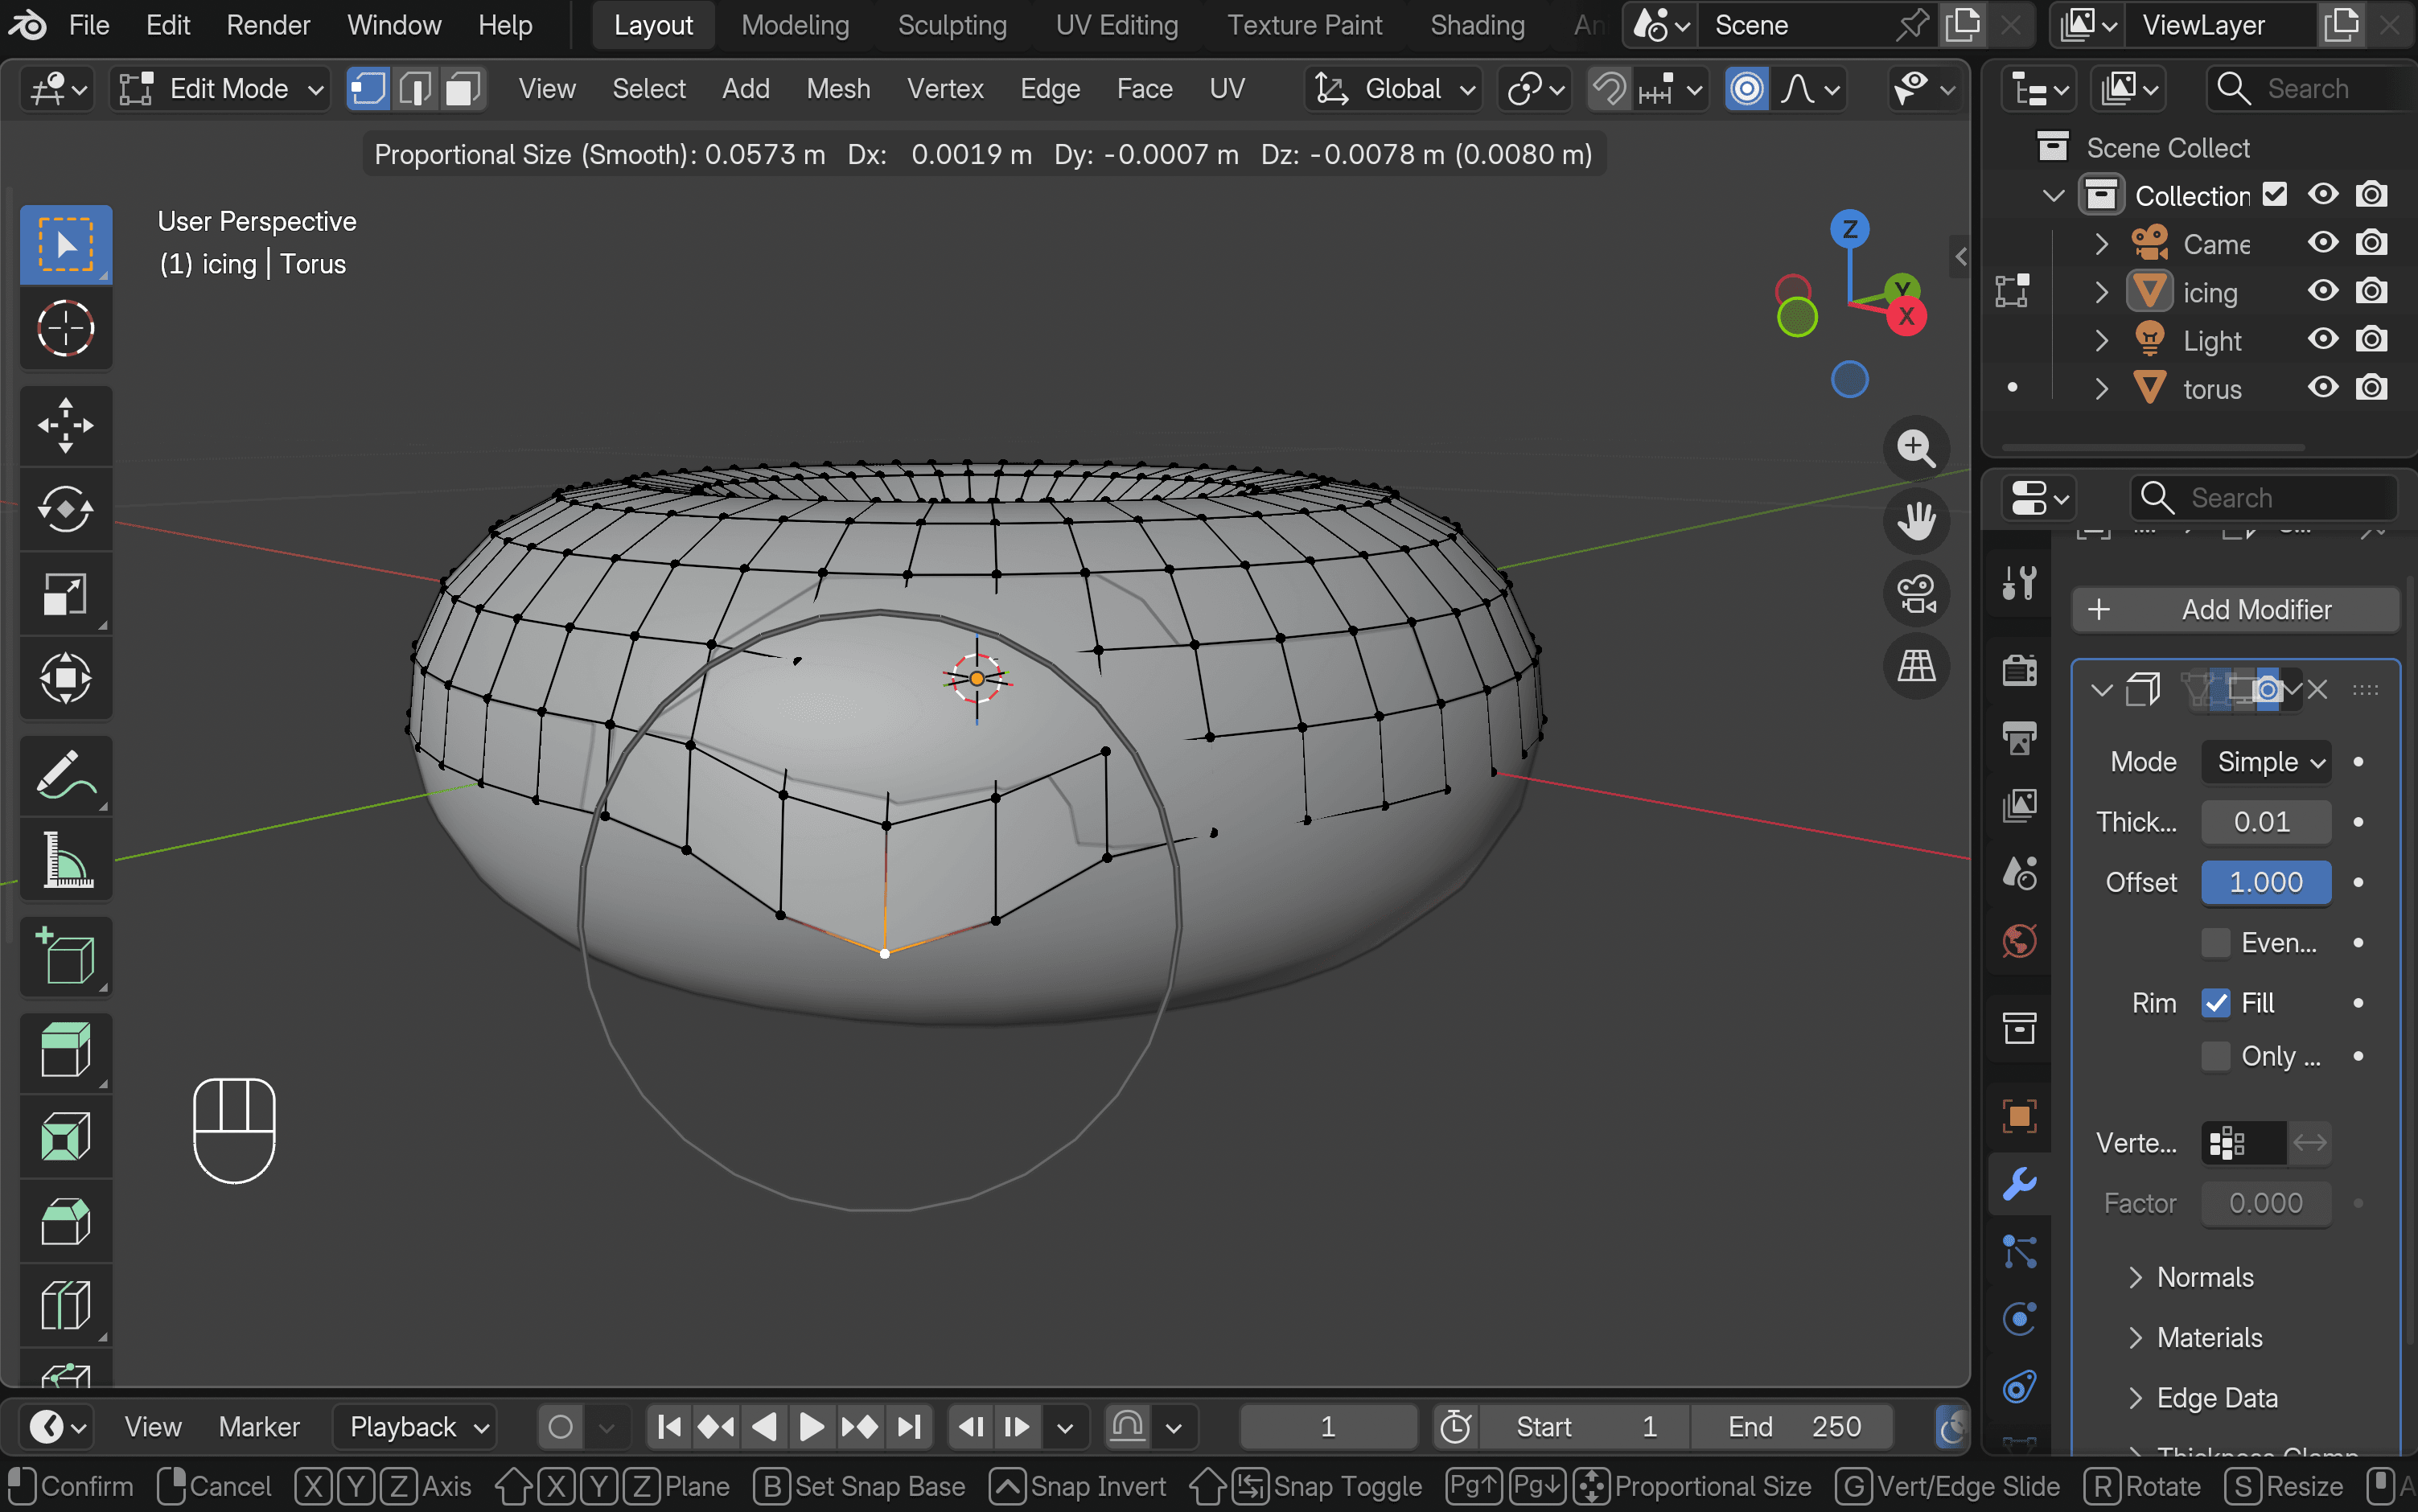
- Enable Proportional Editing to shape the icing more naturally. Select a vertex, press G, and use the mouse wheel to adjust the influence area. Move the vertex to form soft, uneven drips. Repeat this process until the shape looks natural.
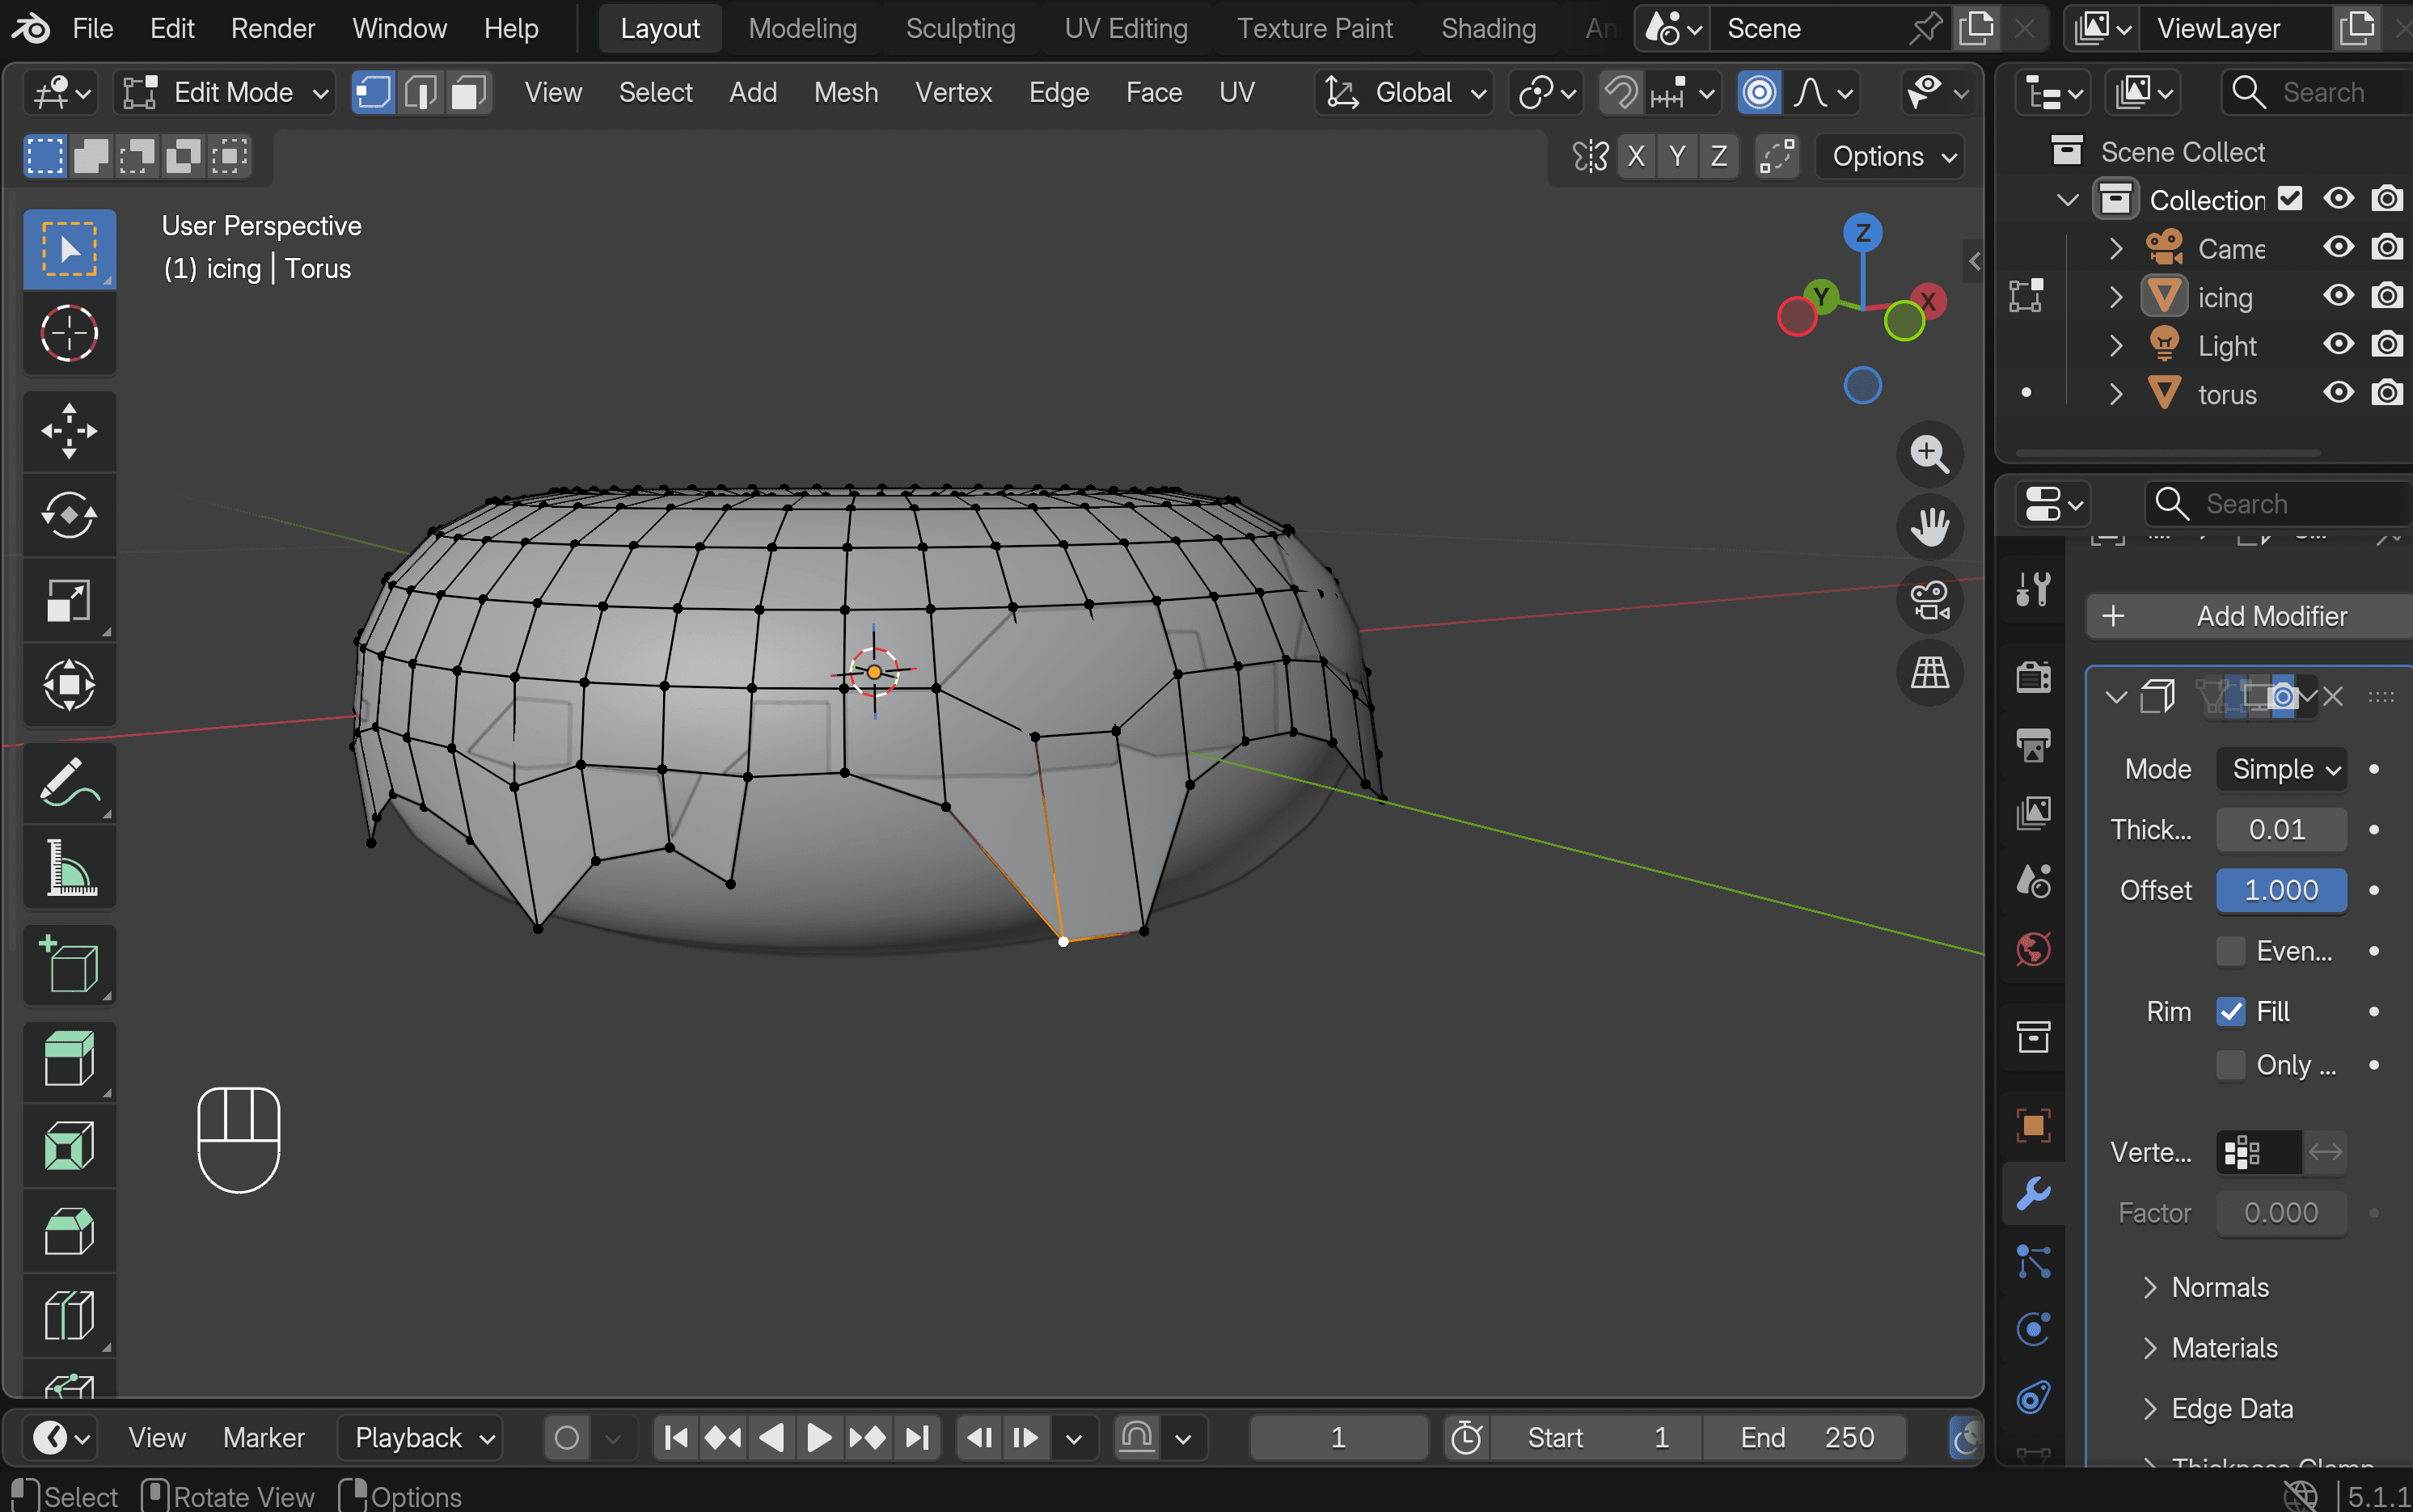
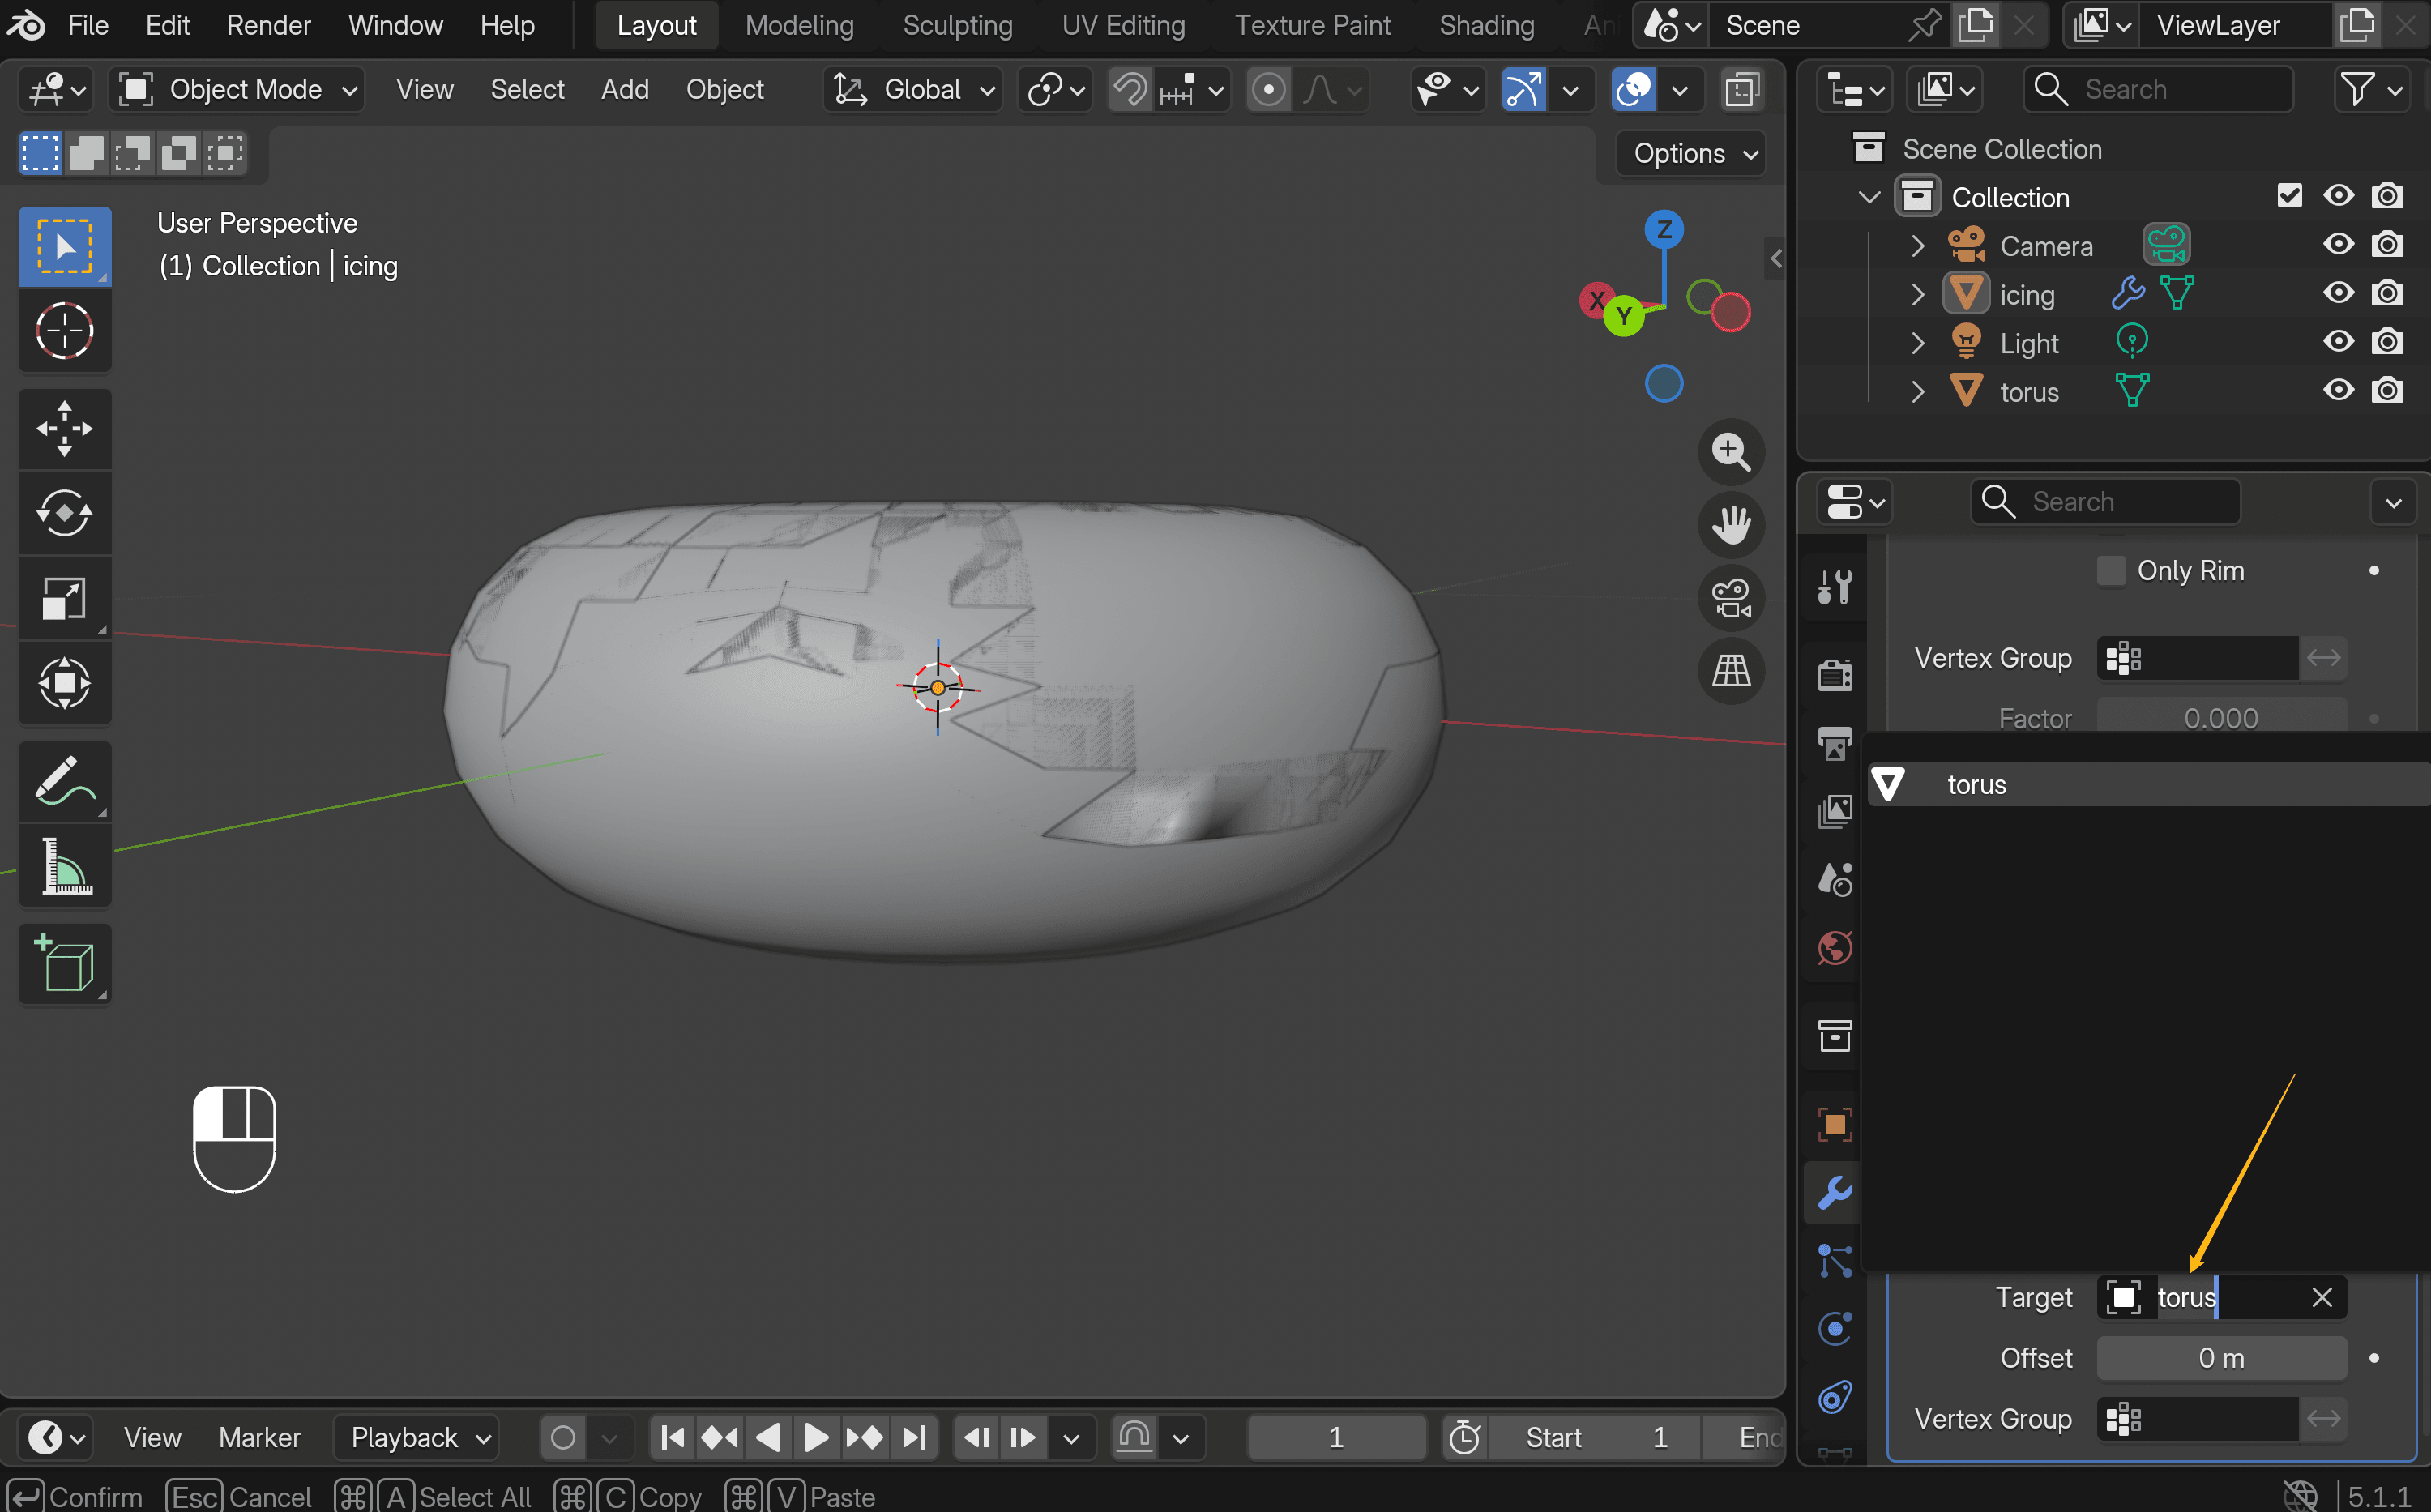
- To make the icing stick to the donut, add a Shrinkwrap modifier (Add Modifier → Deform → Shrinkwrap). Make sure to set the donut as the target object.
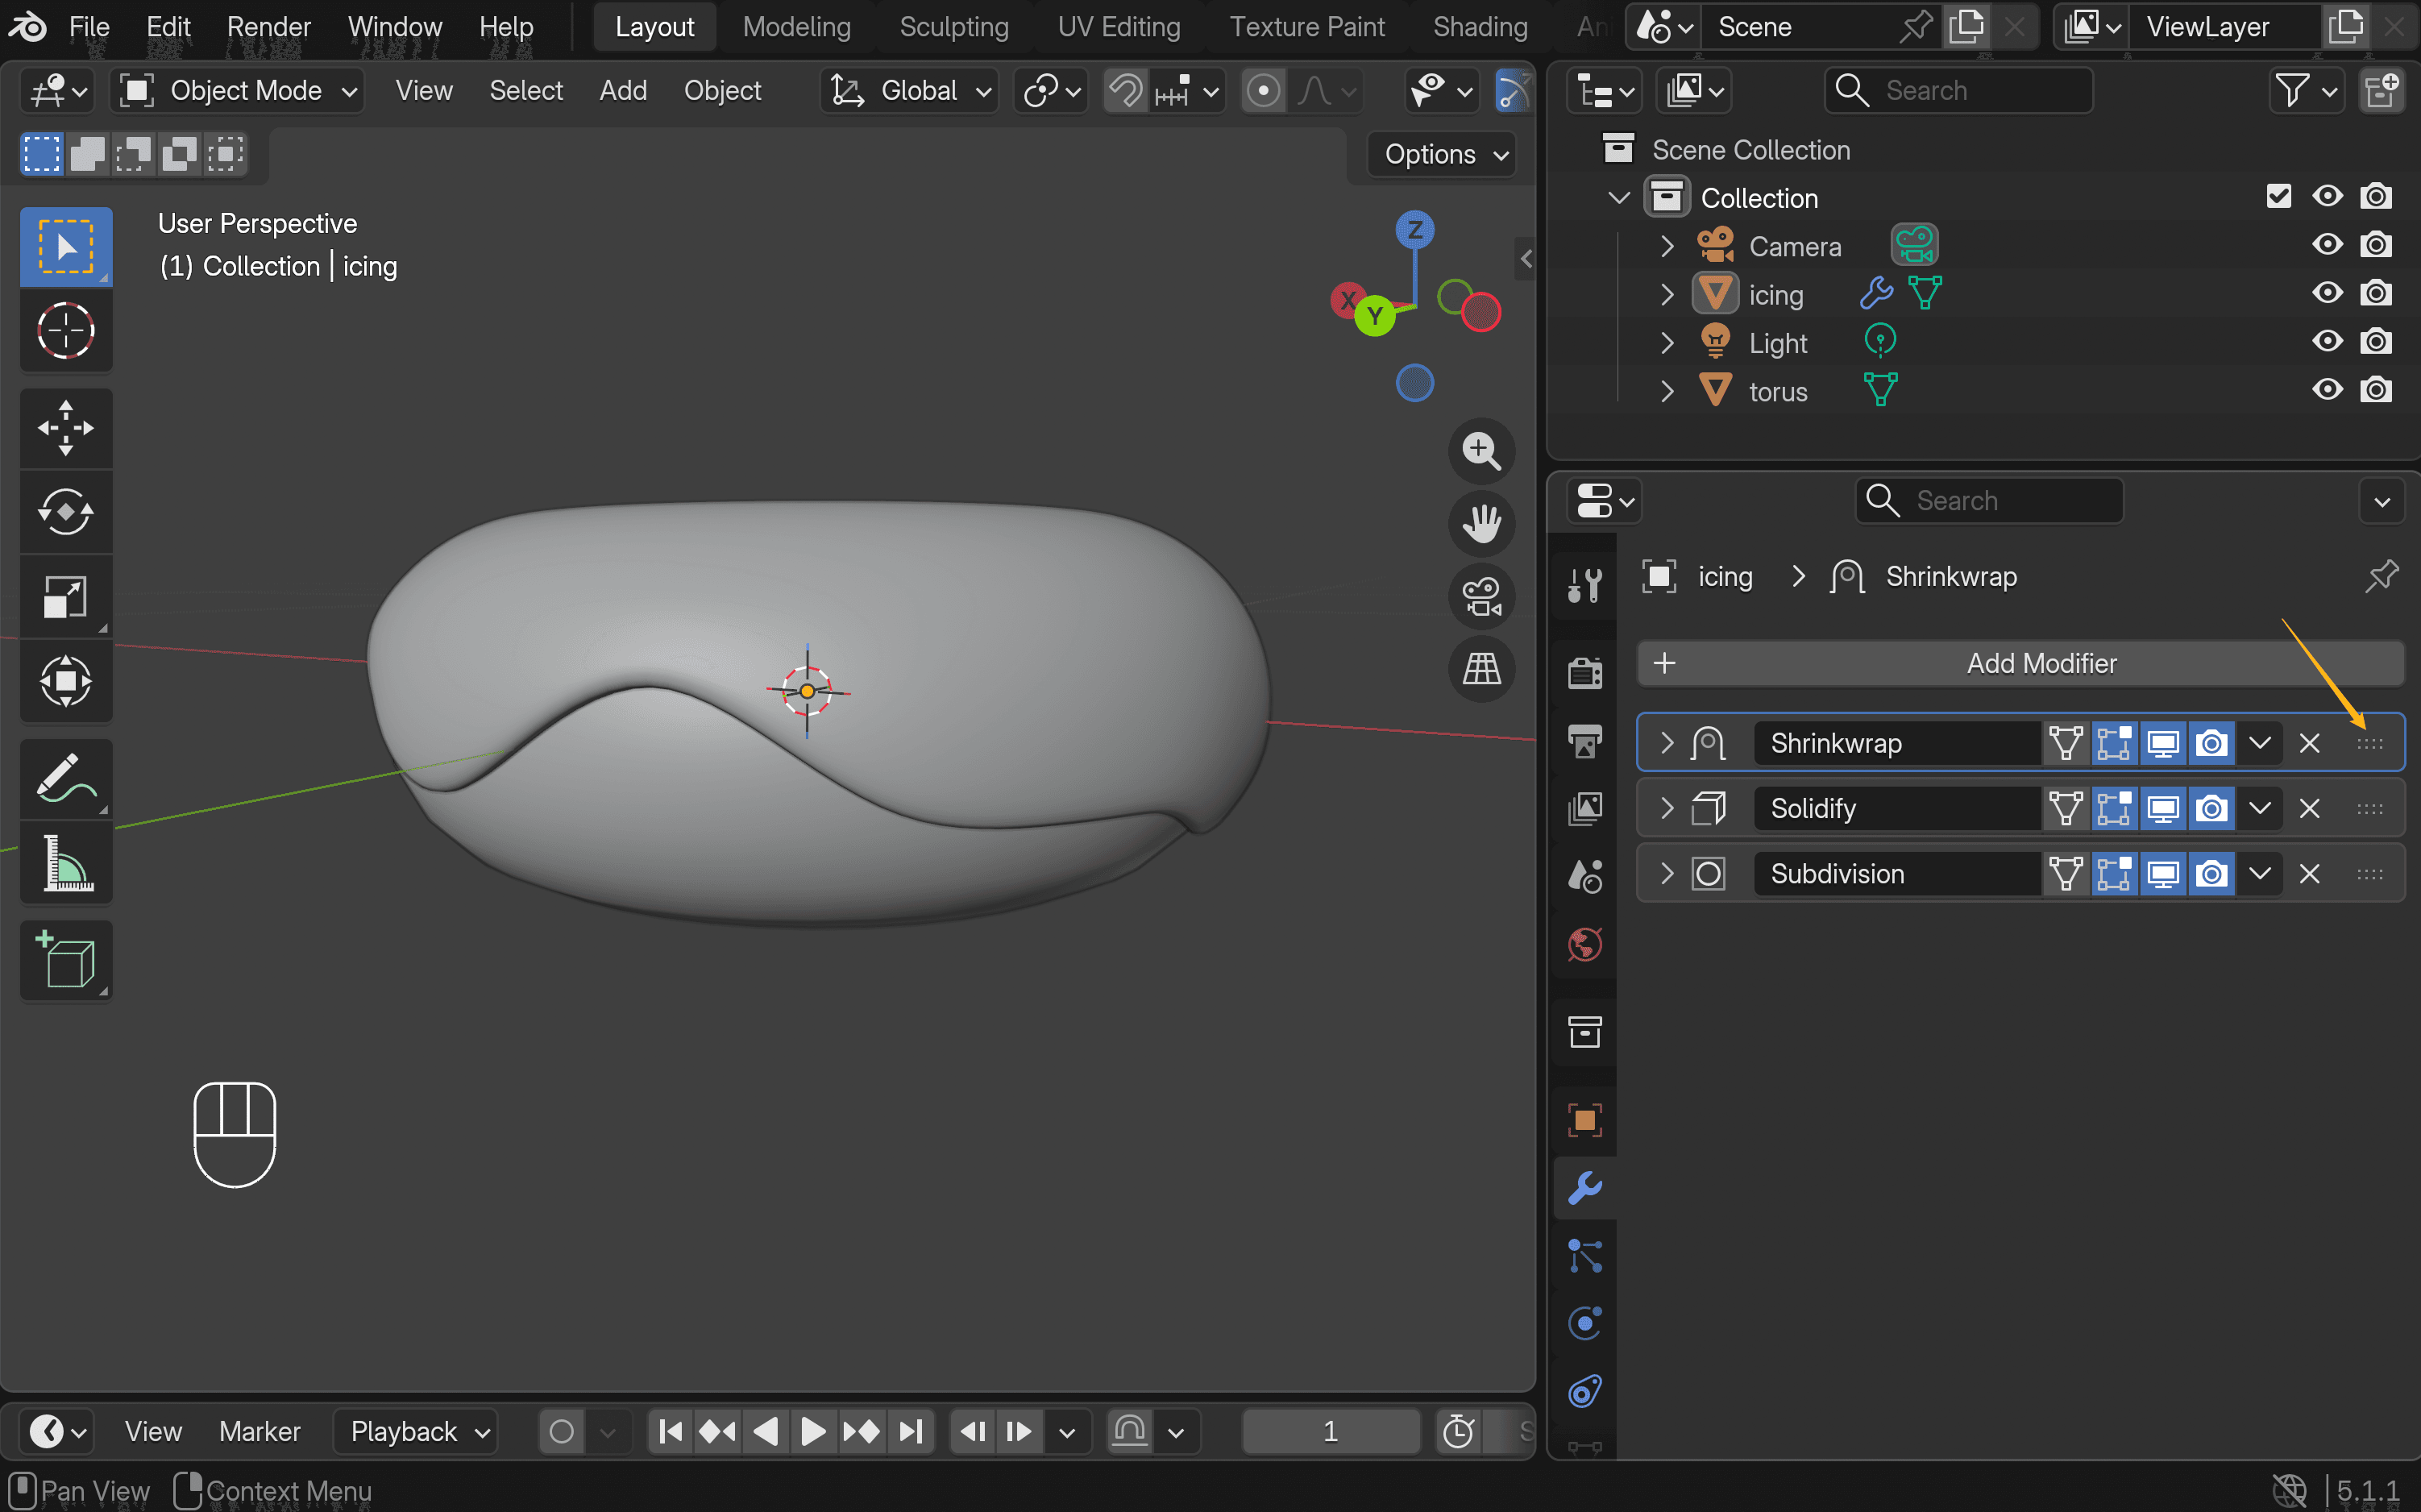
- Arrange the modifiers in this order: Shrinkwrap at the top, Solidify in the middle, and Subdivision at the bottom.
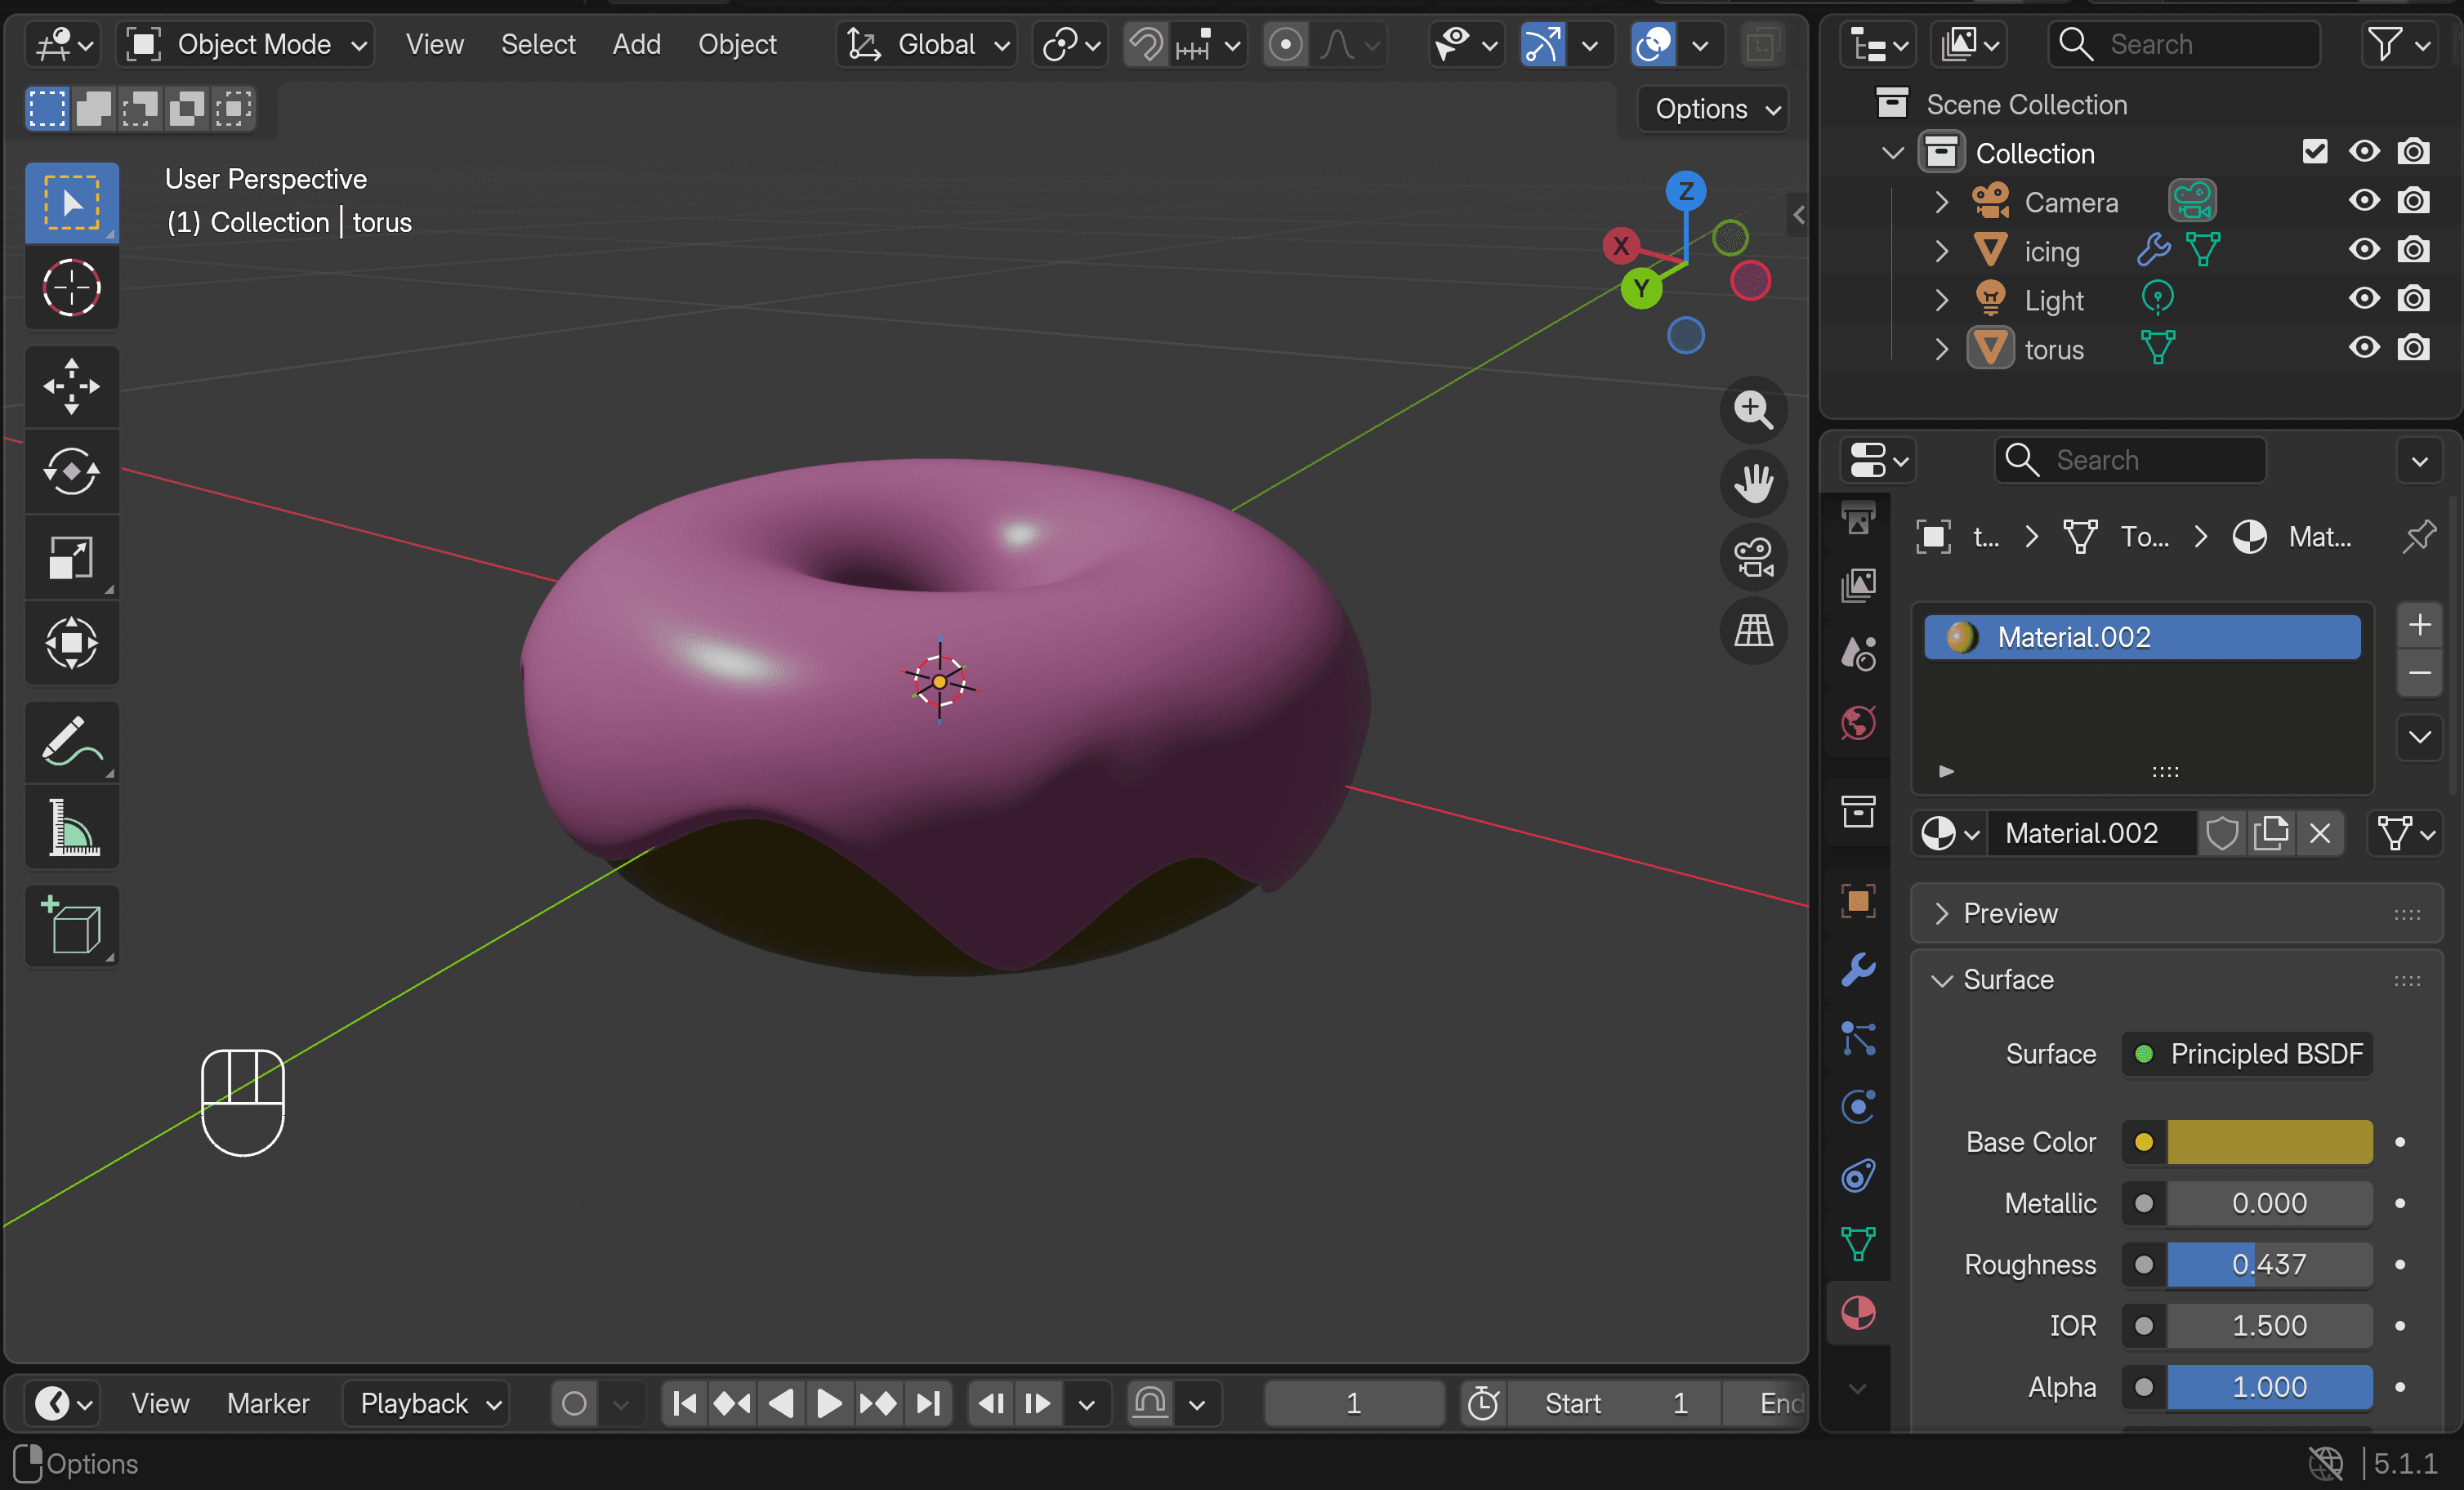
Step 3: Apply the Color
- Switch back to Object Mode, then go to the Material Properties panel. Create a new material and choose colors for both the icing and the base donut. To preview the result, switch to Rendered View.
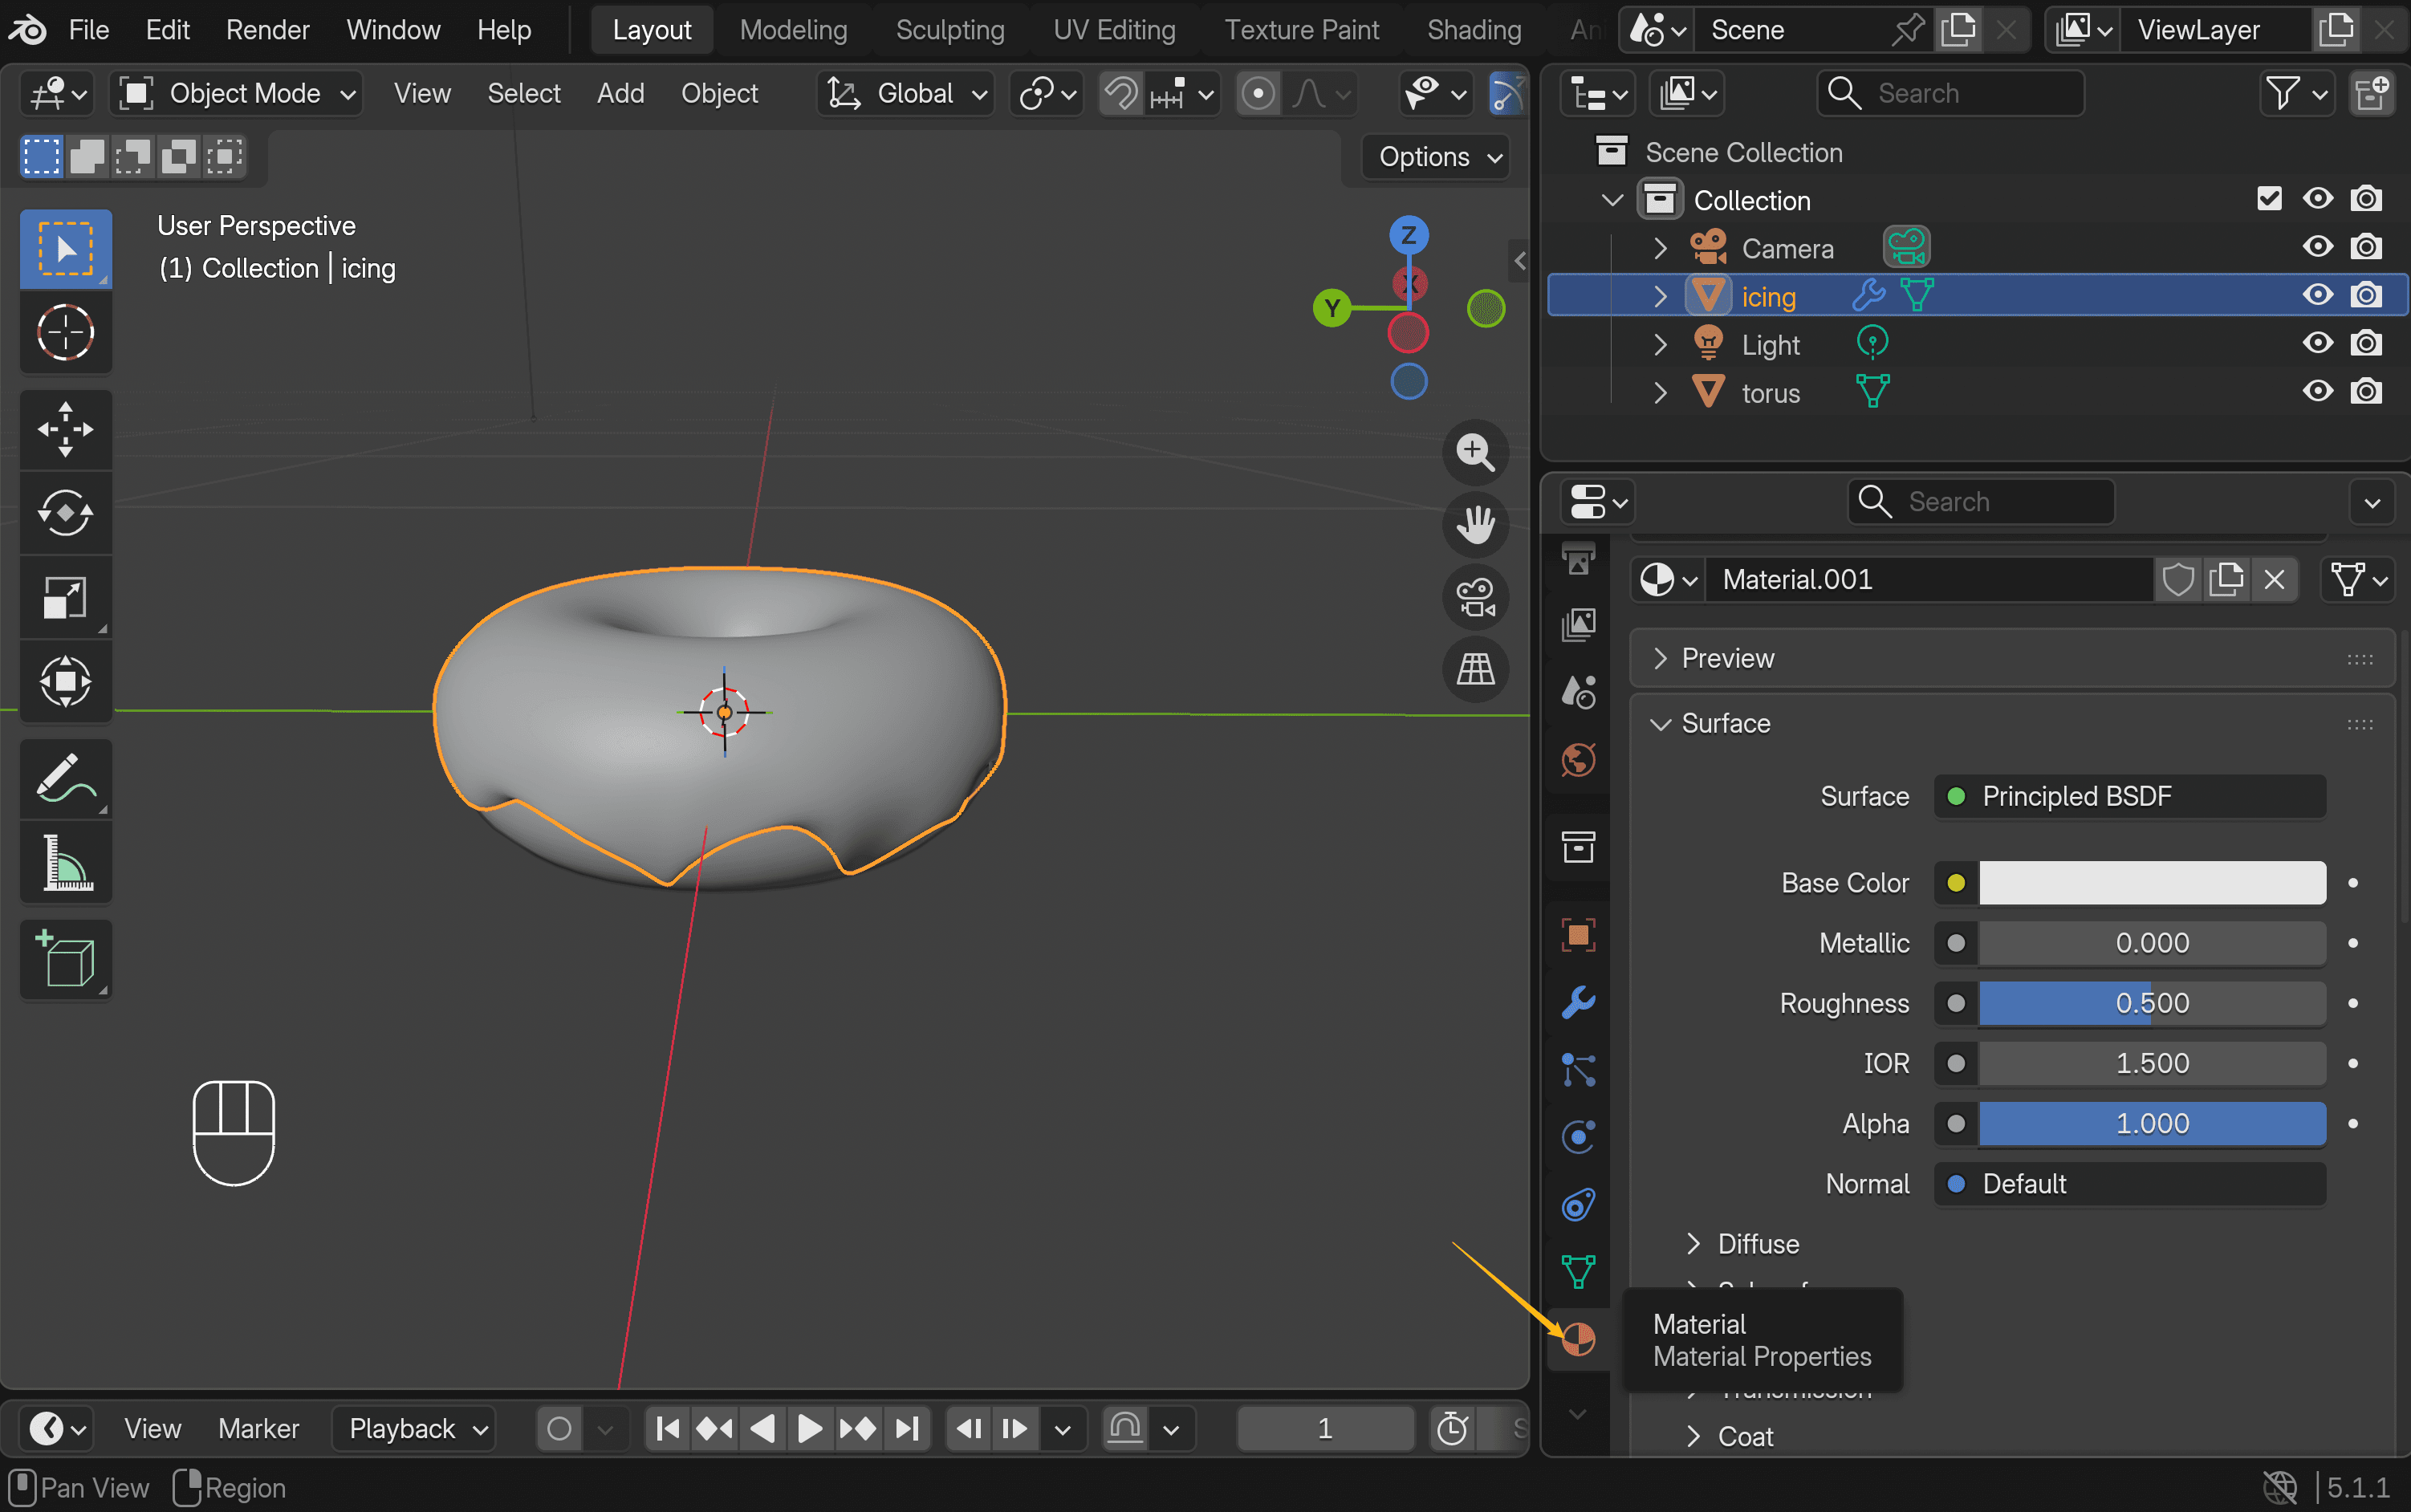
- That’s it—you now have a delicious donut.
Step 4: Create Toppings (Optional)
Placing sprinkles one by one takes a bit of time, but it makes the result feel much more realistic.
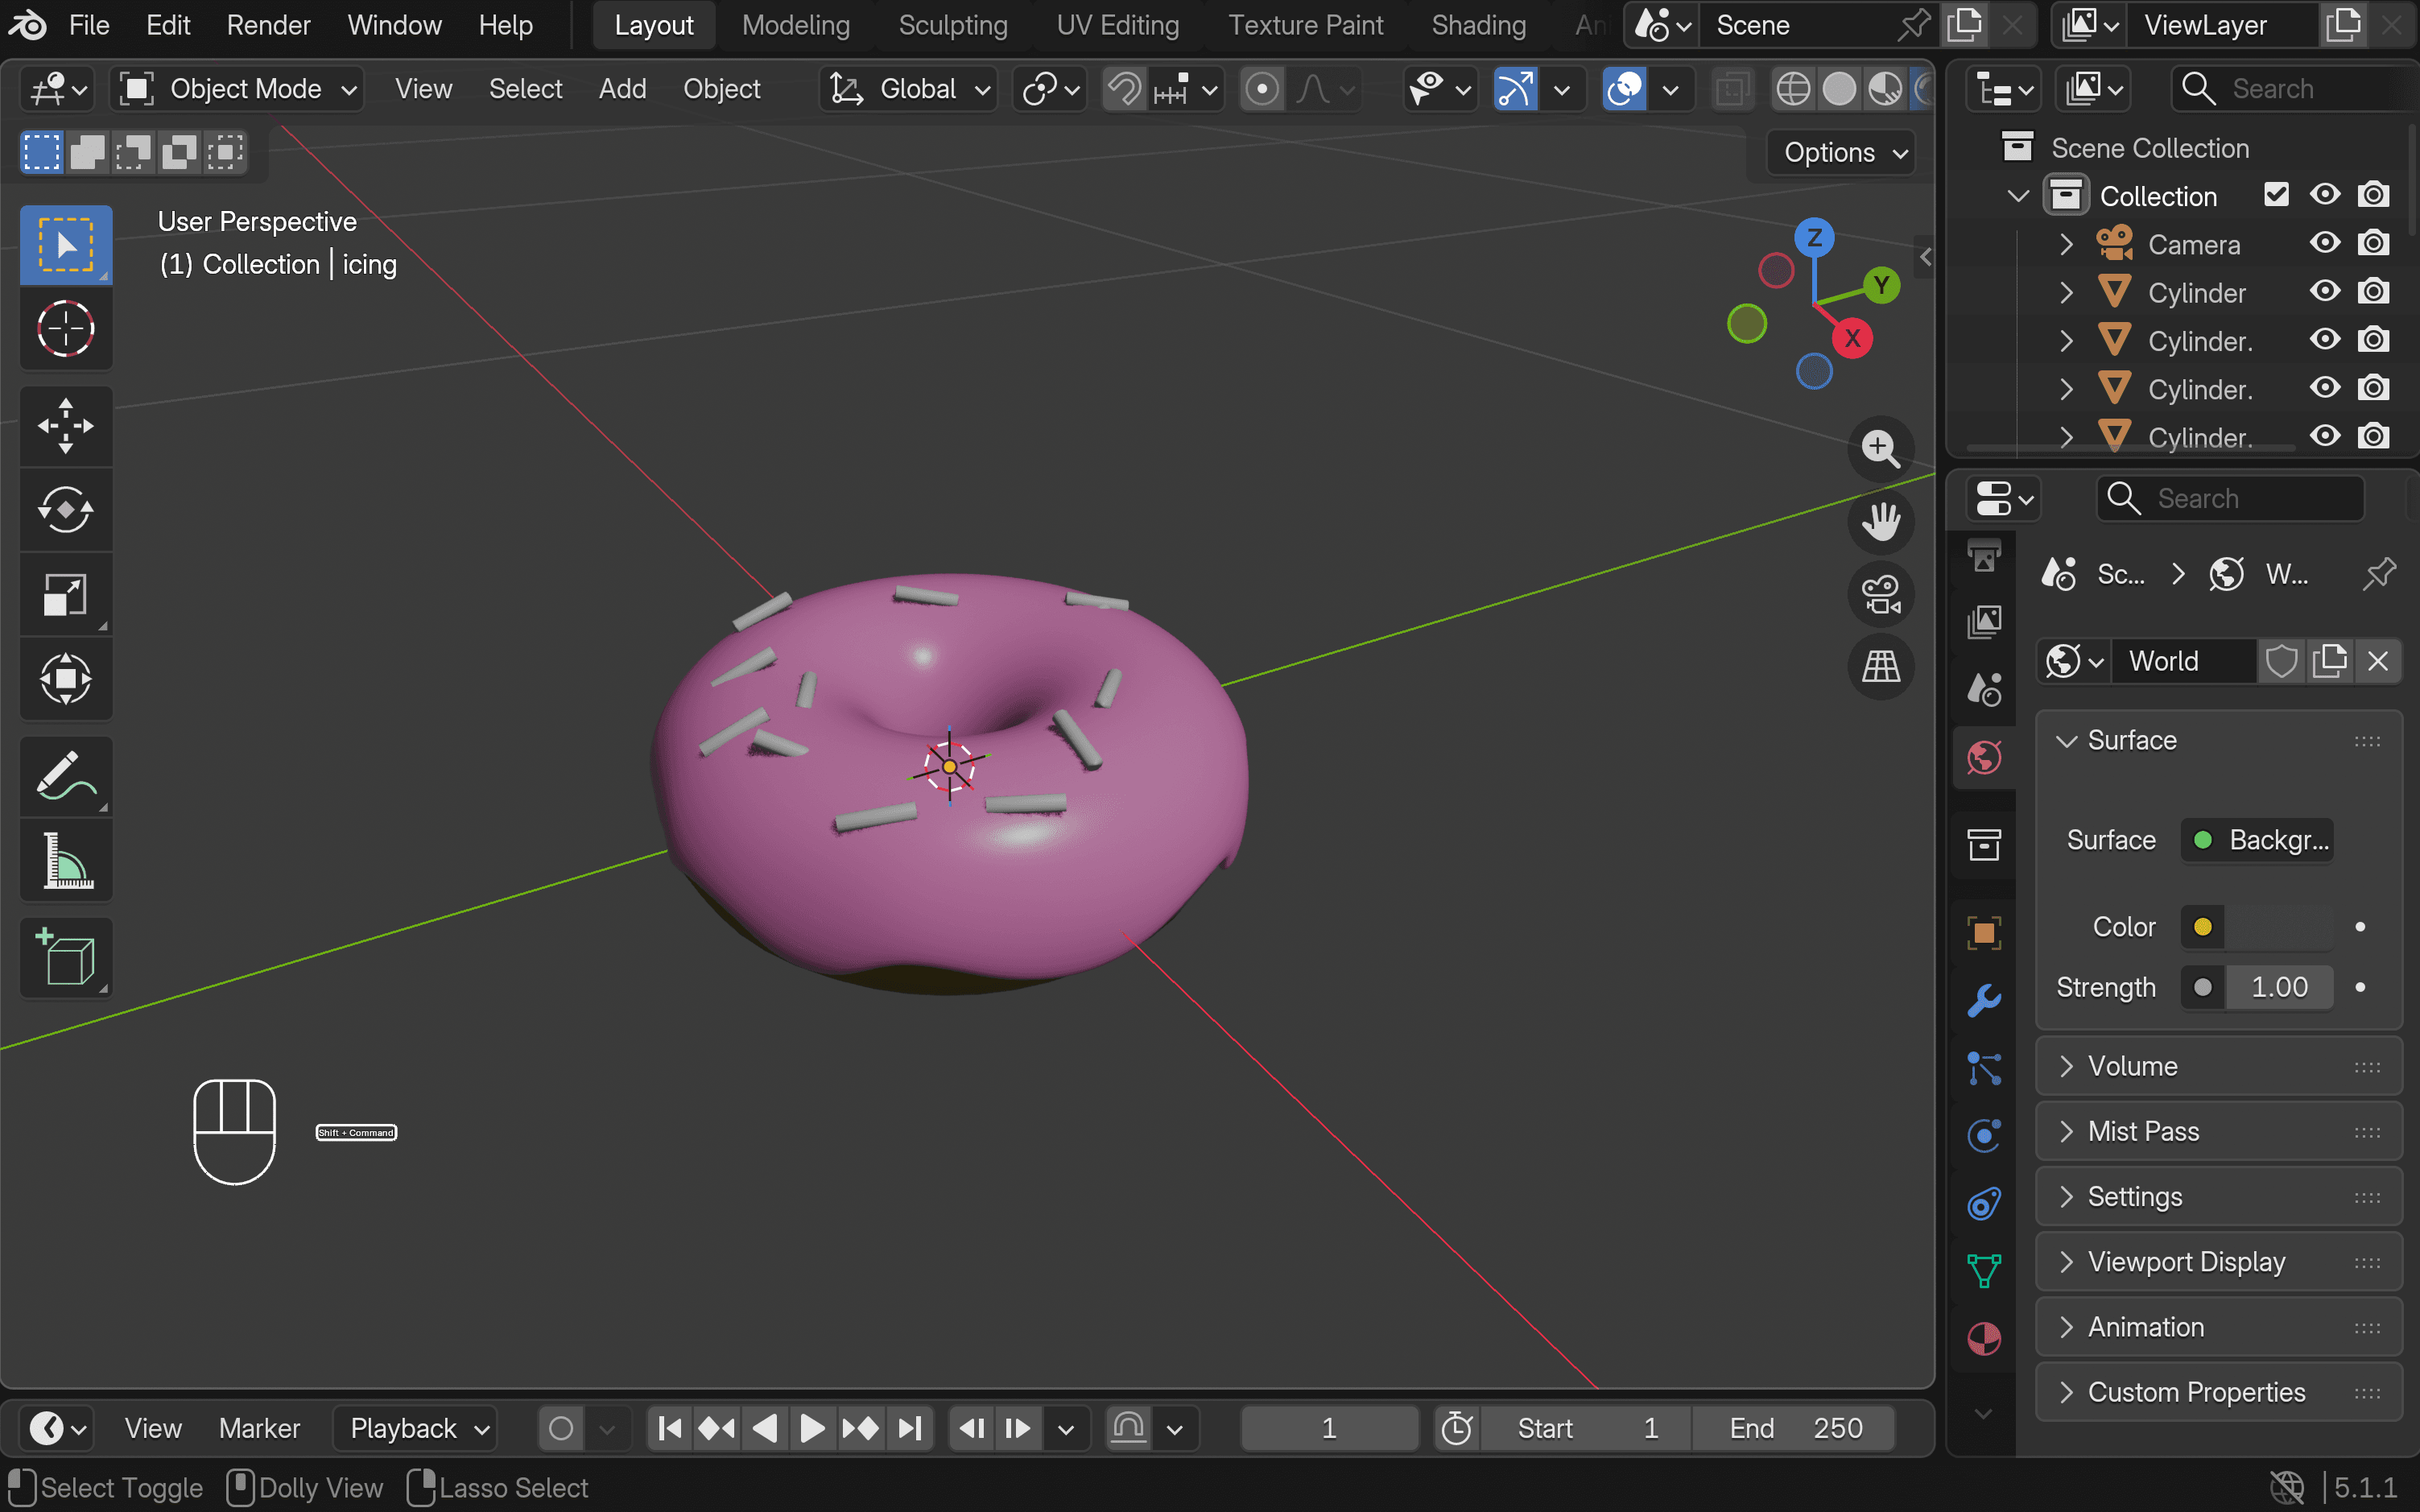
- Shift + A → Mesh → Cylinder. Use a low vertex count (around 8–12) to keep the shape simple.
- Press S to scale it down (around 0.05–0.1), then press S → Z to stretch it slightly. This creates the basic sprinkle shape. Right-click and choose Shade Smooth to remove the faceted look.
- Press R to rotate the cylinder so it doesn’t align perfectly. Then duplicate it with Shift + D, and move your mouse to place the copy. Repeat this step to create multiple sprinkles.
- Scatter them across the icing. Aim for about 15–20 sprinkles. Slightly vary their rotation, scale, and position to make them look more natural.
Faster Way: Create 3D Donut Models with Triverse AI
Here’s the thing—building a donut from scratch teaches you the fundamentals. But if you need a donut model right now for a game, a project, or just to save time, tools like Triverse AI can generate one in minutes.
Triverse offers a text to 3D feature. You describe what you want, and it builds the model for you.
Take the donut as an example. Prompts like these usually work well:
A stylized 3D donut with smooth pink icing, soft rounded shape, minimal imperfections, and a glossy surface. The icing slightly drips down the sides naturally. The donut base is light golden brown. Scattered on top are simple cylindrical sprinkles, randomly placed with slight variations in rotation and scale. Clean topology, soft shading, studio lighting, minimal background, game-ready asset, high-quality, realistic lighting but stylized proportions.
The key is to be specific. Do you want pink or chocolate icing? Sprinkles or no toppings? A realistic style or something more stylized? The more detail you include, the better the result.
If you already have a reference image, you can also use the image to 3D feature to generate a model from it.
Generation usually takes around a couple of minutes. Once it’s done, you can download the model in formats like .GLB, .OBJ, .STL, .FBX, or .USDZ.
From there, you can import the model into Blender and refine it further.
It’s much faster than building everything from scratch, especially when you just need a usable asset.
Methods of Blender Modeling Comparison: Which Should You Use?
Method | Time (Beginner) | Difficulty | Best For |
AI Model Generation (Triverse AI) | ~2 minutes | ⭐ | Fast results, complex shapes |
Manual Modeling (Blender) | 15 minutes | ⭐⭐ | Learning fundamentals |
Manual Modeling (Autodesk Maya) | 30 minutes | ⭐⭐⭐⭐⭐ | industry standard |
Manual Modeling (ZBrush) | 20 minutes | ⭐⭐⭐ | high-detail sculpting |
Manual Modeling (SolidWorks Mechanical) | 25 minutes | ⭐⭐⭐ | professional mechanical engineering |
My recommendation: Start with manual modeling (this tutorial). It builds intuition. Once comfortable, try AI tools like Triverse AI to speed up prototyping. Use modifiers and sculpting as you level up.
Blender 3D Printing: Can You Print This Donut?
Yes! And this is where Blender for beginners gets exciting. That donut you just made can become a real physical object.
How to Prepare Your Donut for 3D Printing
- Check Mesh Normals: Go to Mesh → Normals → Recalculate Outside to ensure all faces point outward.
- Make it Manifold (Watertight): Your donut is probably fine, but for complex models, use Mesh → Transform → Flip Faces if slicing software shows errors.
- Export as STL: Go to File → Export → STL. In the settings, check "Apply Modifiers" if you used any.
- Check in Slicing Software: Open the STL in PrusaSlicer or Cura. If it shows as "non-manifold" errors, fix them in Blender using Mesh → Cleanup or the 3D Printing Toolkit add-on.
A donut geometry is simple, so it prints easily. But the skills you learn here, like checking normals, ensuring watertight meshes, and exporting correctly, apply to every 3D print you ever make.
Bonus: Common Blender Beginner Mistakes to Avoid
Every Blender beginner hits these roadblocks. Save yourself the frustration:
Forgetting to Apply Transforms
Problem:
You scale or rotate an object, and it looks fine in the viewport. But when you add a modifier or export it, things don’t behave the way you expect.
Solution:
Before moving on, press Ctrl + A → Apply All Transforms.
Do this anytime you’ve scaled or rotated something and are about to add modifiers or export. It keeps everything consistent.
Inverted Normals (Inside-Out Faces)
Problem:
Your model suddenly looks dark, transparent, or just wrong. In some cases, parts of it may disappear completely in other software.
Solution:
Go into Edit Mode, press A to select everything, then press Shift + N.
If you’re not sure, turn on Face Orientation—blue means correct, red means flipped.
Sometimes you may find that your model’s textures are missing. You can refer to the detailed guide for a step-by-step fix.
Floating Geometry (N-gons and Triangles)
Problem:
Everything looks fine at first, but shading starts to look uneven, or your model becomes harder to edit as you keep working.
Solution:
Try to keep your mesh clean and mostly in quads (four-sided faces). When things get messy, use Loop Cut (Ctrl + R) or Knife (K) to fix the flow.
Wrong Export Settings
Problem:
Your model looks perfect in Blender, but once you export it, something breaks—wrong scale, missing textures, or weird shading.
Solution:
Before exporting:
- Press Ctrl + A to apply transforms
- Use formats like .FBX or .GLB
- Make sure Apply Modifiers and Include Textures are enabled
Take a few seconds to double-check these—it saves a lot of headaches later.
Ignoring the Outliner
Problem:
As your scene grows, everything starts to feel messy. You spend more time finding objects than actually working on them.
Solution:
Get into the habit of naming things properly—donut_base, icing, sprinkles, and so on.
Use the Outliner to quickly find and select what you need.
Conclusion
The donut has been a starting point for 3D artists for a long time, and for good reason. It teaches the fundamentals using a shape that’s easy to recognize. The same skills—modeling, shading, and rendering—apply to almost everything you build afterward. Even if you plan to use tools like Triverse AI for production models, going through the process once helps you understand how things actually work.
So open Blender, make the donut, and then move on to whatever you want to build next.
FAQs about Making 3D Models in Blender
How to make a liquid in Blender 3D?
Use the Fluid simulation (Physics → Fluid). Set one object as the Domain and another as the Flow, then bake.
For a simpler effect, you can fake liquid using a displacement modifier with a noise texture.
Is Blender CPU or GPU heavy?
Both. CPU handles physics simulations, modifiers, and the viewport. GPU handles real-time rendering in Eevee and final renders in Cycles. A decent GPU helps significantly.
What does Ctrl+L do in Blender?
In Object Mode, it links data (like materials) from the active object to others. In Edit Mode, it selects all connected geometry.
Is Blender difficult to learn?
It can feel unfamiliar at first, but most people get comfortable after a couple of weeks of practice.
Can I learn Blender in 2 days?
You can learn the interface and make your first model in 2 days. Proficiency—being able to build what you imagine could take weeks to months. But day one? You can absolutely make something you're proud of.
Which AI tools work best with Blender?
Tools like Triverse AI work well with Blender. They export formats like .GLB, .OBJ, .STL, .3MF, .FBX, and .USDZ, which can be imported directly into your scene.
Can AI generator create 3D models for Blender?
Triverse AI, an AI-powered 3D mode can generate 3D models from text prompts or images directly. You describe what you want or upload a reference image, it outputs a .GLB / .OBJ / .STL / .3MF / .FBX / .USDZ file. You then can import it to Blender for refinement, texturing, or animation.