How to Fix Missing Textures in Blender
Fix missing textures in Blender fast. Learn why your model turns pink, how to relink image files, and how to prevent texture issues in future projects.
April 22, 2026
You open a Blender file you've been working on for weeks. The model loads. But instead of the carefully crafted textures you applied, everything is a flat, aggressive shade of magenta.
Don't panic. Missing textures in Blender is one of the most common issues in Blender, and it's almost always fixable in several minutes. Besides talking about how to fix it, we'll also cover something most tutorials skip entirely: how that same "broken" pink texture became one of the most recognizable visual aesthetics in gaming culture.

What Is a "Missing Texture" in Blender?
In Blender, image textures are usually stored as external files rather than embedded in the .blend file by default. Blender keeps a path that points to where each image lives. When you open the project, Blender follows that path and tries to load the file. If you want those resources stored inside the .blend, you have to pack them.
A missing texture happens when Blender follows that path and cannot find the image. The file may have been moved, renamed, deleted, or left behind on another computer. When that happens, Blender cannot load the intended image and the material falls back to a bright magenta warning color.
Why Your Model Turns Pink (Magenta)
There are four common reasons this happens.
Broken File Paths
This is the most common one. If you move the .blend file, move the texture folder, or open the project on a different machine, the stored path may no longer point to a real file. Blender tracks external data through file paths, including relative and absolute paths.
Missing Texture Files
Sometimes the image file is simply gone. Maybe it was deleted, maybe it got lost during a transfer, or maybe someone sent you the .blend file without the texture folder. Blender cannot load a file that is no longer there.
Not Packing Resources
If you never packed the textures into the .blend file, they remain external resources. That is fine while everything stays in place, but it becomes a problem when you share the project or archive it. Blender’s Pack Resources feature exists for exactly this reason.
Import/Export Issues
Imported models can come in with broken or unusable texture references, especially when the asset folder has been moved, renamed, or exported without the expected image files. The result is the same: Blender cannot find the texture, so the material shows the magenta warning color.
How to Fix Missing Textures in Blender
Method 1: Relink the Image Texture
Best for: one or two simple textures, especially if only the base color is missing.
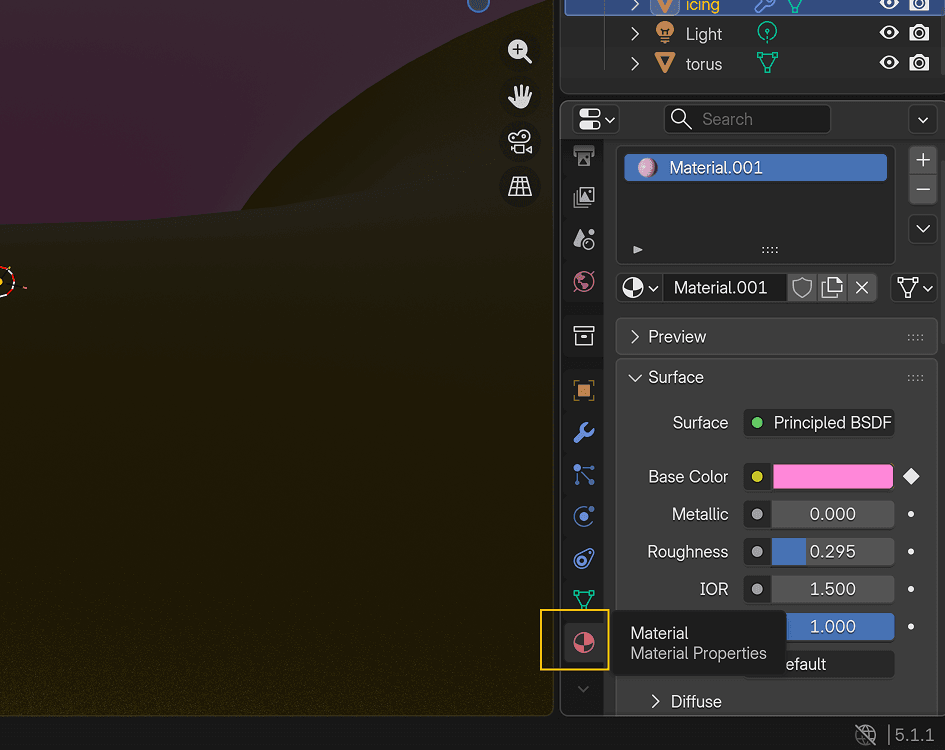
- Go to the Material Properties tab. Under Surface, look for Base Color.
- Click the small dot next to Base Color and choose Image Texture.
- Click the folder icon and browse to the correct image file.
- Once you load it, the magenta should disappear.
- Repeat the process for other simple materials if needed.
This is the easiest beginner fix, but it is best for simple materials. If your shader uses multiple maps such as roughness, normal, or metallic, it is more precise to reconnect the original image nodes in the Shader Editor instead of only replacing Base Color.
Method 2: Batch Fix Missing Textures
Best for: multiple missing textures across a larger scene.
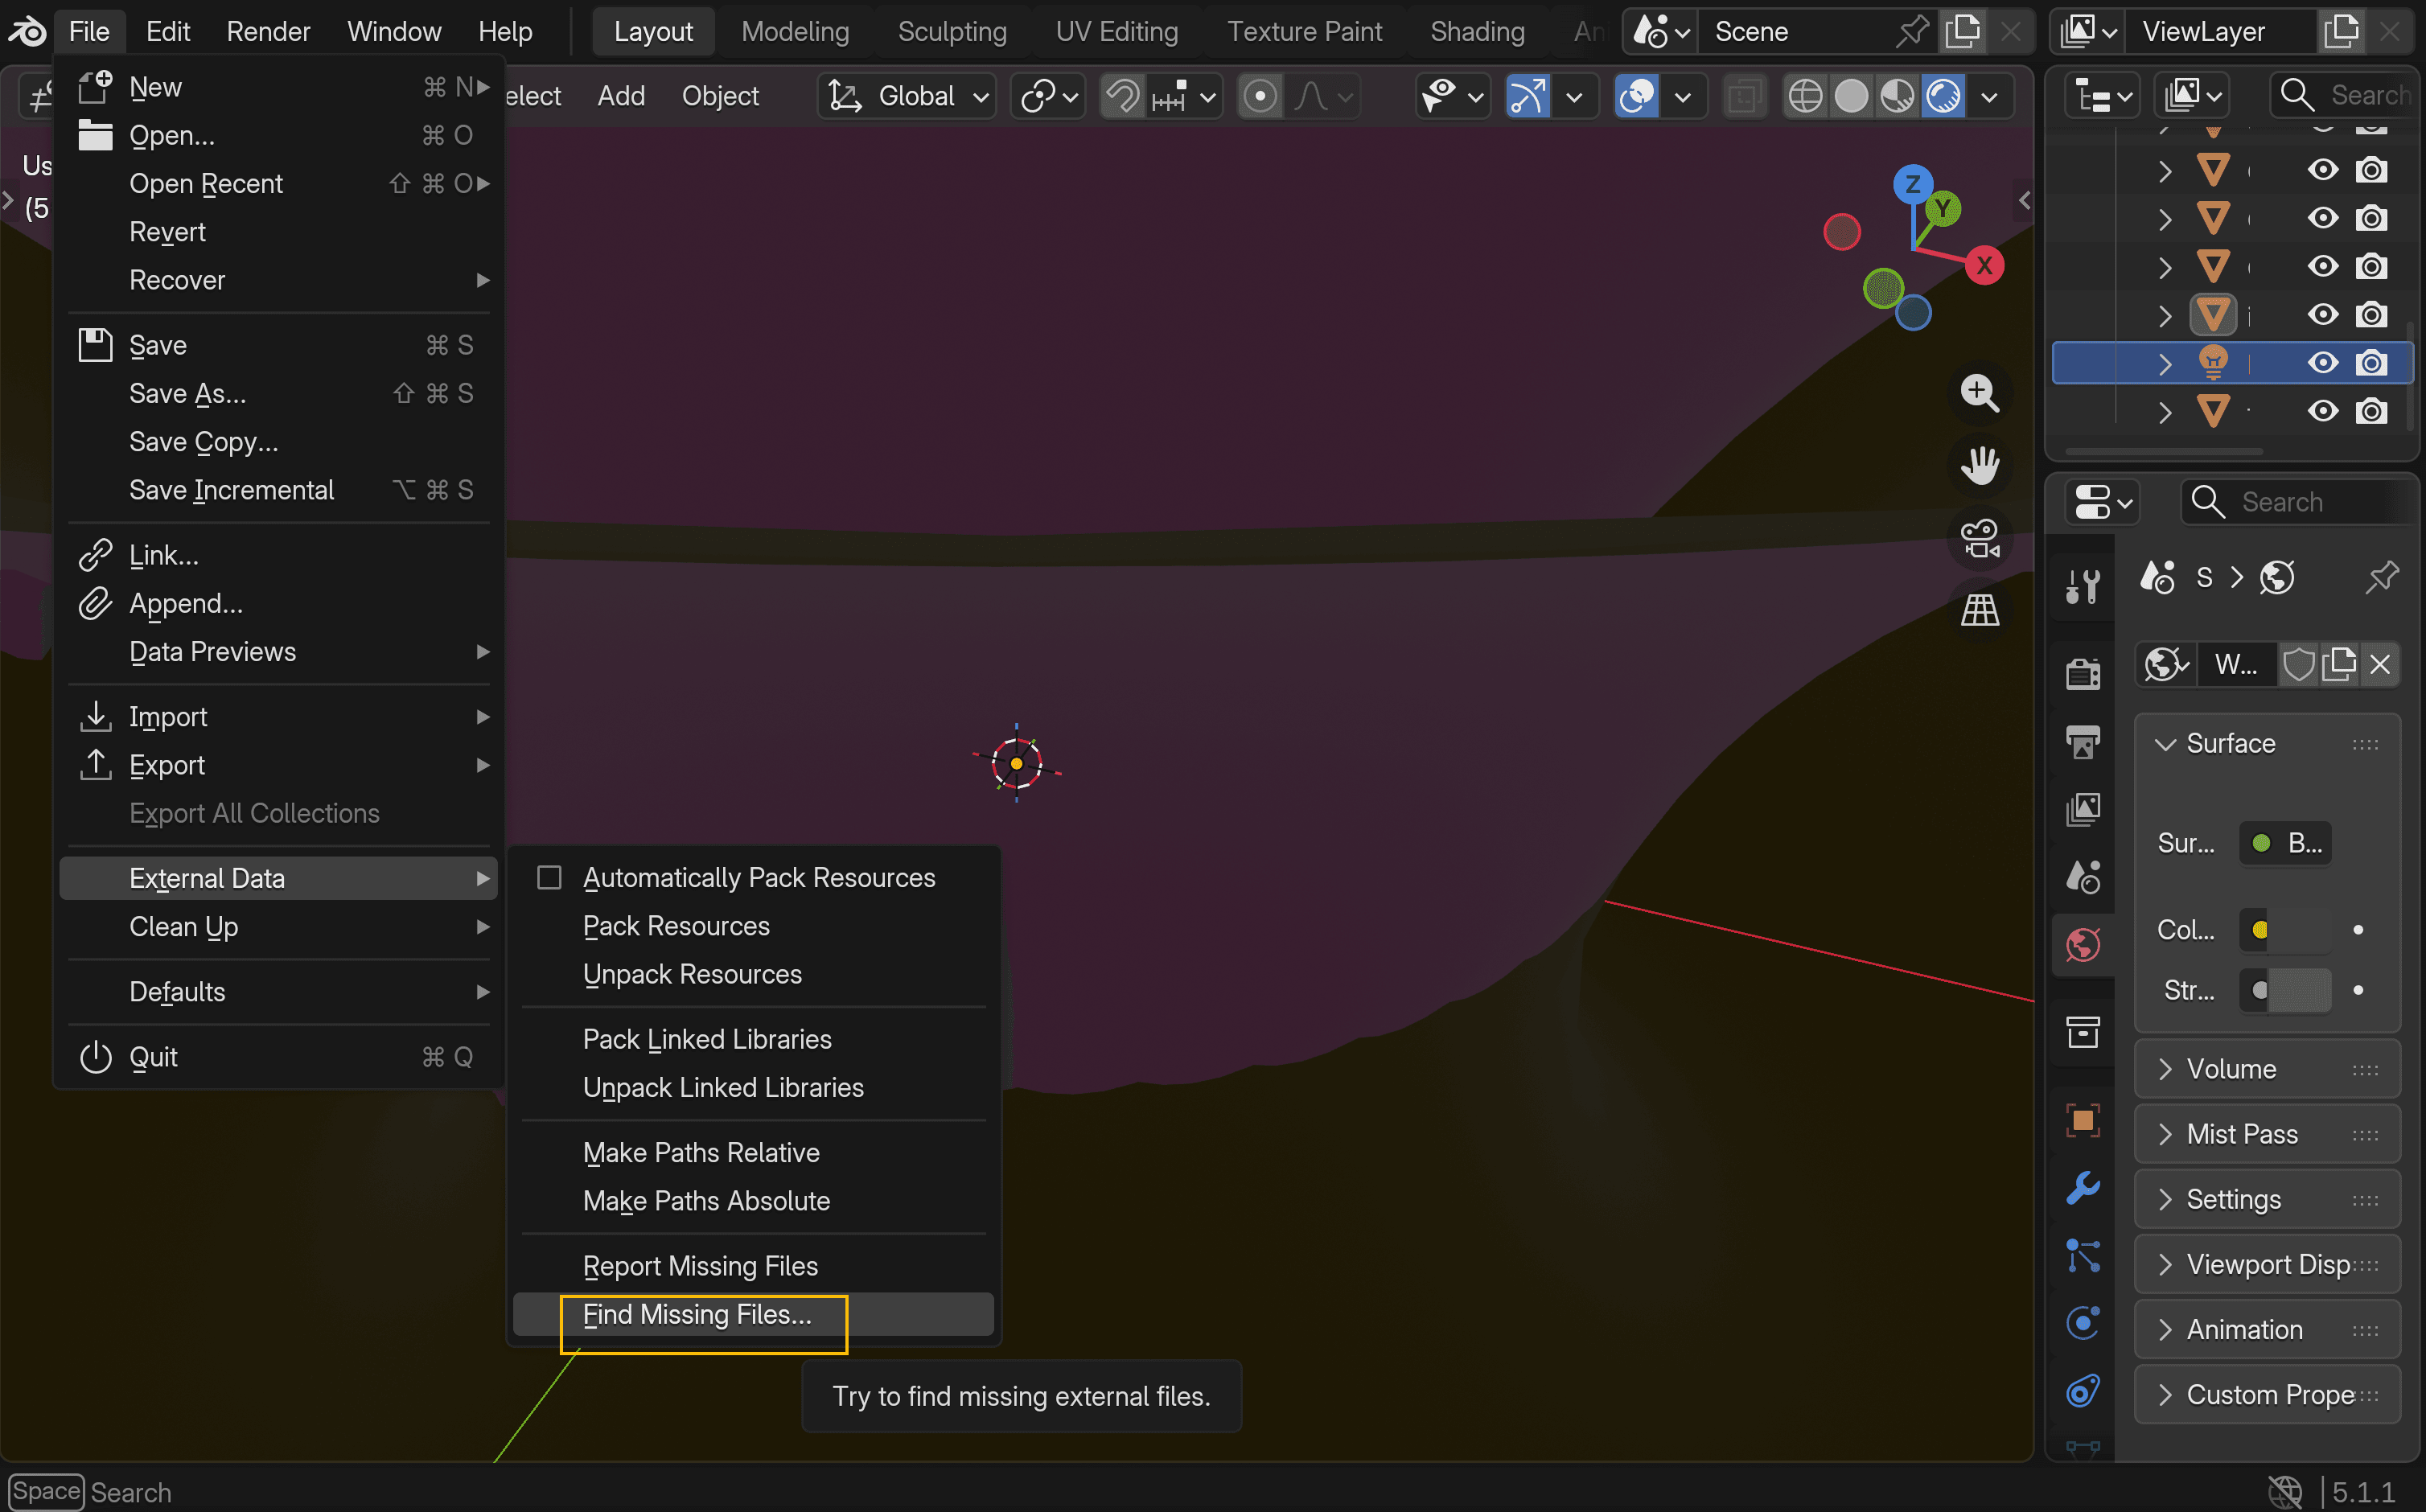
- Go to File → External Data → Find Missing Files.
- In the file browser, navigate to the folder that contains your textures.
- Select the folder, then click Find Missing Files.
- Blender will search that folder and all subfolders recursively.
- Any missing files it finds will be recovered automatically.
This is the fastest built-in batch fix. One thing to remember: Blender restores those links as absolute paths. If you want the project to stay portable after that, run Make All Paths Relative next. In some cases, you may also need to save and reopen the file to force a full reload of all external resources.
Method 3: Use relative file path
Best for: preventing broken links when moving or sharing a project folder.

- Go to File → External Data → Make All Paths Relative.
- Save the
.blendfile. - Keep your
.blendfile and your texture folder inside the same project folder structure.
This does not recover missing files by itself. What it does is make the project more portable. As long as the folder structure stays intact, Blender will still know where to find the images.
Method 4: Pack All Resources
Best for: sending a file to someone else or archiving a finished project.
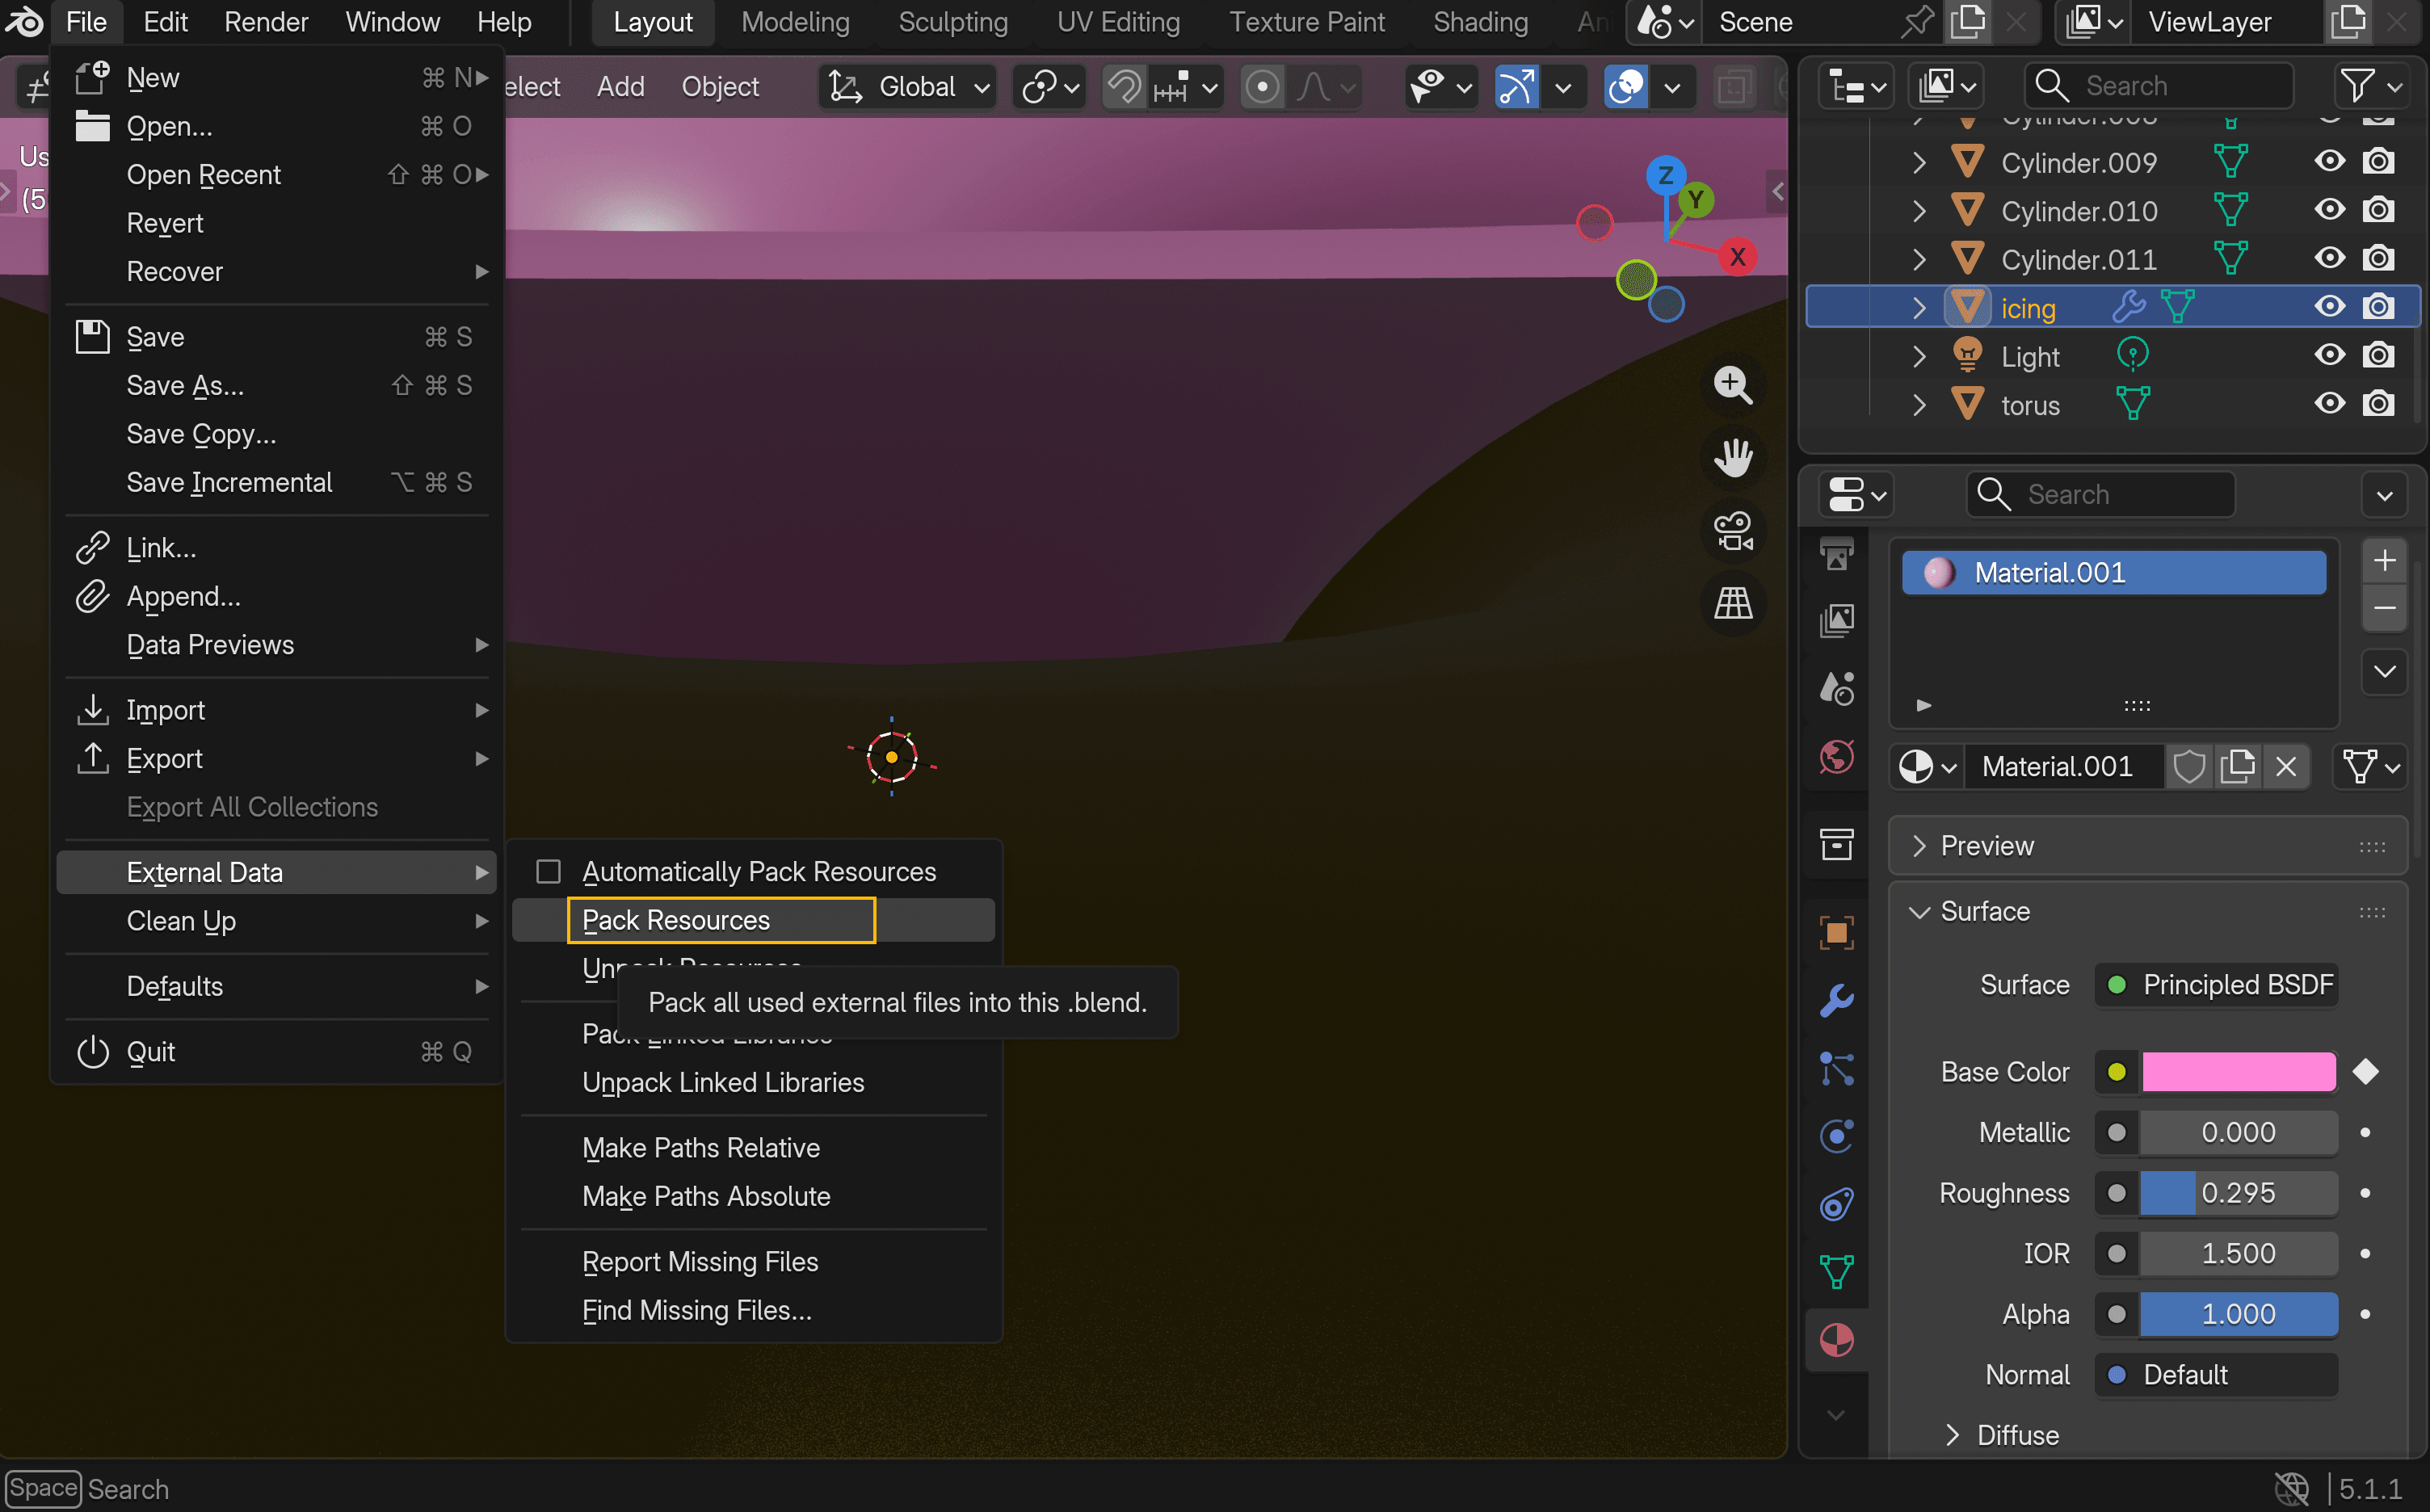
- Go to File → External Data → Pack Resources.
- Save the file.
Blender marks the external resources as packed, and the actual packing happens on the next save. After that, the .blend becomes self-contained, because the texture data lives inside the project file instead of in separate image files.
This is the safest sharing method, but it increases file size. For large or ongoing projects, that may not be ideal. If you want this behavior every time you save, you can enable Automatically Pack Resources. Blender also lets you unpack those resources later through File → External Data → Unpack Resources. Depending on which option you choose, Blender can recreate external folders, such as textures in your project directory.
From Bug to Aesthetic: The Rise of “Missing Texture Style”
Here is the fun part.
When Errors Become Visual Language
The black-and-magenta checkerboard became especially recognizable through Valve’s Source engine. Valve’s own developer documentation identifies it as the classic missing content visual, and Half-Life 2’s 20th anniversary commentary explained that the checkerboard was designed to make missing materials obvious during development.
Over time, that fallback texture became familiar to players well outside of debugging. It showed up again and again in communities built around Half-Life 2, Counter-Strike: Source, and Garry’s Mod.
Why Players Recognize It So Fast
By the late 2010s, missing Source textures had clearly crossed into meme culture. Know Your Meme documents a noticeable surge in meme usage in 2018. At that point, the checkerboard stopped being just a technical error and started functioning as a shared visual reference for modding culture and old-school PC game chaos.
Why Developers Use the Look on Purpose
This aesthetic works because it is instantly legible to a lot of players. It also creates a rough, unfinished, slightly eerie feel that can come across as self-aware rather than accidental. More broadly, glitch aesthetics and glitch art helped make error-like visuals feel intentional instead of purely broken.
How to Create the “Missing Texture” Look with Triverse AI
You do not have to actually break a Blender project to get this look.
As the “missing texture” aesthetic moved from bug to style, tools started to catch up. Instead of faking the effect manually, you can now generate it directly. With Triverse AI, you can simply describe the kind of “broken” look you want, and the model comes out with that style already applied. In seconds, you get a model that already carries that unfinished, error-texture feel—no need to manually recreate it in Blender.
If you are not going for that aesthetic, the same workflow works in the opposite direction.
You can also use Triverse AI to generate a clean, normal model with proper materials and textures. Instead of the glitch look, you just describe a realistic object, and the output will come with standard PBR-style surfaces.
From there, you can bring the model into Blender and use it as a starting point—whether you want to keep it realistic or modify it further.
Conclusion
Missing textures in Blender are usually a file-link problem, not a ruined project. In most cases, the fix is straightforward: relink the image, use Find Missing Files, switch to relative paths, or pack the resources before sharing. Those four tools cover almost every real-world case where texture links break.
And if you have ever looked at a pink model and thought it actually looked kind of cool, you are not the only one. What started as an error state became a recognizable part of game culture. Now it can be used on purpose, either in Blender or through faster asset-generation workflows.
FAQs about Missing Textures
How do I fix missing textures in Blender?
Use File → External Data → Find Missing Files to batch-recover textures from a folder, or relink individual image files manually in the material or shader setup. Blender’s own docs describe Find Missing Files as a tool for broken links in a .blend file.
Why is my texture not showing in Blender?
Usually because Blender cannot find the referenced image file. That can happen when the file was moved, renamed, deleted, or left out when the project was shared.
What does “missing textures detected” mean in Blender?
It means Blender found broken links to external image files. The external data tools in Blender exist specifically to detect and recover those missing files.
What is Ctrl+Shift+T in Blender?
With the Node Wrangler add-on enabled, Ctrl+Shift+T runs Add Principled Setup, which lets you select multiple texture maps and automatically connect them to a Principled BSDF node.
Can Blender automatically fix missing textures?
Partly. Find Missing Files can automatically reconnect textures it finds in a chosen directory, but it cannot restore files that are truly gone.
What is an "error texture" in games?
It is a placeholder texture shown when the intended asset cannot be loaded. In the Source engine, the classic example is the black-and-magenta checkerboard used for missing content.
Why are textures pink after opening an old Blender file?
Because the stored paths no longer point to the correct image files. This often happens after moving folders, switching computers, or reopening an old project without its original texture directory.
How do I prevent missing textures when sharing Blender files?
The safest method is Pack Resources and then save the file. You can also use Make All Paths Relative and share the whole project folder with its texture subfolders.
How do I switch path direction in Blender?
Use Make All Paths Relative to convert to relative paths, or Make All Paths Absolute to convert back to absolute paths. Blender documents both options in the External Data menu.