3D-модели желобов для боулинга: бесплатные STL-файлы и настраиваемые модели для дорожек мини-боулинга
Найдите бесплатные 3D-модели бортов для боулинга для скачивания и печати. В комплект входят STL-файлы (формат для 3D-печати) для мини-дорожек для боулинга, настольных компоновок и кастомных аркадных конструкций. Также предоставлены настройки печати и советы по сборке.
21 июля 2026 г.
Вы ищете файлы для 3D-печати желобов для боулинга и находите множество кеглей и шаров. Но желоба? Почти ничего нет. Это самая незаслуженно обойдённая вниманием часть настольного боулинга, и сложнее всего сделать правильно.
Проблема в том, что боулинг-желоба выглядят просто. Два наклонных желоба кажутся простыми, но для правильной работы им необходимы определённые размеры. Если они слишком узкие, шар застревает. Если слишком широкие, он никогда не докатывается до конца дорожки. При неправильном угле наклона шар просто остаётся на месте.
В этом руководстве вы узнаете, где найти бесплатные STL-файлы желобов для боулинга, какие настройки печати позволяют получить функциональные желоба и как создать или доработать собственную 3D-модель желобов для полноценного мини-боулинга. Будь то настольная игра для офиса или игровой комплект для детей, именно от желоба чаще всего зависит успех или провал проекта.
Что такое желоба в боулинге?
Боулерные желоба — это два канала по обеим сторонам дорожки, которые ловят шары, свернувшие не туда. В обычном боулинге они направляют шар обратно к автомату для расстановки кеглей. В мини-боулинге они направляют шар к концу дорожки, не позволяя ему упасть со стола.
Размеры стандартных бортиков для мини-боулинга варьируются в зависимости от проекта, однако большинство бесплатных STL-файлов рассчитаны на следующие параметры:
- Ширина канала: 30–40 мм (достаточно по размеру для стандартного мраморного шара или шара для мини-боулинга)
- Глубина канала: 10–15 мм
- Длина лотка — соответствует длине полосы, обычно 300–600 мм для настольных моделей
- Угол наклона стенки: наклон 60 градусов внутрь оптимален для большинства размеров мячей. Более крутые углы в 70–80 градусов увеличивают силу отскока и снижают предсказуемость траектории
Угол наклона стенок канала имеет большее значение, чем ожидает большинство начинающих. Наклон внутрь на 60 градусов удерживает шарик в центре без излишнего отскока. Прежде чем что-либо печатать, сначала измерьте размер вашего шарика, так как от его размера зависит ширина канала.
Бесплатные STL-файлы желобов для боулинга
Здесь можно найти бесплатные файлы 3D-моделей желобов боулинговой дорожки:
Thingiverse
Thingiverse — крупнейшая централизованная платформа с 3D-моделями желобов для боулинга. Ищите по запросам «bowling gutter» или «mini bowling lane». Самый популярный полный набор от пользователя Vincey_boi включает желоба, кегли, систему возврата шаров и основную часть дорожки в одной загрузке. Желоба печатаются двумя отдельными деталями, которые крепятся к дорожке. В комментариях можно найти варианты (ремиксы) с адаптированными размерами под разные диаметры шаров.
Шаблоны для печати
На платформе Printables есть коллекция настольного боулинга с тегом «боулинг». Модели на платформе Printables обычно имеют более чистую геометрию и готовые к печати профили, что сокращает время настройки. Ищите файлы с тегами «настольный боулинг» или «мини-боулинг», поскольку поиск по более общим запросам «боулинг» чаще всего возвращает только файлы шаров и кеглей.
Cults3D
Cults3D предлагает меньше результатов, но среднее качество отдельных моделей дорожек выше. Некоторые дизайнеры продают улучшенные версии со встроенными механизмами возврата шариков. Бесплатные варианты проще, но при этом функциональны, а некоторые включают модульные системы креплений, которых нет в большинстве бесплатных файлов на Thingiverse.
MakerWorld
MakerWorld — платформа Bambu Lab, имеет небольшую коллекцию хорошо протестированных наборов для боулинга с преднастроенными профилями печати для принтеров Bambu. Поиск по этой категории не так эффективен, как на Thingiverse, однако существующие модели были подтверждены реальными испытаниями на печать.
При загрузке с любой платформы проверяйте лицензию перед печатью файлов для раздачи в классе, для публичного показа или для коммерческих проектов.
Оптимальные настройки 3D-печати для желобов в боулинге
Желоба боулинга обнажают две распространенные проблемы печати: длинные детали изгибаются, а тонкие боковые стенки трескаются. Чрезмерно прочная печать не всегда лучше. Канал должен иметь достаточную прочность стенок, чтобы выдерживать игру, сохраняя гладкость поверхности качения.
PLA обычно является правильным выбором для настольных боулинг-игрушек. Печать получается аккуратной, модель хорошо держит форму и обладает достаточной жесткостью для маленьких шариков или стеклянных марблсов. PETG лучше подходит, когда желоб должен немного гнуться, защелкиваться на других деталях или выдерживать многократное использование. Если вы печатаете из PETG, учтите, что он может оставлять паутинку в канале, если не настроены ретракт и температура.
Для быстрой справки приведено сравнение ключевых настроек:
Сценарий использования | Материал | Толщина стенки | Инфилл | Высота слоя |
Компактный настольный лоток | НОАК | 1.2 мм | 15–25% | 0,2 мм |
Модульная секция полосы движения | PLA или PETG | 1.6 мм | 25–40% | 0,2 мм |
Амортизирующий бампер | ПЭТГ | 1.6–2.0 мм | 40%+ | 0,2 мм |
Декоративная боковая панель | PLA | 0.8–1.2 мм | 10–20% | 0,2 мм |
Толщина стенки имеет большее значение, чем ожидают многие новички. При использовании сопла 0,4 мм три контура стенки обычно создают толщину около 1,2 мм, а четыре контура — около 1,6 мм. Для функциональных элементов желоба начинайте с толщины 1,6 мм, так как боковые стенки могут быть повреждены во время игры или сборки. Наш руководство по толщине стенок при 3D-печати содержит более подробную информацию о минимальных значениях для каждого материала.
Как печатать U-образный желоб: ориентация и настройка
Большинство моделей желобов для боулинга следует печатать с плоским дном на платформе печати и отверстием U-образного канала, направленным вверх. Такая ориентация уменьшает объём опорного материала внутри канала и обеспечивает шару для боулинга более гладкую поверхность для катания. Это также обеспечивает стабильность детали во время печати.
Есть исключения. Дизайнер может создать желоб, который печатается в боковой ориентации, чтобы улучшить прочность слоёв в определённом направлении. Если на странице модели есть инструкции по ориентации печати, сначала следуйте указаниям дизайнера. Если указаний нет, начните с ориентацией открытой стороной вверх и проверьте предварительный просмотр в программе-слайсере.
Длинные желоба могут потребовать бортика, особенно при печати PLA на принтере с открытым корпусом. PETG также может образовывать перемычки (нити) поперек канала, если настройки втягивания не настроены для материала. После печати удалите все нити и неровности внутри желоба, чтобы шарик не застревал в них.
Если стол вашего принтера слишком мал для полноразмерного жёлоба, разделите модель на 2–3 сегмента и напечатайте их отдельно. Добавьте к модели штифты для выравнивания или используйте простое стыковое соединение с суперклеем (цианоакрилатный клей) для сборки. Для длинных швов эпоксидная смола подходит лучше, чем суперклей.
Разработка конструкции бортика кегельной дорожки с помощью Tinkercad и Fusion 360
Готовые STL-файлы экономят время, но их размеры часто фиксированы. Если ваш шар, дорожка или печатная платформа отличаются от настроек автора модели, боковой желоб может не подойти. Глобальное масштабирование модели может непредсказуемым образом изменить толщину стенок, зазоры соединений и расстояние между шарами.
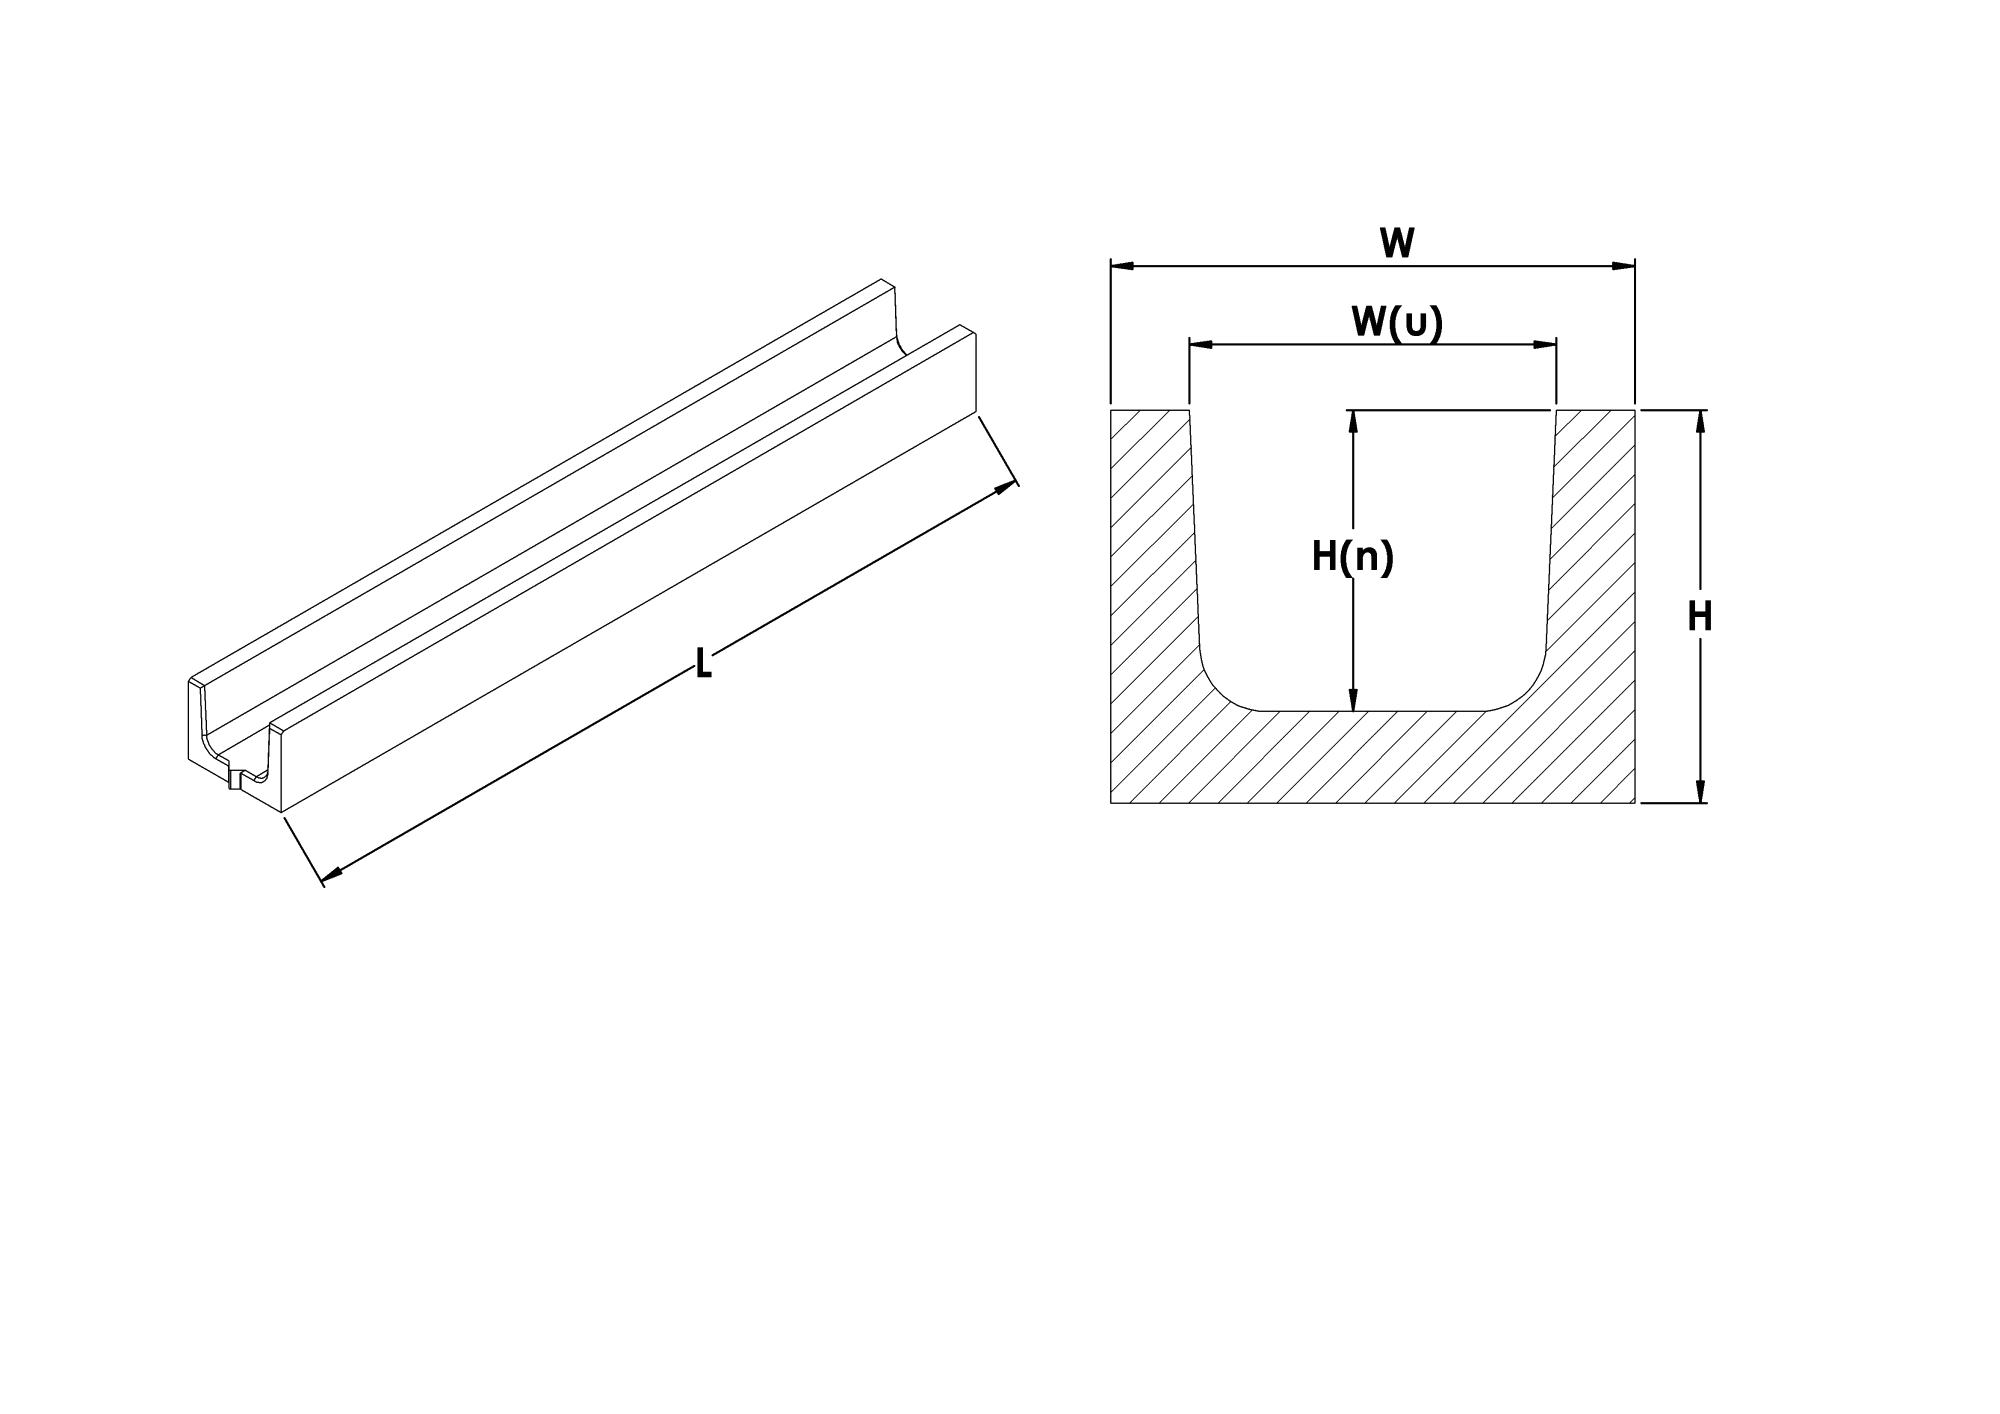
Tinkercad — самый простой инструмент для начала для новичков. Базовый лоток можно построить из прямоугольного основания, двух боковых стенок и округлого или прямоугольного выреза. Это не идеально для сложного параметрического моделирования, но отлично подходит для школьного проекта, настольной игрушки или быстрого прототипа. Сначала измерьте диаметр шара, так как это определяет ширину канала. Затем задайте ширину полосы, выберите глубину лотка и решите, как будут соединяться секции.
Fusion 360 идеален, когда важны размеры. Если вы знаете ширину дорожки, диаметр мяча, толщину стенки и длину сегмента, создайте желоб с параметрами, чтобы изменение одного параметра автоматически обновляло все остальные.
Базовый процесс проектирования одинаков для любого CAD-инструмента. Сначала измерьте шар, затем установите ширину канала примерно на 5–8 мм больше диаметра шара. Сохраняйте уклон стенки в 60 градусов, если только вы не хотите большего отскока шара. Добавьте небольшие скругления, чтобы уменьшить концентрацию напряжений в углах, экспортируйте STL и напечатайте короткий тестовый сегмент перед изготовлением всей трассы.
Чтобы получить руководство по сравнению материалов для желобов кегельных дорожек, используемых в 3D-печати, и их характеристик, ознакомьтесь с нашим обзором видов филаментов для 3D-принтеров.
Генерируйте кастомные модели боулинг-желобов с Triverse AI
CAD обеспечивает максимальный контроль, но может быть медленным, если вам нужен быстрый концепт. Triverse AI полезен, когда вы хотите рассмотреть варианты дизайна мини-боулинговых дорожек, тематические бортики, декоративные боковые бортики или подходящие по стилю детали, такие как кегли и торцевые заглушки.
Triverse AI наиболее эффективен, когда желобок является частью творческого проекта, а не точной заменой существующей детали. Используйте его для тематической настольной дорожки для боулинга, нестандартных боковых ограждений, декоративных бамперов или соответствующих деталей. Вместо этого используйте CAD, если деталь требует точных отверстий под винты, защелок или плотной посадки к существующей коммерческой дорожке.
Сначала создайте эталонные изображения, затем преобразуйте их в 3D
Оптимальный рабочий процесс для создания кастомного набора для мини-боулинга состоит из двух этапов. Сначала используйте инструмент генерации изображений Triverse Studio, чтобы зафиксировать визуальную концепцию каждой детали, а затем загрузите эти изображения в HD Mesh для преобразования их в готовые к печати модели. Предварительная генерация референсных изображений позволяет скорректировать внешний вид до создания геометрии, что экономит время по сравнению с многократным повторением промптов text-to-3D, пока модель не станет соответствовать вашему замыслу.
Для полного набора три референсных изображения охватывают весь проект. Каждый образец промпта описывает деталь как печатный объект, а не просто визуальную концепцию.
- Базовый рельс + боковые направляющие желоба (основной узел):
"Single solid mini bowling lane base with integrated left and right gutter trough side rails, curved rear backstop wall, two long parallel guide grooves for ball rolling, 3mm thick solid watertight mesh, flat bottom for 3D printing, clean quad topology, stable slicing geometry, tabletop desktop size, no ball."- Мини-твердый шар для боулинга:
"Solid perfect sphere mini bowling ball, fully closed watertight manifold mesh, thick solid volume, no hollow inside, smooth quad sphere topology, 3D print ready."- Одна мини-кегля (можно скопировать для создания набора из 10):
"Single small bowling pin model, tapered classic pin shape with red decorative ring on neck, solid thick watertight mesh, flat stable base to stand upright, 3mm minimum wall thickness, no thin unstable top tip, printable toy geometry."
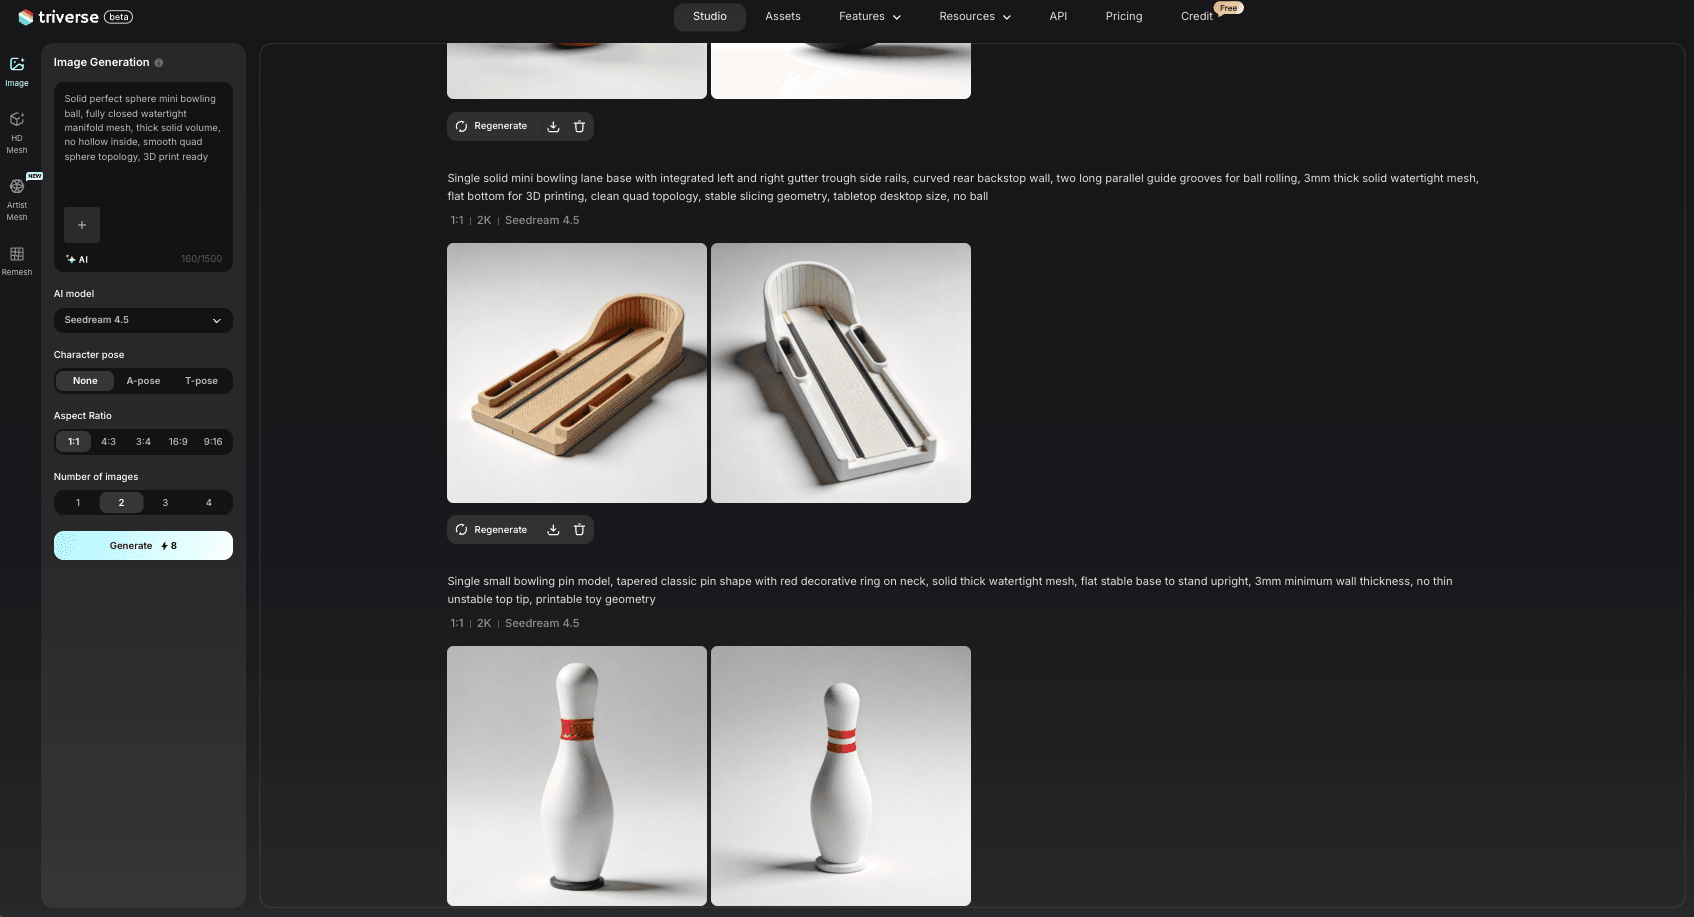
Воспринимайте изображения как концепт-арт, а не готовые проекты. Если референс выглядит неправильно, переделайте его перед переходом к этапу 3D. Исправить картинку гораздо быстрее, чем дорабатывать полигональную сетку.
Превратите каждое референсное изображение в 3D-модель с HD-мешем (высокодетализированной сеткой)
Откройте Triverse Studio и переключитесь на HD Mesh workflow. HD Mesh принимает текстовые данные или изображения и создаёт высокополигональную сетку, которую можно использовать в качестве геометрической основы для модели для печати. Загружайте референсные изображения по одному и генерируйте отдельные модели для основания дорожки для боулинга, шара и кегли. Их раздельное выполнение позволяет сосредоточиться на каждой модели, что обычно обеспечивает более чистую геометрию, чем объединение всех трёх в один запрос.
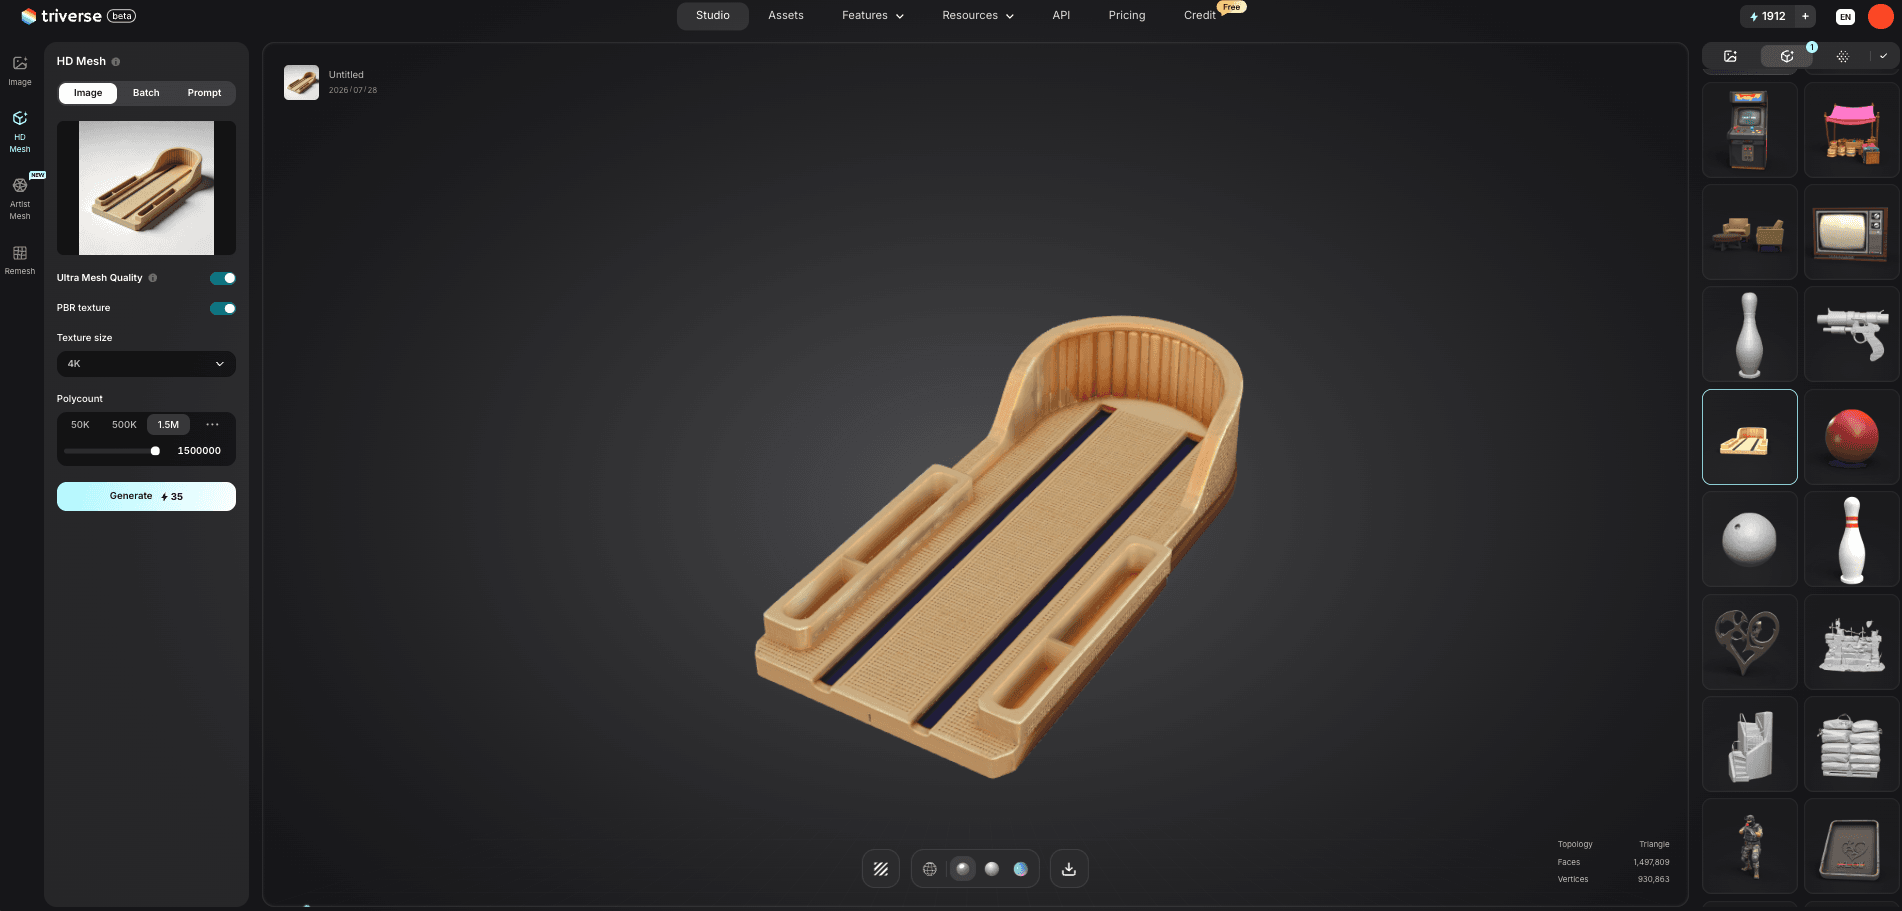
Рассматривайте первый результат как концептуальную модель. Она не обязана быть идеальной, но должна чётко показывать форму канала для дорожки, круглый профиль шара и коническую форму кегли. Вращайте каждую модель в программе просмотра и переключайтесь в режим каркаса, чтобы проверить, нет ли беспорядочной геометрии до того, как модель попадёт в слайсер. Ищите плоское основание у дорожки, открытый канал, боковые стенки, которые не слишком тонкие, замкнутую сферу у шара и устойчивое основание у кегли.
Экспорт и тестирование
Triverse экспортирует в форматы GLB, OBJ, STL, 3MF, FBX и USDZ. Для 3D-печати практичным выбором является STL или 3MF. Откройте каждый экспортированный файл в программе-слайсере, проверьте масштаб и сориентируйте каждую деталь самой прочной стороной вниз на платформу: дорожку — с отверстием канала, направленным вверх, шар — плашмя на самой широкой его части, а кеглю — вертикально на её основании.
Сначала напечатайте короткий участок жёлоба и один штифт. Если шар задевает боковую стенку, расширьте канал в вашей CAD-программе или сгенерируйте заново эталонное изображение дорожки с более широким желобом. Если штифт шатается, немного сплющите основание штифта перед полной печатью. Шар редко требует корректировки, так как сфера — самая простая форма в наборе.
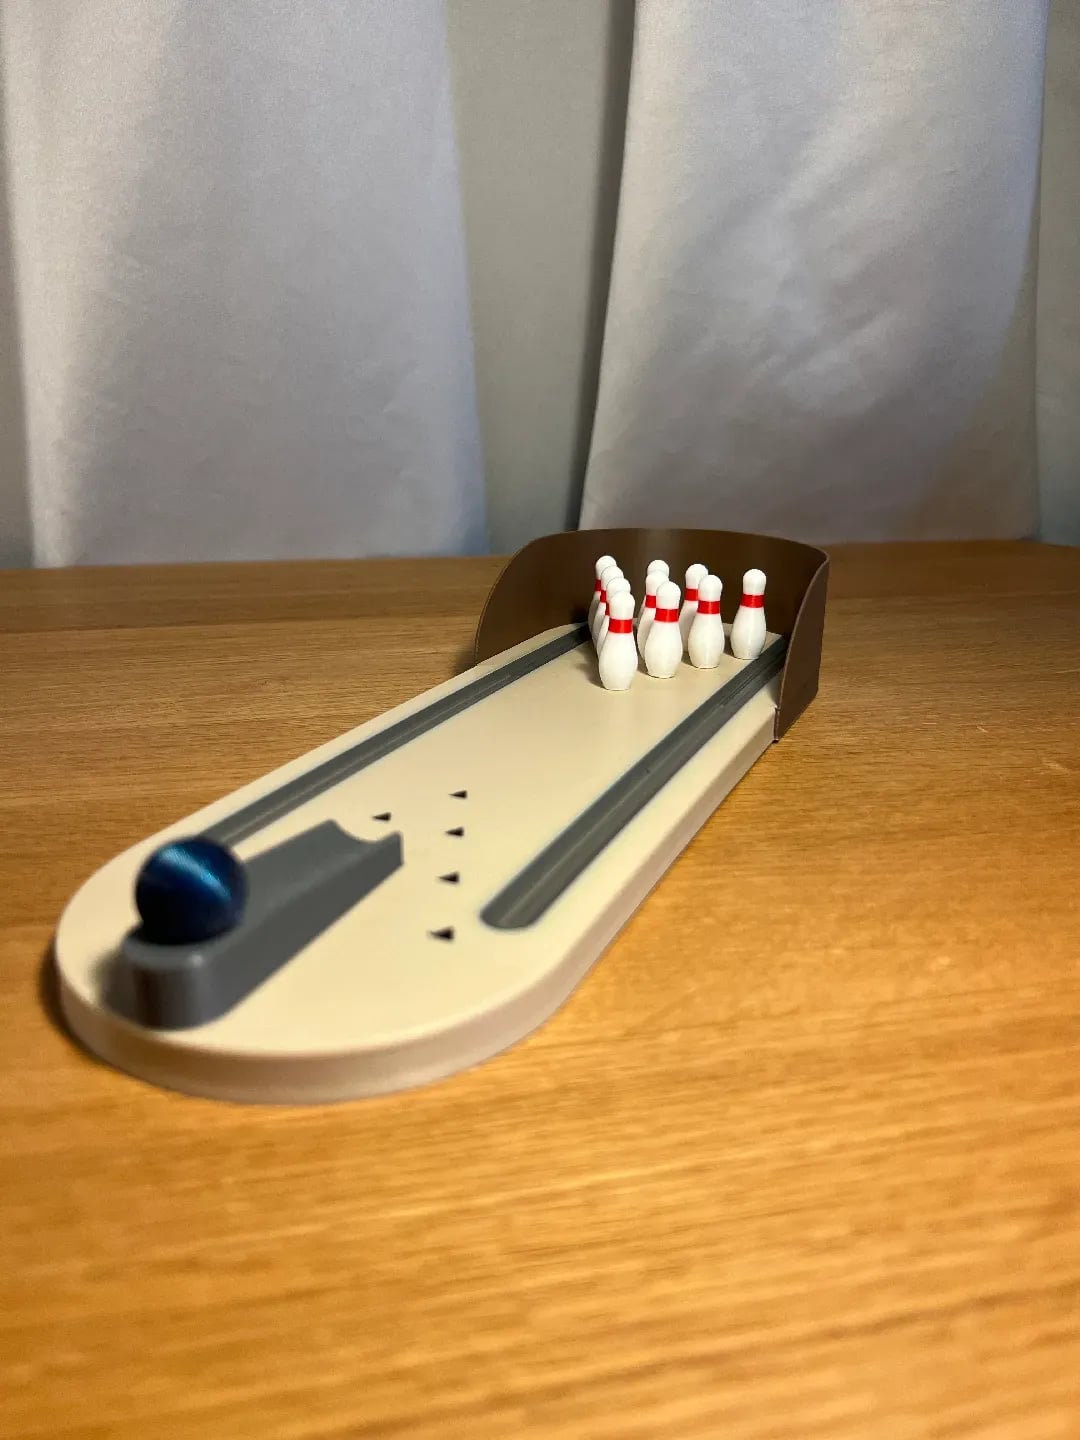
Для создания таких деталей, как торцевые заглушки, декоративные бамперы или тематические боковые рейки, повторите тот же двухэтапный рабочий процесс. Сгенерируйте референсное изображение, затем подайте его в HD Mesh и проверьте результат.
Другие 3D-модели для боулинга для завершения вашего набора
Лоток эффективнее всего работает, когда он спроектирован с учетом всей проезжей части.
Кегли печатайте вертикально с юбкой (brim). Стандартные мини-кегли для боулинга имеют высоту около 50–75 мм. Напечатайте 10 штук. В некоторых моделях используется более высокое заполнение у основания, чтобы они были устойчивее.
Для мяча более высокое заполнение оправдано, потому что вес улучшает качение и смягчает удар. Полый мяч печатать быстрее, но он может оказаться слишком легким для игры. Сплошной стальной шарикоподшипник диаметром 25 мм из строительного магазина подходит лучше, чем напечатанный мяч, в большинстве случаев.
Сегменты дорожек должны быть гладкими на стыках. Если дорожка разделена на несколько частей, используйте фиксирующие штифты или неглубокие сцепляющиеся элементы, чтобы всё оставалось выровненным. Концевые заглушки и улавливатели шариков облегчают игру, так как шарик остаётся на столе после каждого прохода.
Если вы всё ещё выбираете проект, наш гид по интересным моделям для 3D-печати охватывает настольные игры, игрушки и полезные модели, которые отлично дополняют мини-боулинг.
Как построить полную мини-дорожку для боулинга
Начинайте с выбора шара, а не дорожки. Определив диаметр шара, вы сможете выбрать ширину дорожки, ширину желоба, размер кегли и высоту пандуса, которые будут гармонично сочетаться. Это позволит избежать распространённой ошибки — печати красивых боковых направляющих, которые оказываются слишком узкими для шара.
Далее, напечатайте один тестовый сегмент желоба и один небольшой сегмент дорожки. Проведите шарик через них перед печатью полного набора. Если шарик задевает боковую стенку, расширьте желоб на 2–3 мм. Если он выпрыгивает из дорожки, поднимите ограничитель или отрегулируйте угол рампы. Если сегмент деформируется, увеличьте толщину стенки.
После завершения печати деталей вырежьте основание игрового поля, боковые желоба, кегли, шар, трамплин и концевую заглушку. Соберите дорожку на ровной поверхности и проверьте работу несколько раз перед нанесением краски или украшений. Простой трамплин обычно обеспечивает более стабильную игру по сравнению с ручным запуском, так как шар запускается с одного и того же угла.
Часто задаваемые вопросы о 3D-моделях желобов для боулинга
Какой материал-филамент лучше всего подходит для желобов для боулинга?
PLA подходит для настольного использования. PETG лучше для желобов, которые будут часто использоваться или перевозиться между локациями. Избегайте гибких филаментов. Желоба из TPU поглощают энергию шара и непредсказуемо замедляют его.
Нужны ли поддержки для STL-файлов желобов для боулинга?
Большинство моделей с каналом, обращенным вверх, печатаются без поддержек. Стенки канала обычно достаточно крутые, чтобы стандартная высота слоя 0,2 мм подходила. Проверьте угол свеса в предпросмотре слайсера перед началом полной печати.
Как соединить несколько сегментов желоба?
Стыковые соединения с суперклеем подходят для постоянных конструкций. Если вам нужны модульные сегменты, ищите STL-файлы со встроенными центрирующими штифтами и гнездами. Вы также можете добавить отверстия для штифтов диаметром 3 мм в Tinkercad перед печатью.
Какой размер шара подходит для 3D-печатных желобов для боулинга?
Большинство STL-файлов для мини-боулинга предназначены для стальных шарикоподшипников диаметром 25 мм. Некоторые используют шарики диаметром 16 мм для меньших настольных версий. Проверьте ширину канала в описании модели перед печатью, затем стремитесь к каналу, который на 5–8 мм шире вашего шара.
Можно ли печатать желоба для боулинга на смоляном принтере?
Смоляные 3D-принтеры могут создавать более гладкие желоба, но платформа построения обычно слишком мала для желобов полной длины. Среднеформатный смоляной принтер с платформой 150 мм или больше может печатать отдельные сегменты, которые затем собираются.
Как сделать, чтобы шар катился быстрее в желобе?
Отшлифуйте дно канала наждачной бумагой зернистостью 220 и нанесите тонкий слой силиконовой смазки-спрея. Если шар все еще застревает, возможно, канал слишком узкий. Увеличьте ширину на 2–3 мм и протестируйте снова.
Как создать пользовательскую модель желоба для боулинга с помощью ИИ?
Создайте текстовый запрос для каждой части (дорожка, шар, кегля), описывающий ее как печатаемый объект с герметичной сеткой, плоским основанием и стабильной структурой. Загрузите каждое эталонное изображение в рабочий процесс HD Mesh Triverse Studio, чтобы преобразовать его в 3D-модель, затем экспортируйте как STL или 3MF и проверьте в слайсере перед печатью тестового сегмента.
Главный вывод: как правильно печатать боулинг-лотки
Желоба для боулинга — самая недооценённая часть проекта по созданию желобов для боулинга на 3D-принтере, но именно они определяют, будет ли игра функционировать должным образом. Начните с бесплатных STL-файлов с Thingiverse или Printables, печатайте каналом вверх при высоте слоя 0,2 мм и используйте филамент PETG для долговечности, если набор будет регулярно использоваться. Предварительно измерьте диаметр шара, сделайте канал на 5–8 мм шире диаметра шара и всегда напечатайте один контрольный образец перед печатью полного набора.
Если вы хотите выйти за рамки стандартных дизайнов, Triverse AI позволяет создавать индивидуальные аксессуары для боулинга по текстовому описанию или референсному изображению. Экспортируйте в STL, проверьте толщину стенок в слайсере и напечатайте пробный фрагмент перед использованием на всей дорожке.