The Studio Workspace Overview
March 20, 2026The Triverse Studio brings your creation tools and assets together in one intuitive workspace.
Once you sign in, you can see the platform interface as above. The workspace is divided into three main sections:
Left-side controls
1. Image Generation
Generate reference images from text prompts to explore visual concepts before creating 3D models.
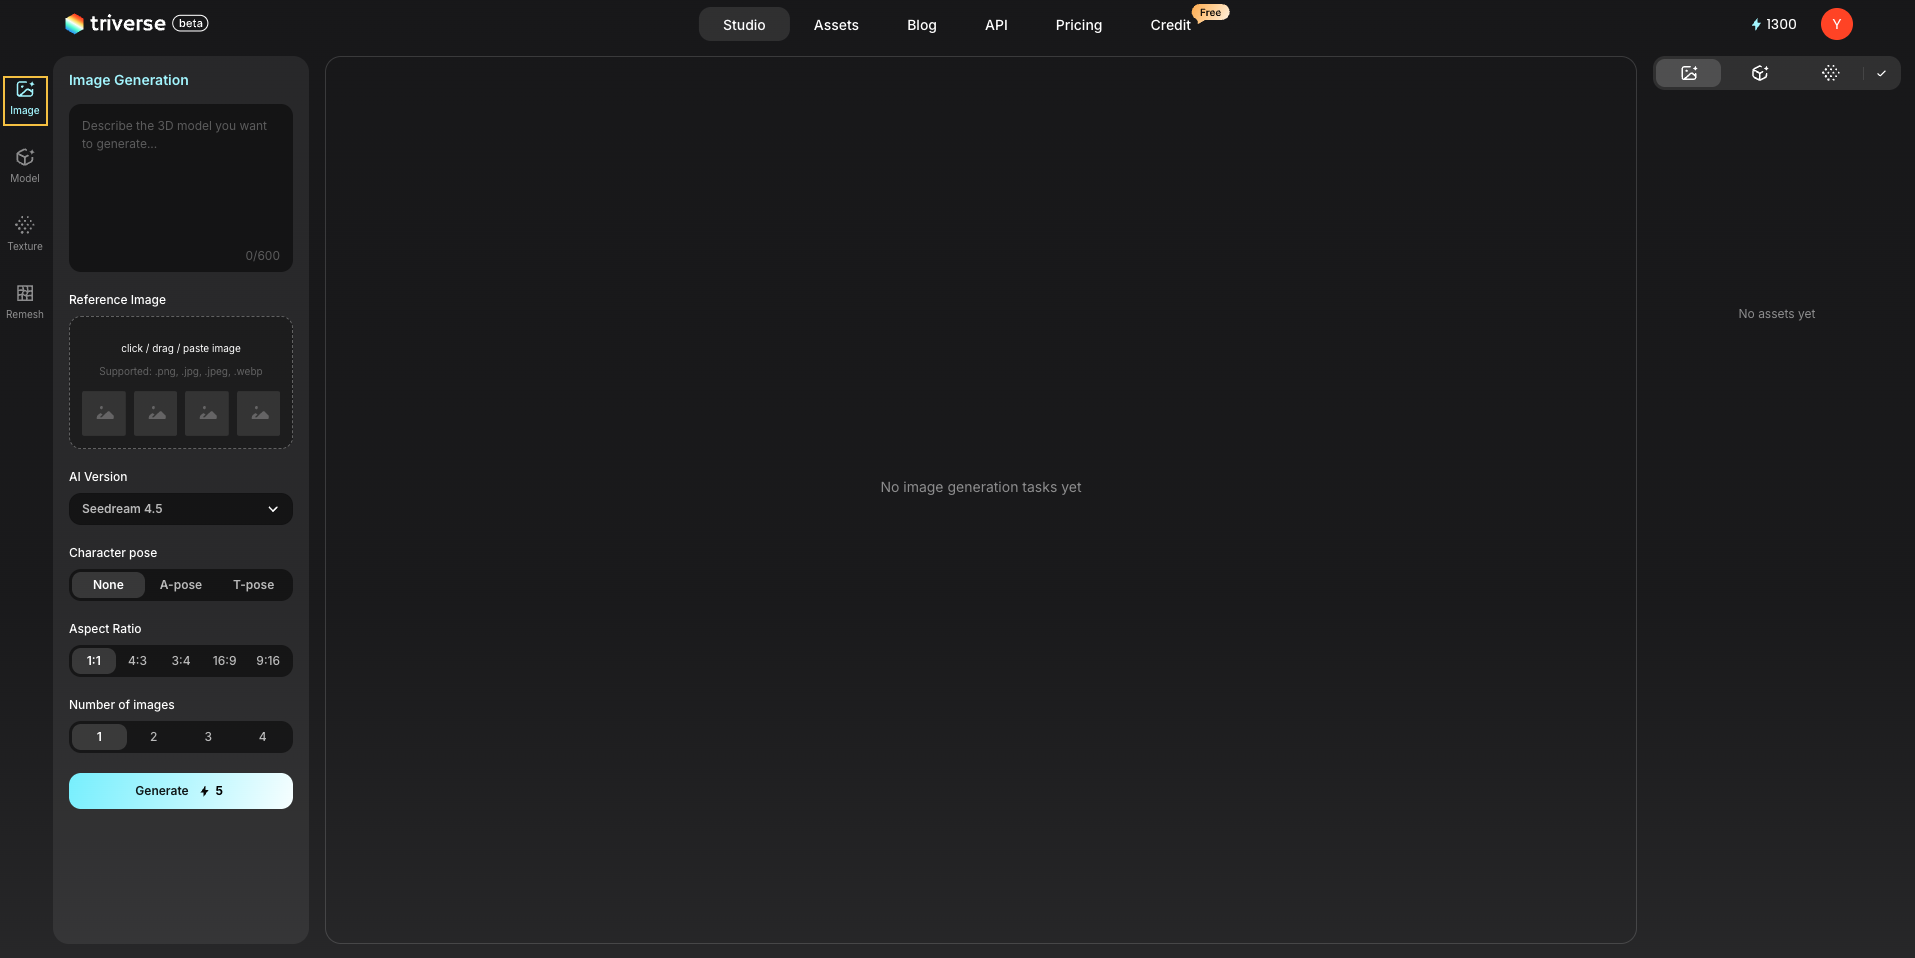
- Prompt Input: enter a text description of the image you want to generate
- Reference Image (optional): upload an image to guide generation
- AI Version: select different image generation models
- Character Pose (None/A-pose/T-pose): for character-related outputs, control the base pose of characters
- Aspect Ratio: set the output image ratio
- Number of images: Choose how many images to generate (up to 4)
- Generate: start image generation
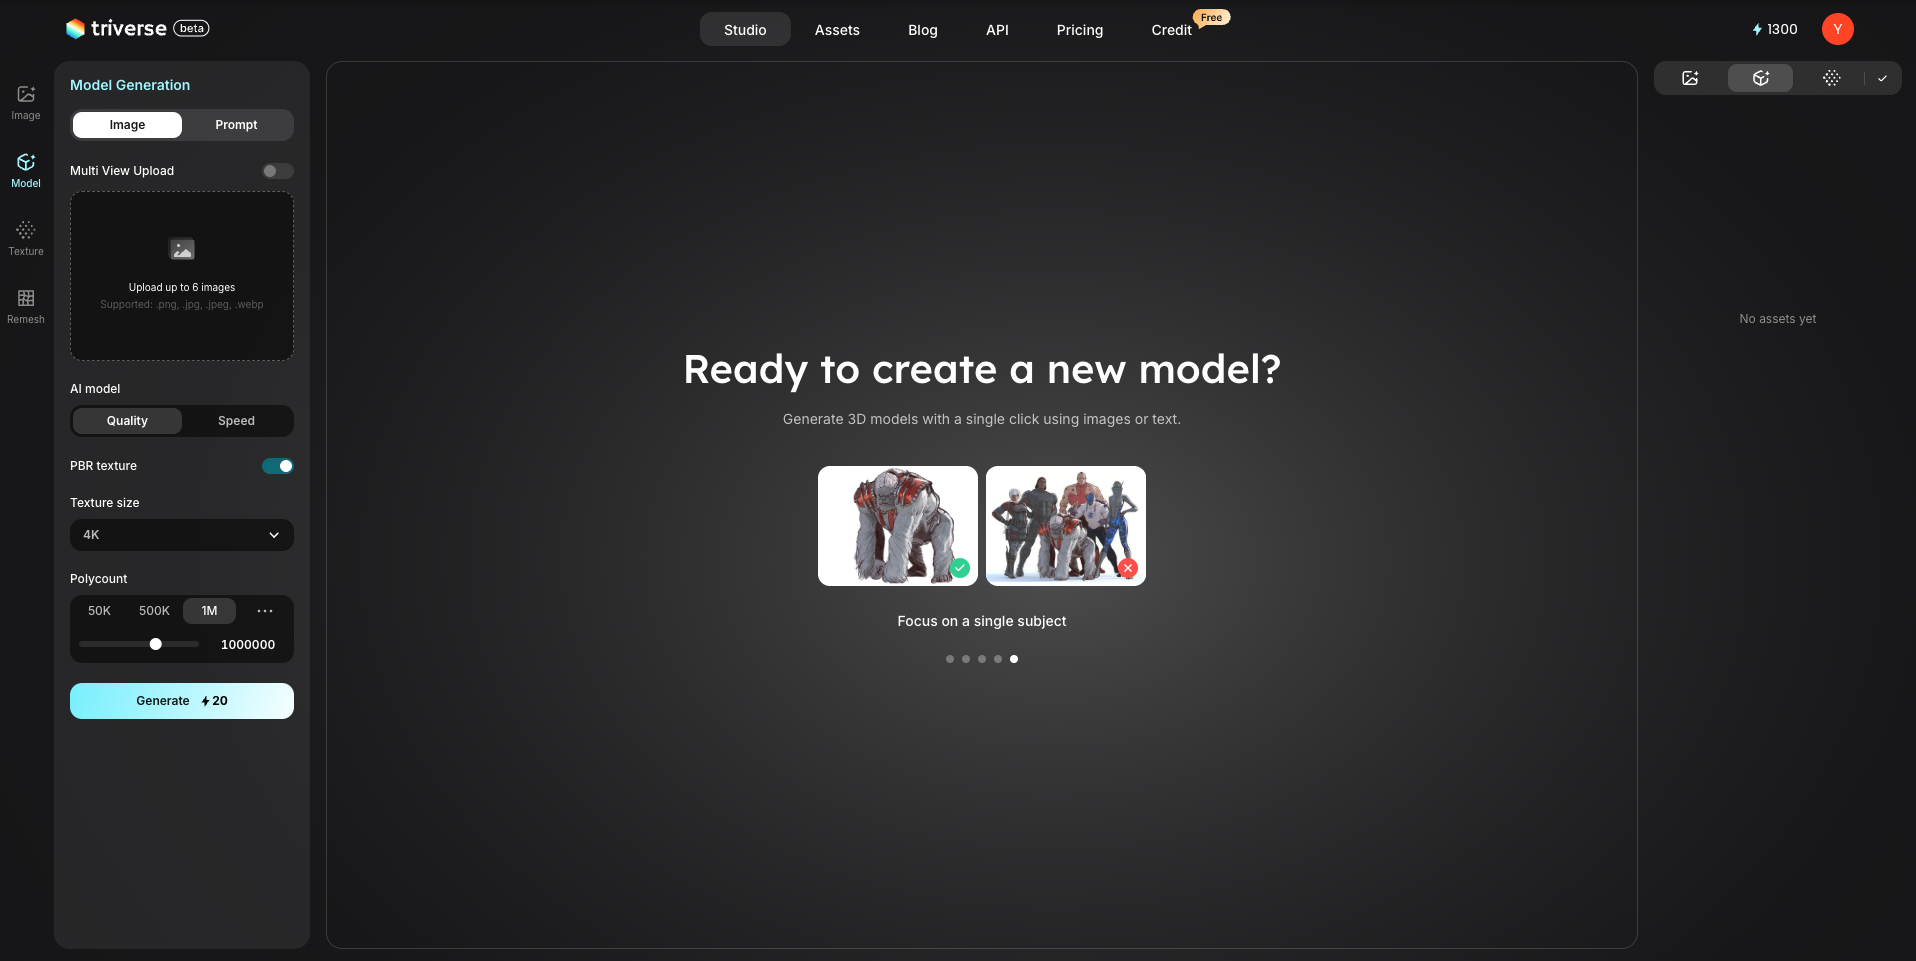
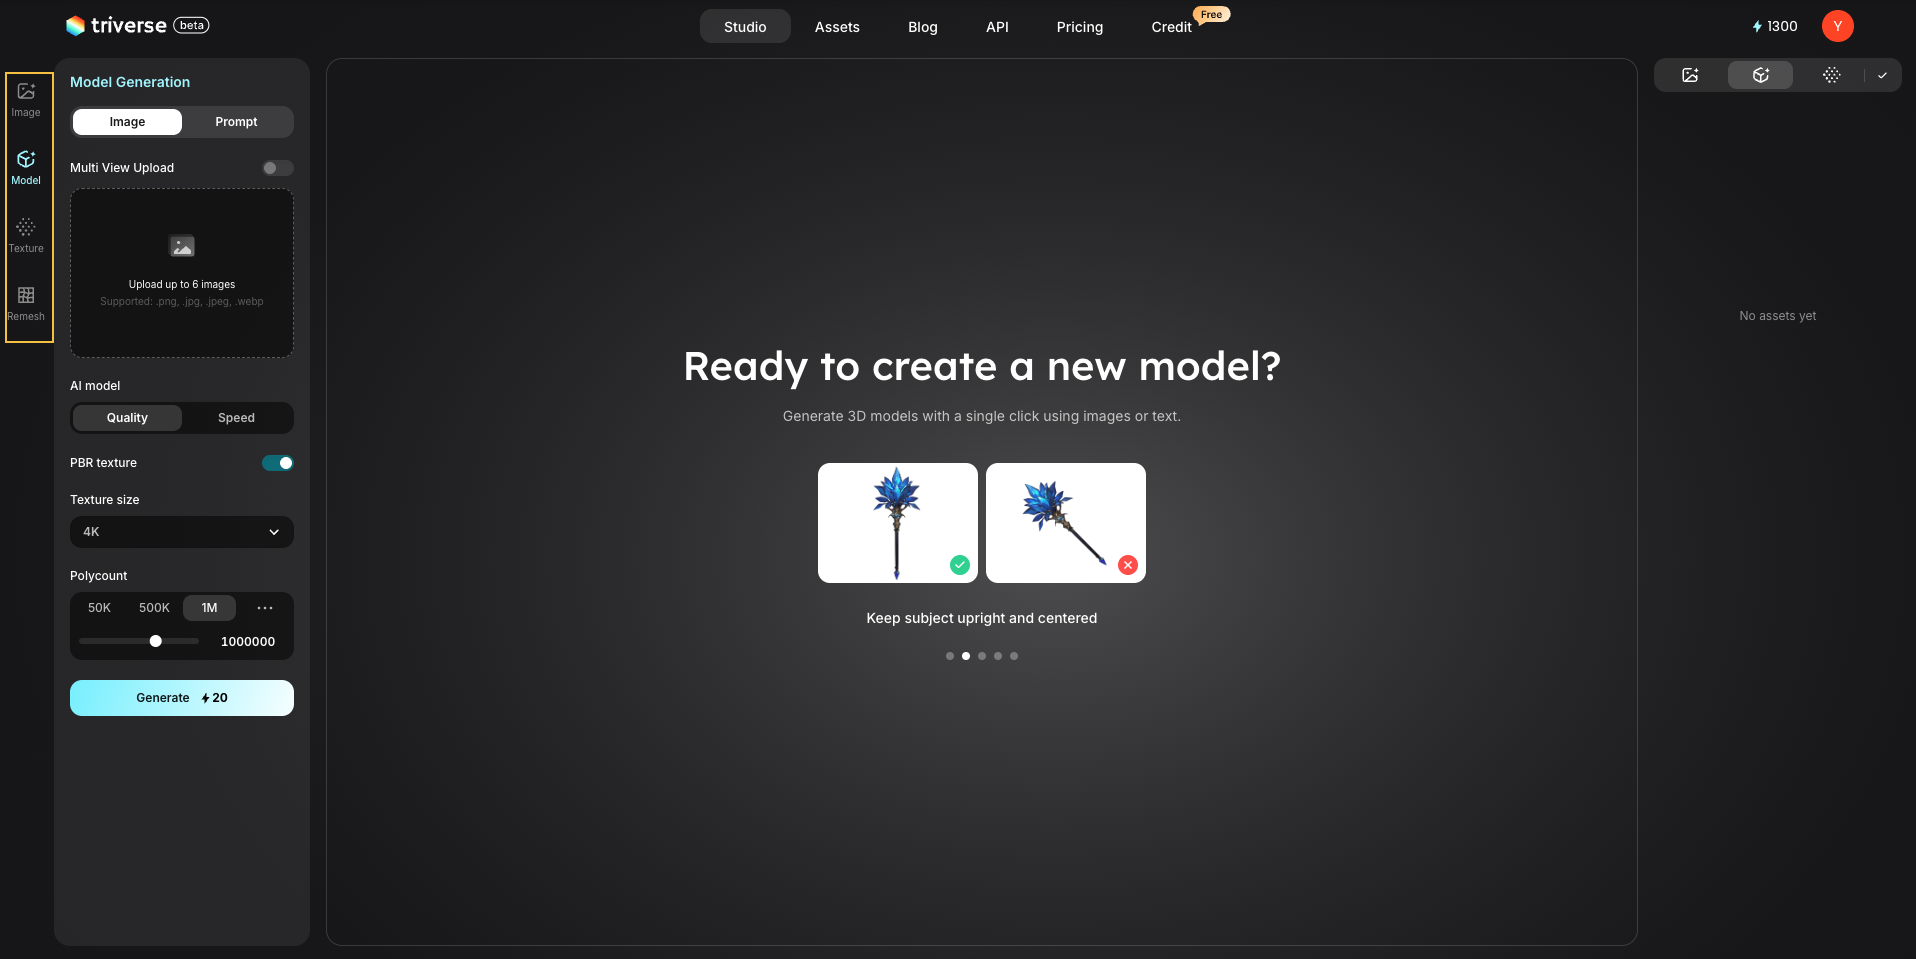
2. Model Generation
Convert images or text prompts into 3D models.
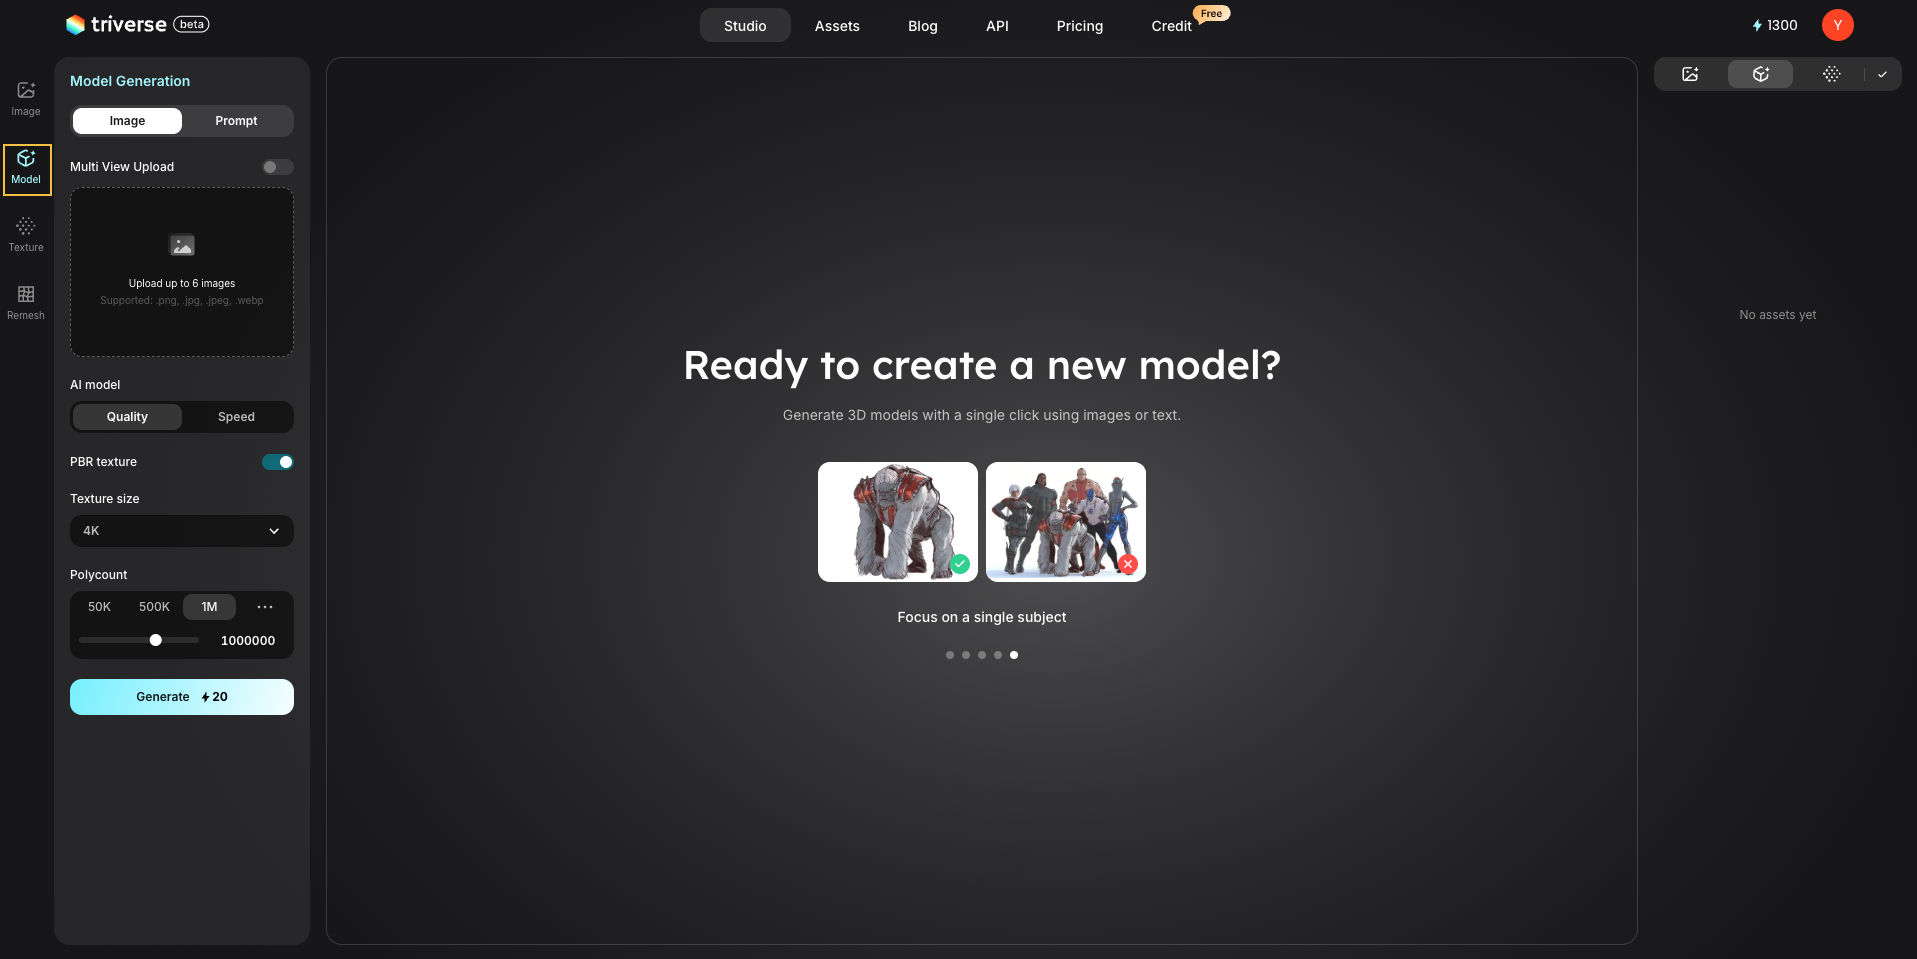
- Image/Prompt Input: Choose input type: image-to-3D or text-to-3D
- Multi View Upload: Upload front, left, right, and back views of the object (minimum 2 images)
- AI Model: Choose between Quality (slower, more accurate results) and Speed (faster, slightly lower quality)
- PBR Texture: enable automatic texture generation
- Texture Size: set the resolution of generated textures
- Polycount: control mesh complexity
- Generate: start 3D model generation
3. Texture Generation
Apply high-quality textures to existing 3D models.
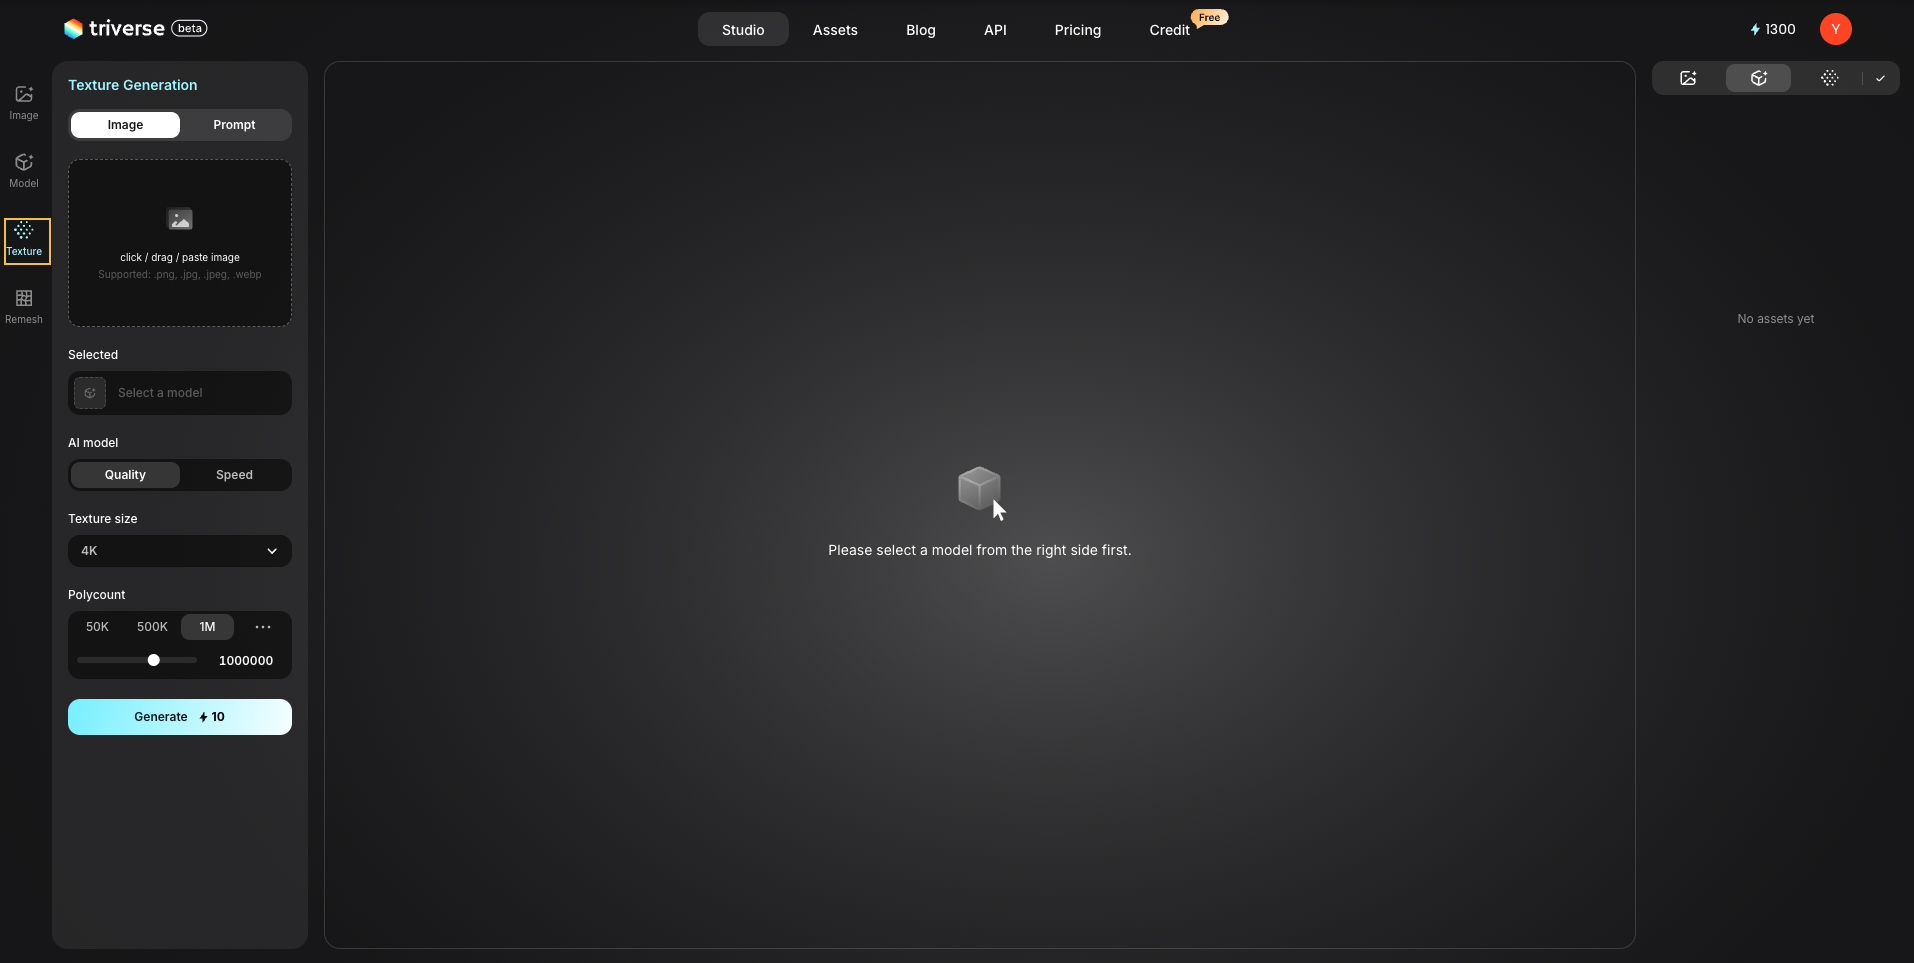
- Image/Prompt Upload: Choose texture source
- AI Model: Choose between Quality (slower, more accurate results) and Speed (faster, slightly lower quality)
- Texture Size: Set the resolution of generated textures
- Polycount: Adjust details during texture processing
- Generate: Apply textures to the model
4. Remesh
Refine and optimize the mesh structure for better usability and performance.
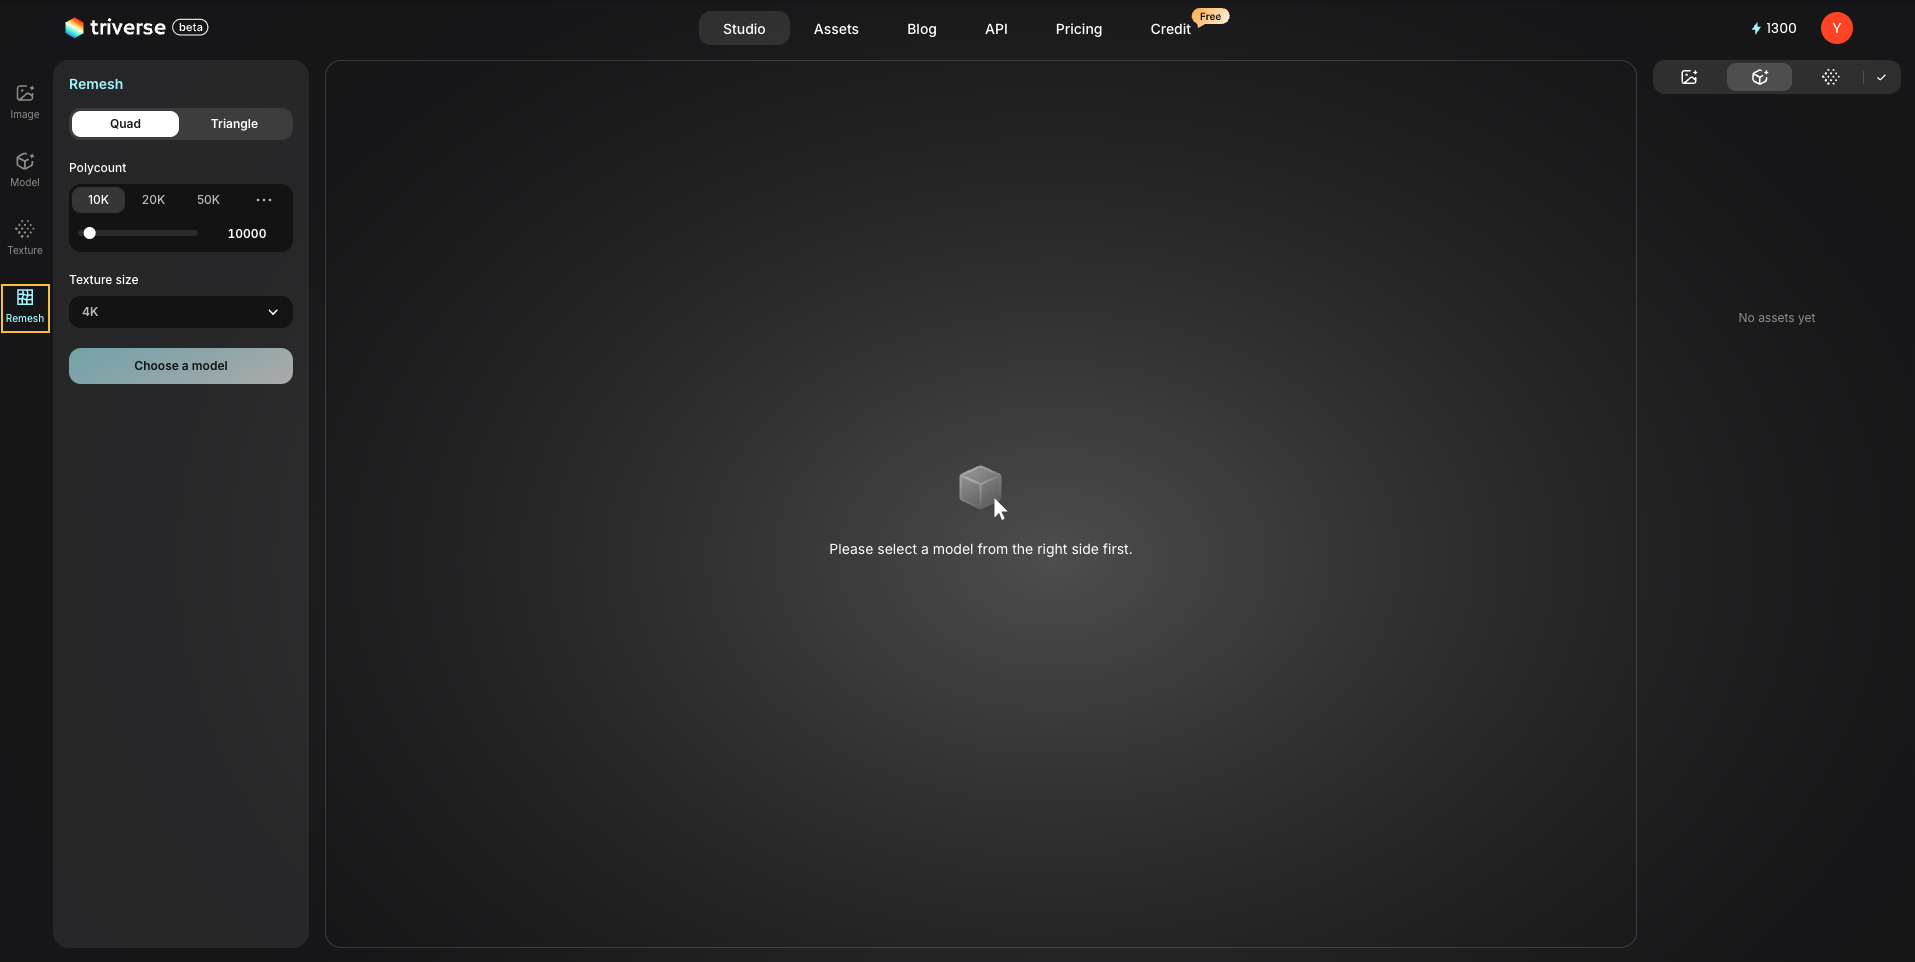
- Topology Type (Quad/Triangle): Choose mesh structure type
- Polycount: Adjust mesh complexity
- Texture Size: Adjust texture resolution
- Generate: Apply remeshing and optimization
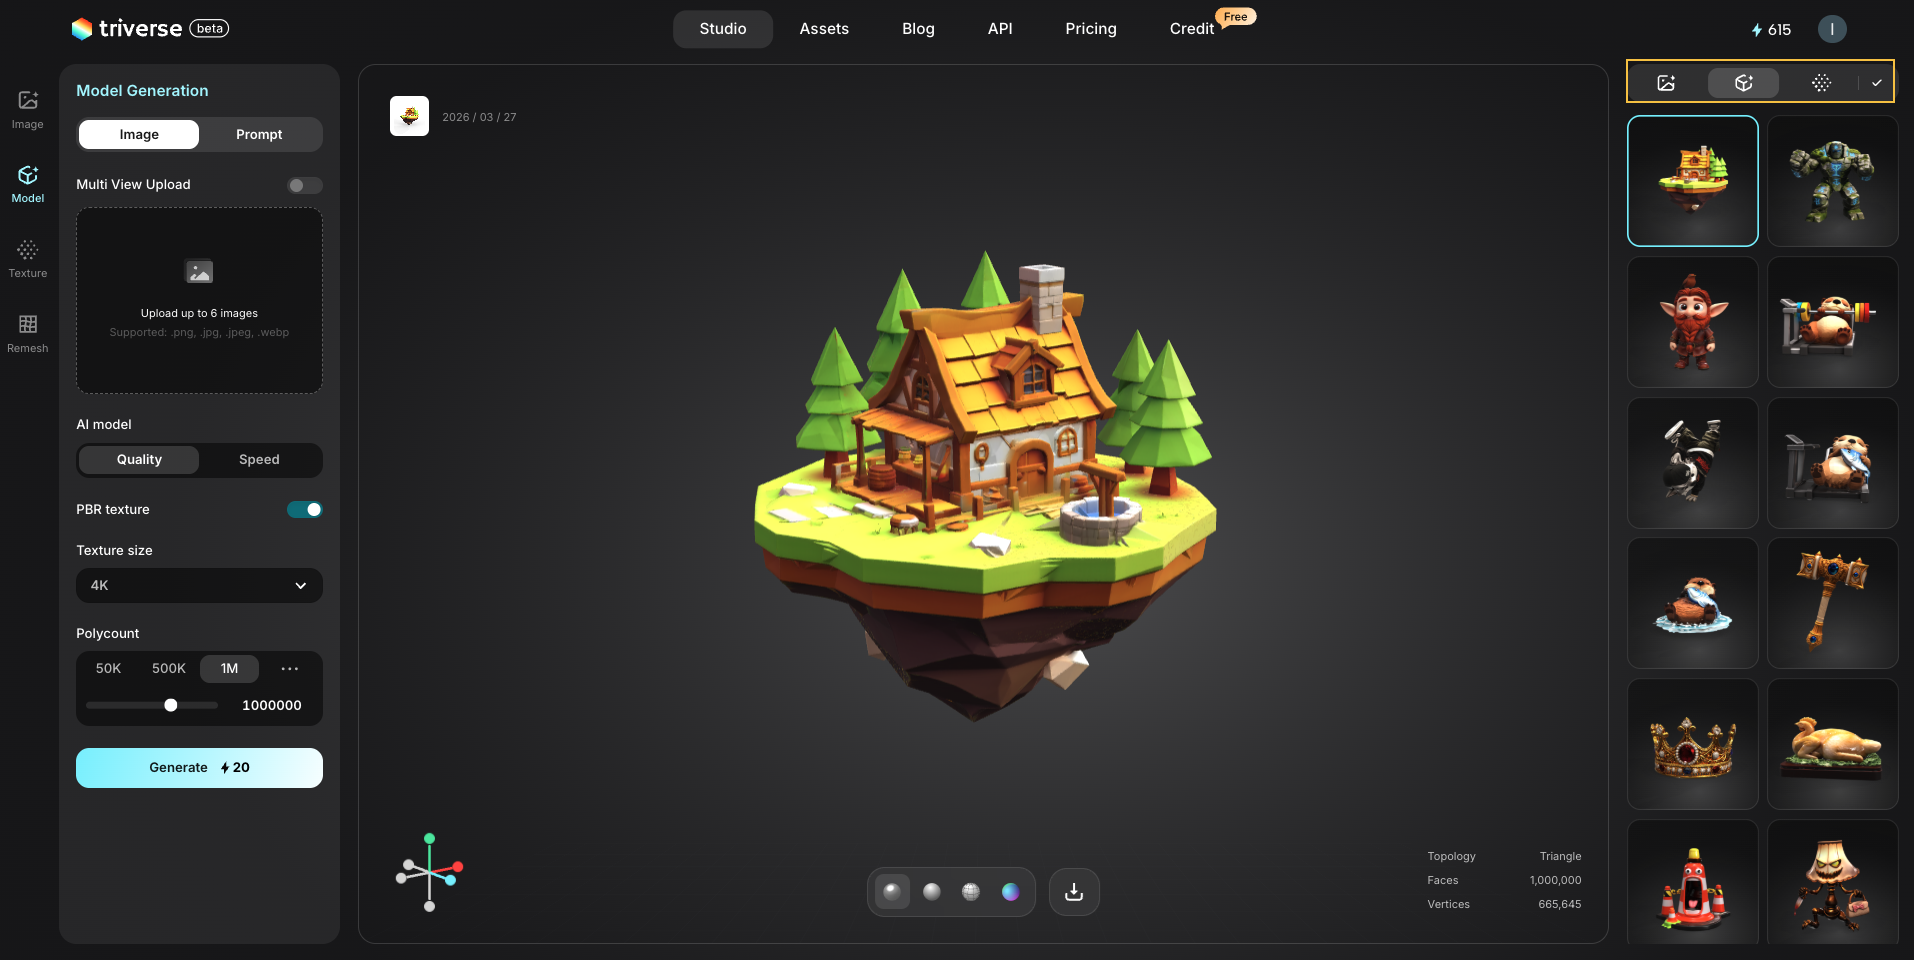
Center: 3D Canvas
The 3D viewer is the central workspace where you preview and inspect your generated models.
You can rotate and zoom the model, inspect geometry and surface details, evaluate materials and textures, and preview the model under different display modes.
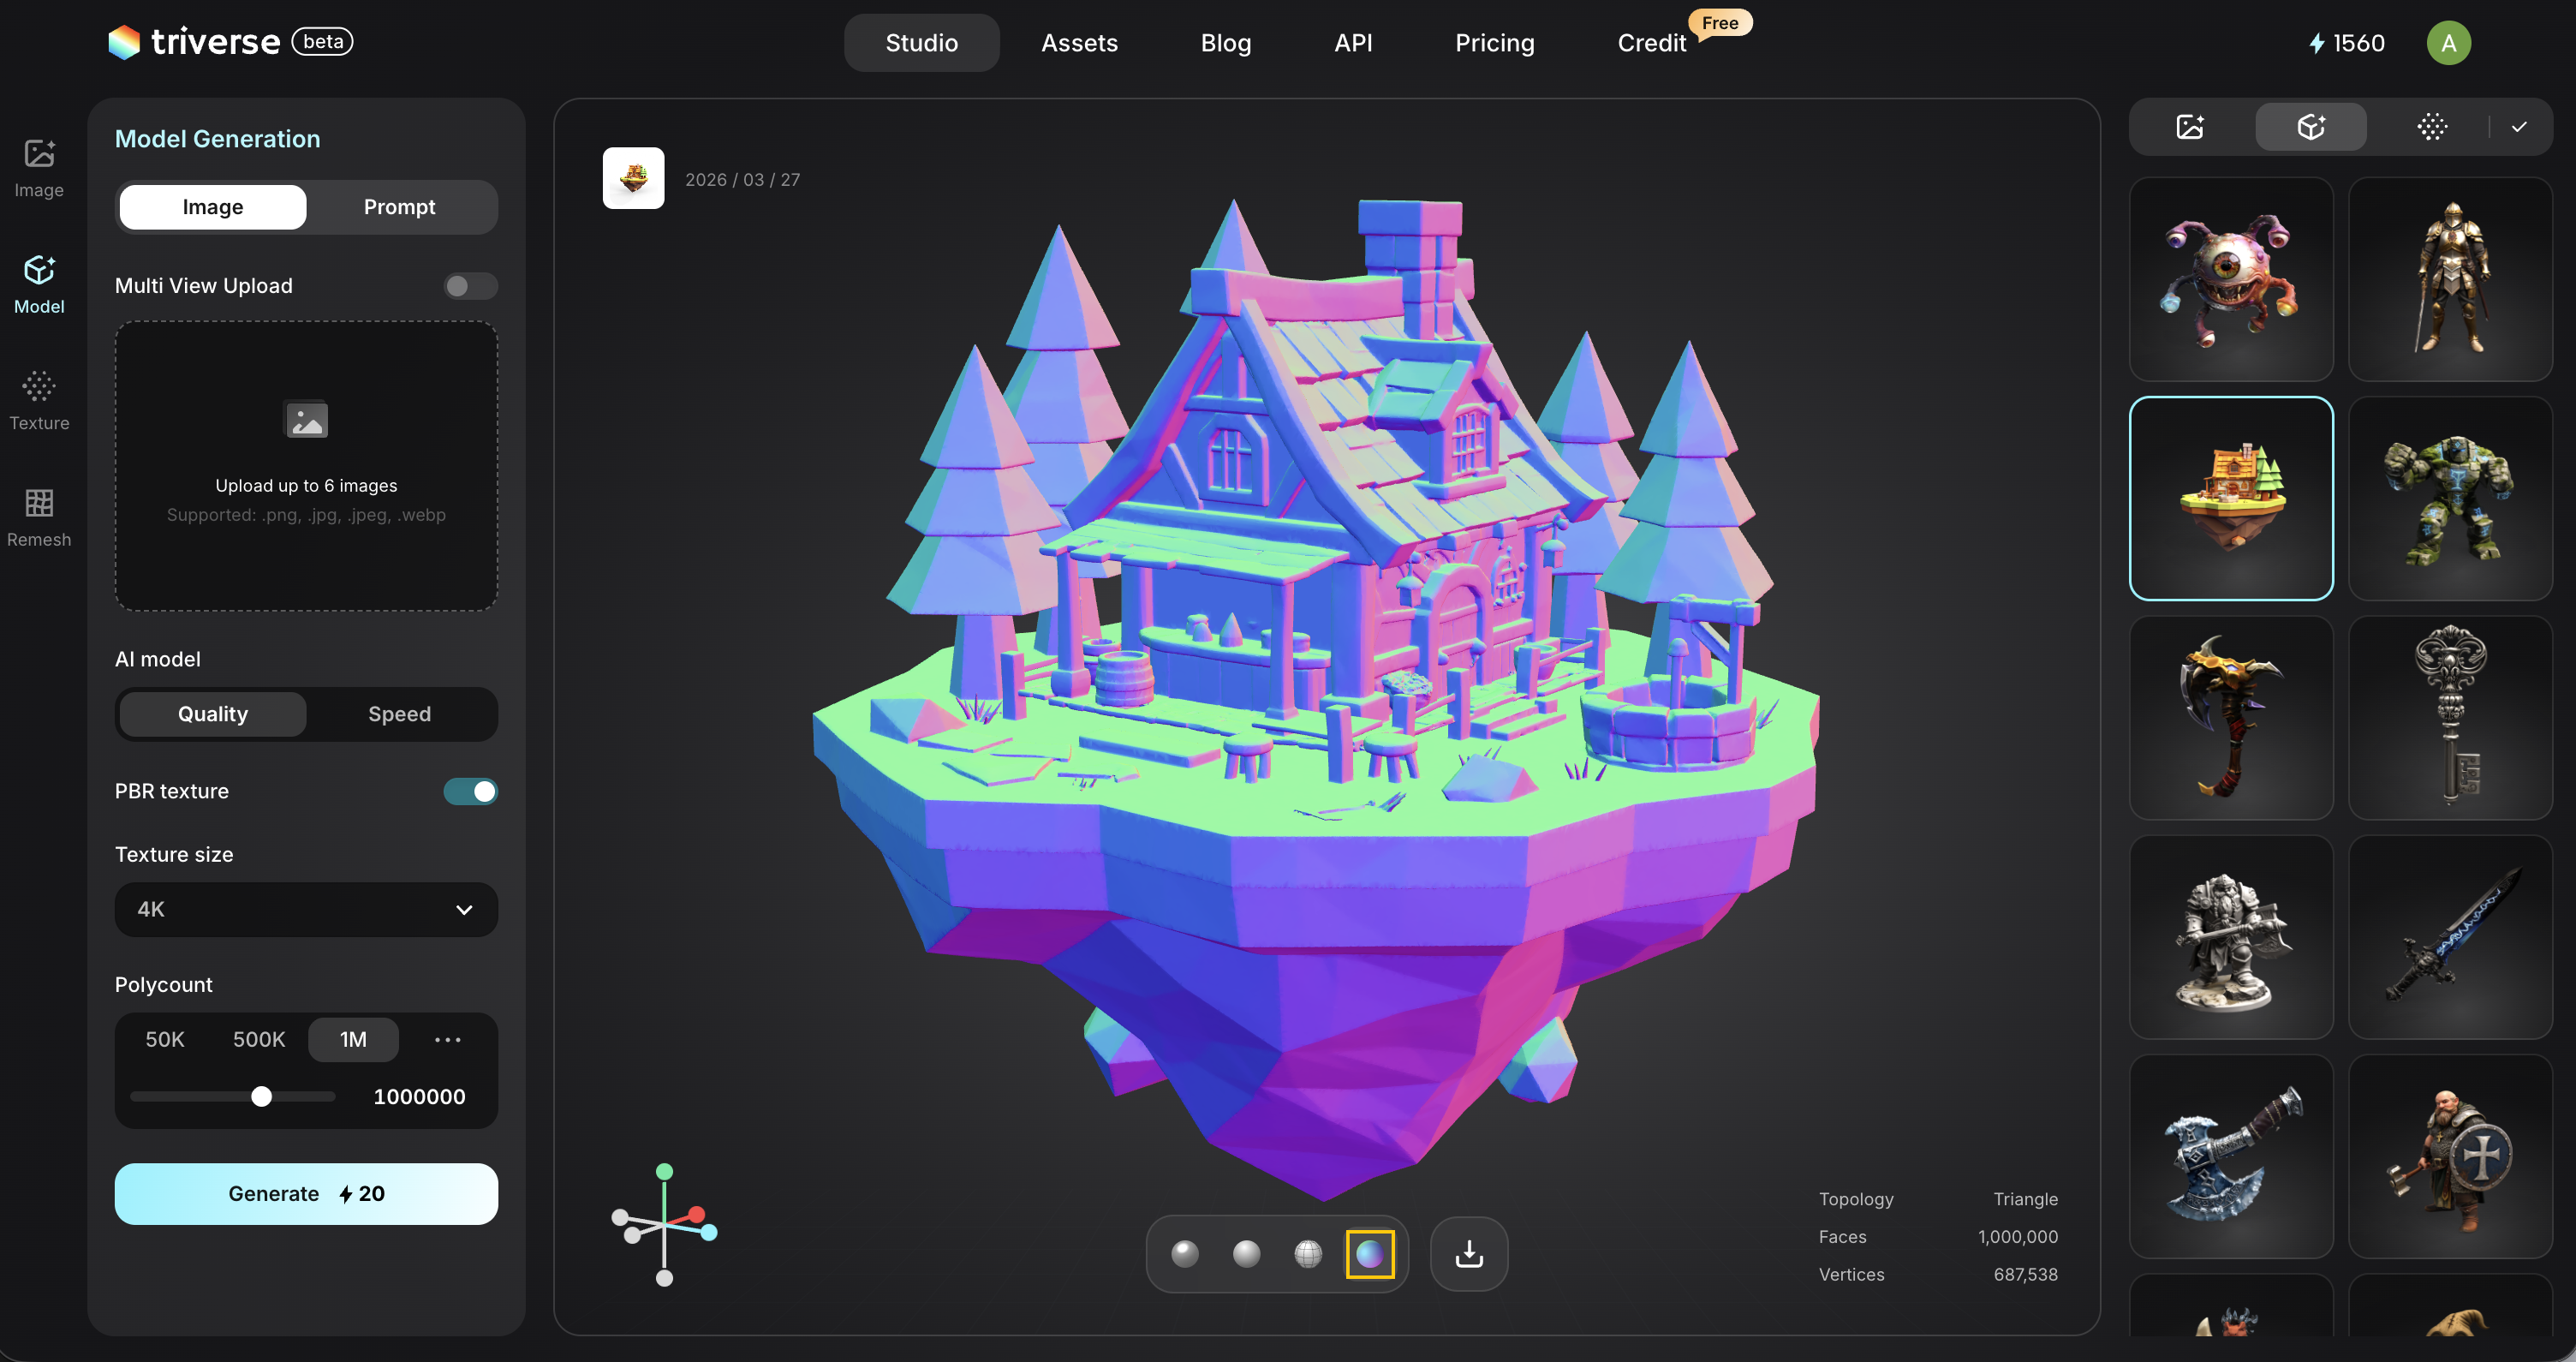
At the bottom of the canvas, from left to right, four sphere icons represent different display modes for evaluating the model.
- PBR View: Display the model with full materials, textures, and lighting.
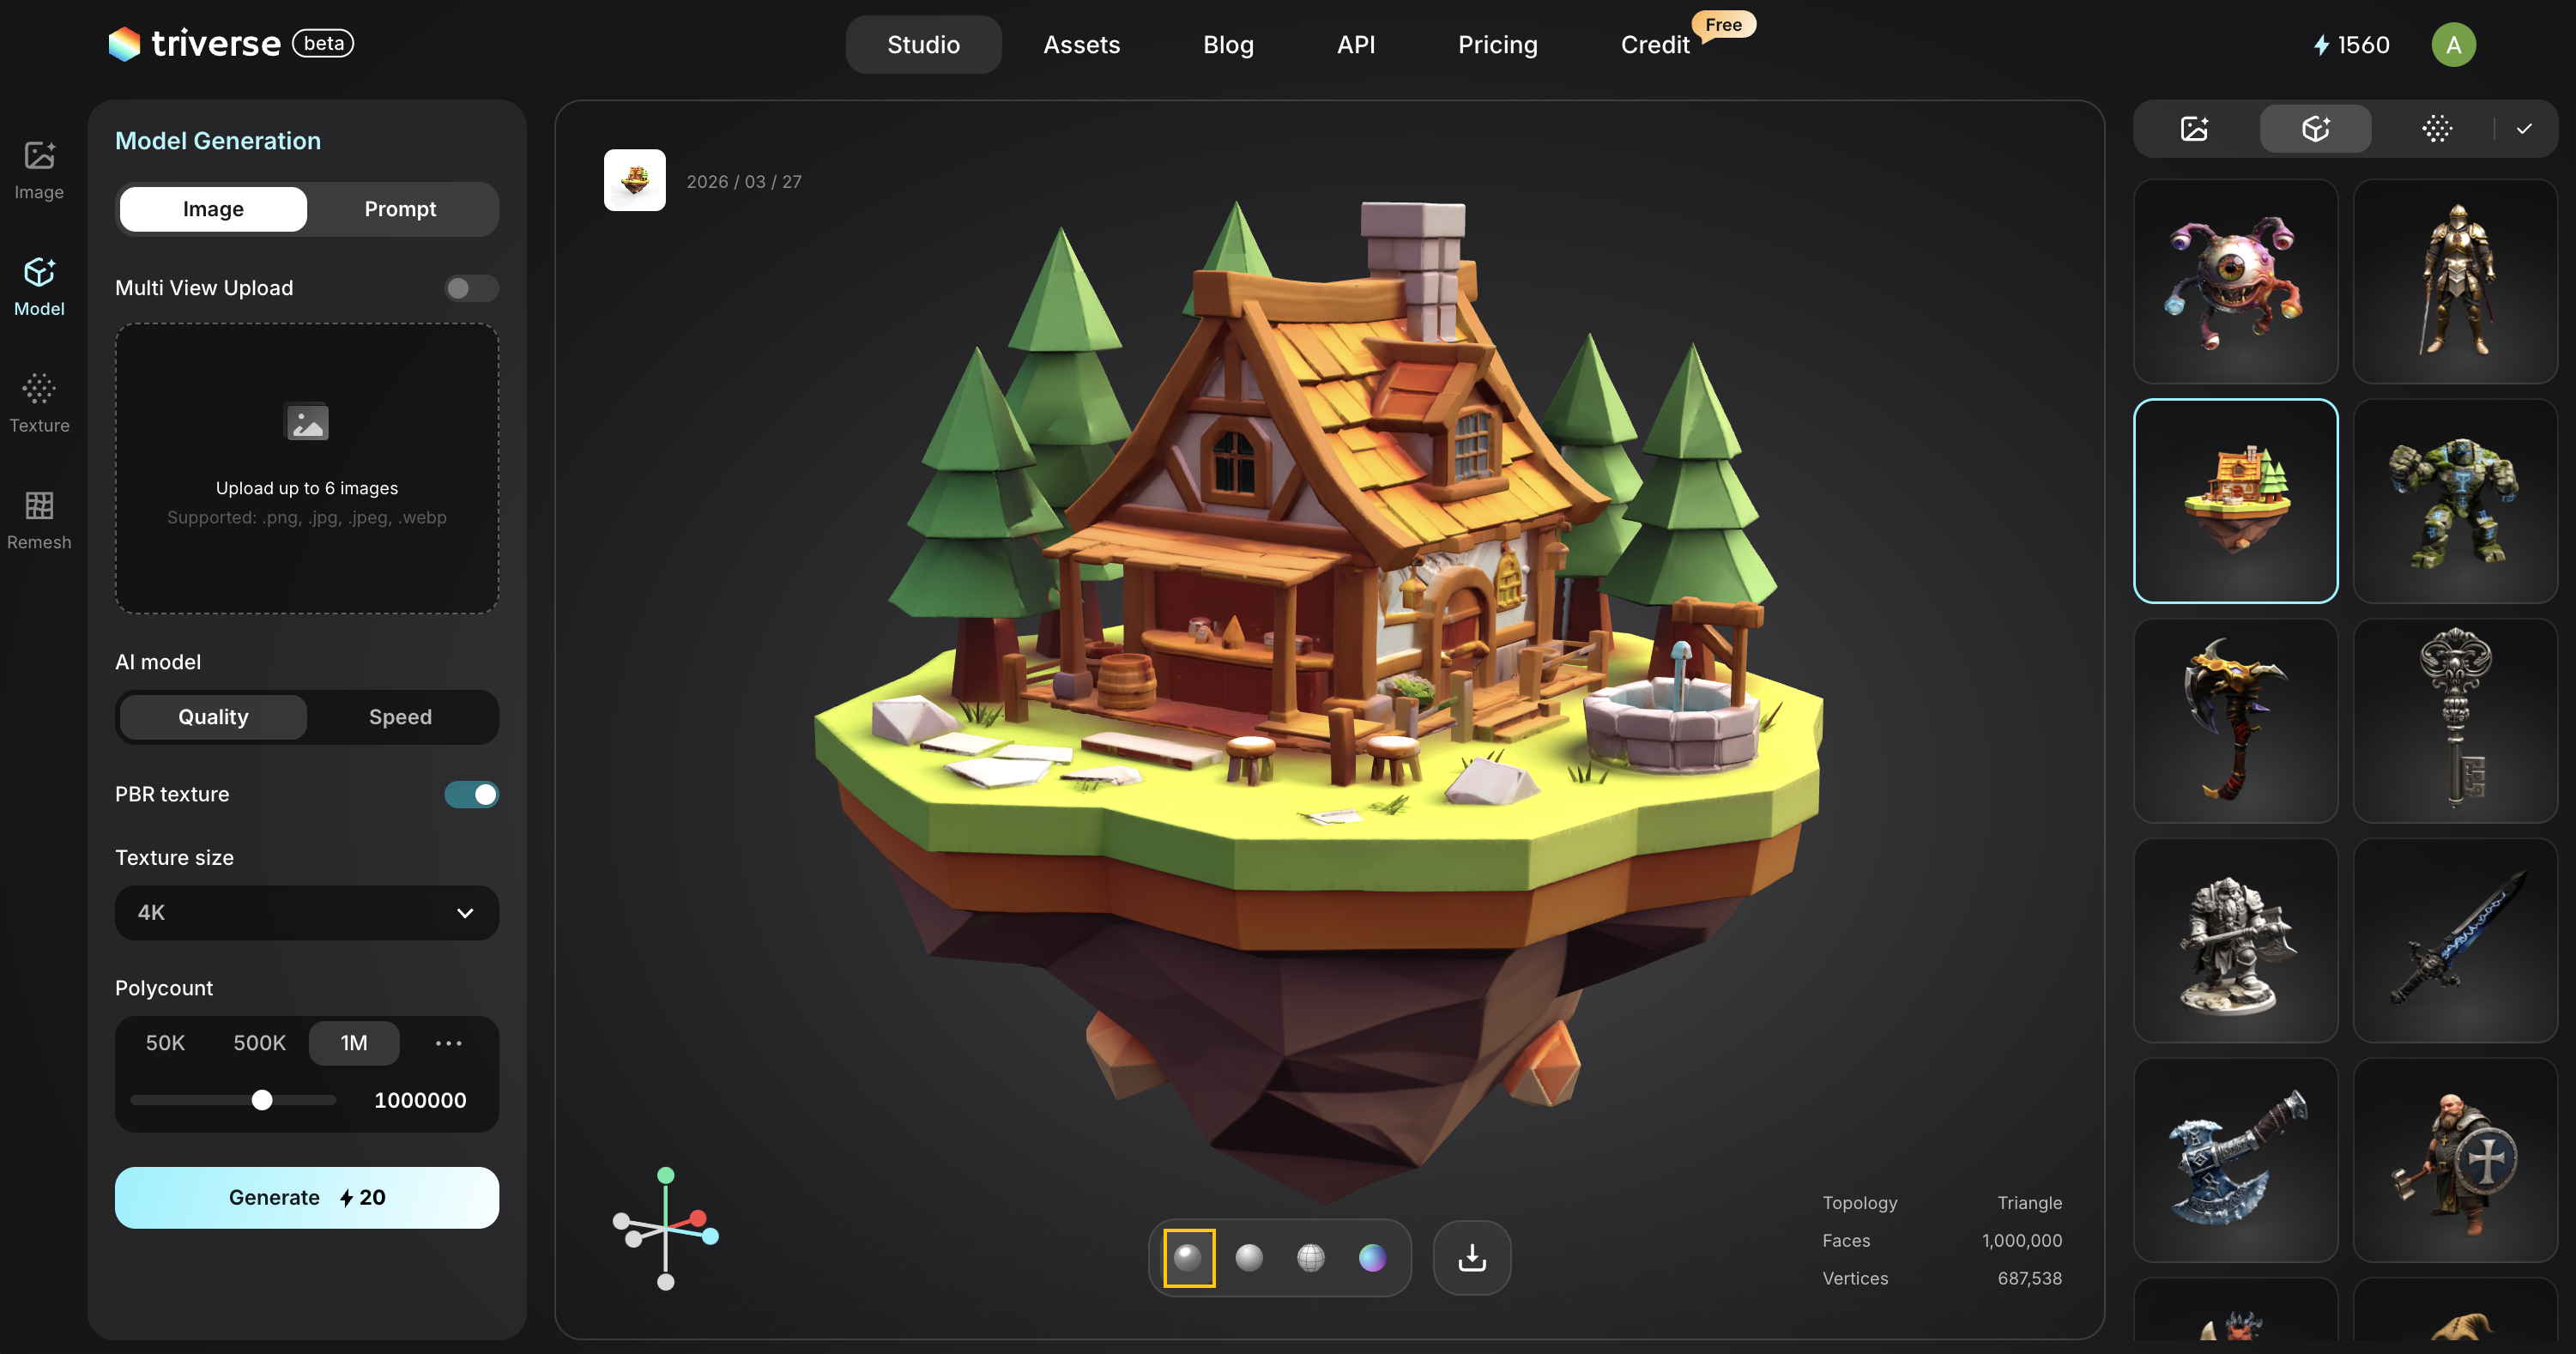
- Clay View: Show the model with a neutral material, removing textures to focus on shape and form.
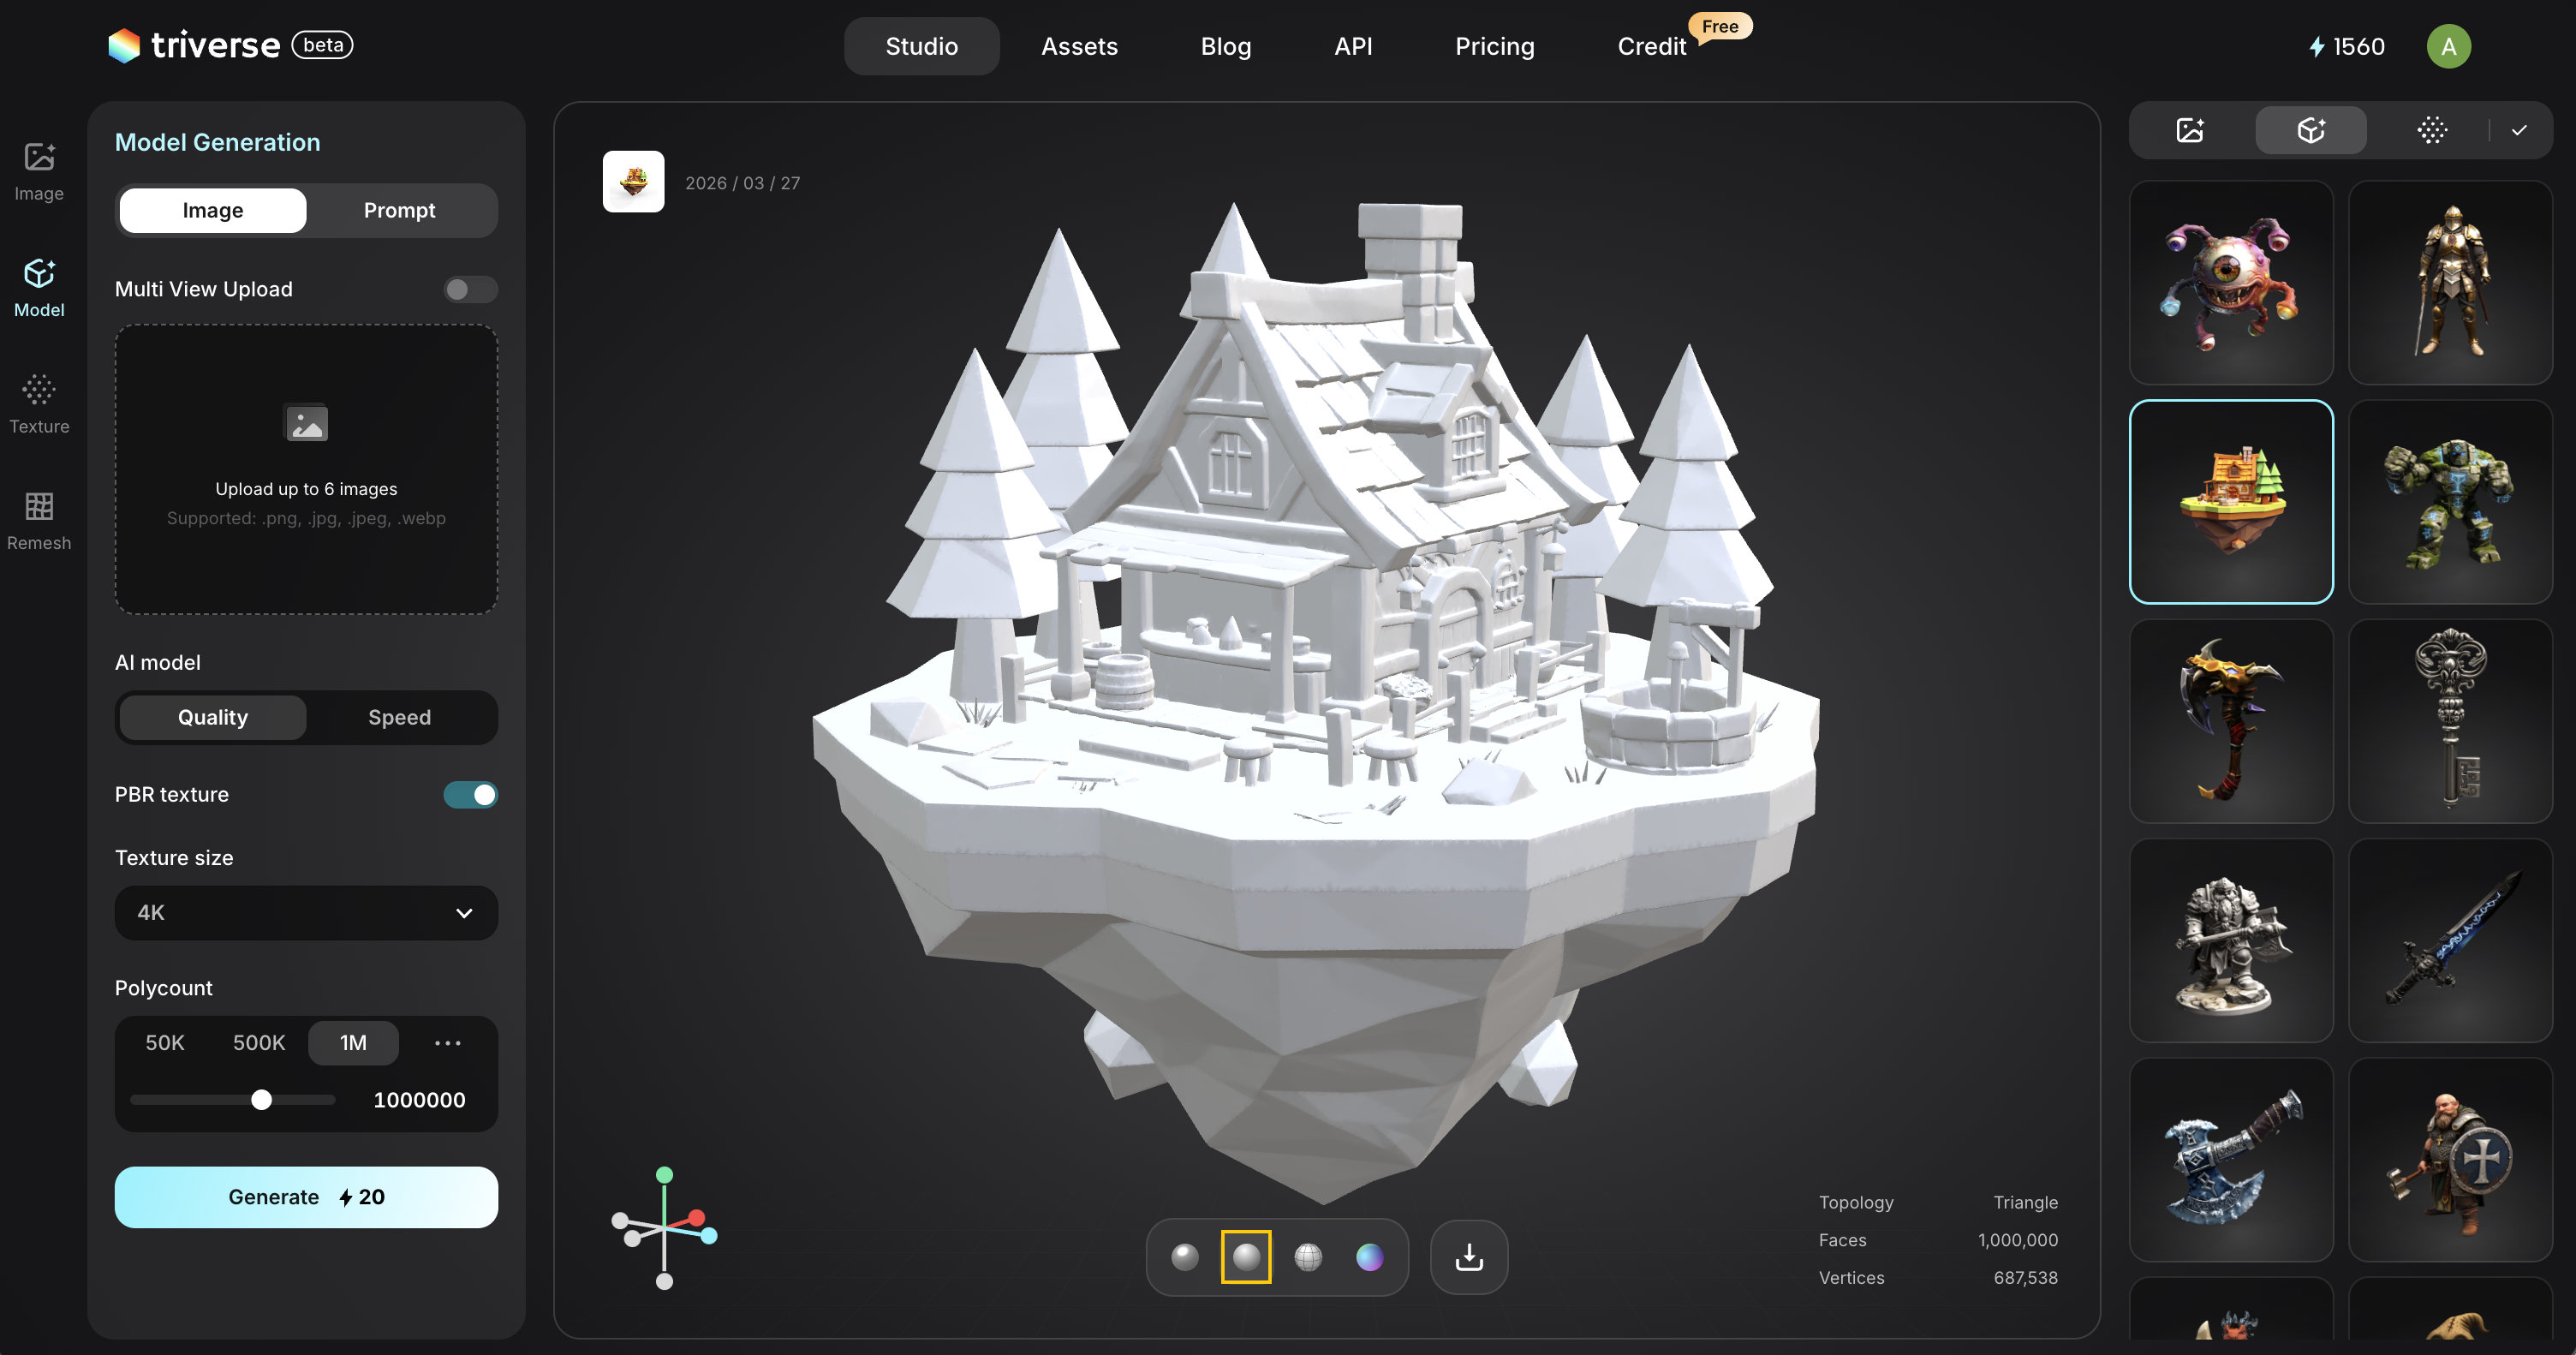
- Wireframe View: Display the mesh structure, including edges and polygon density.
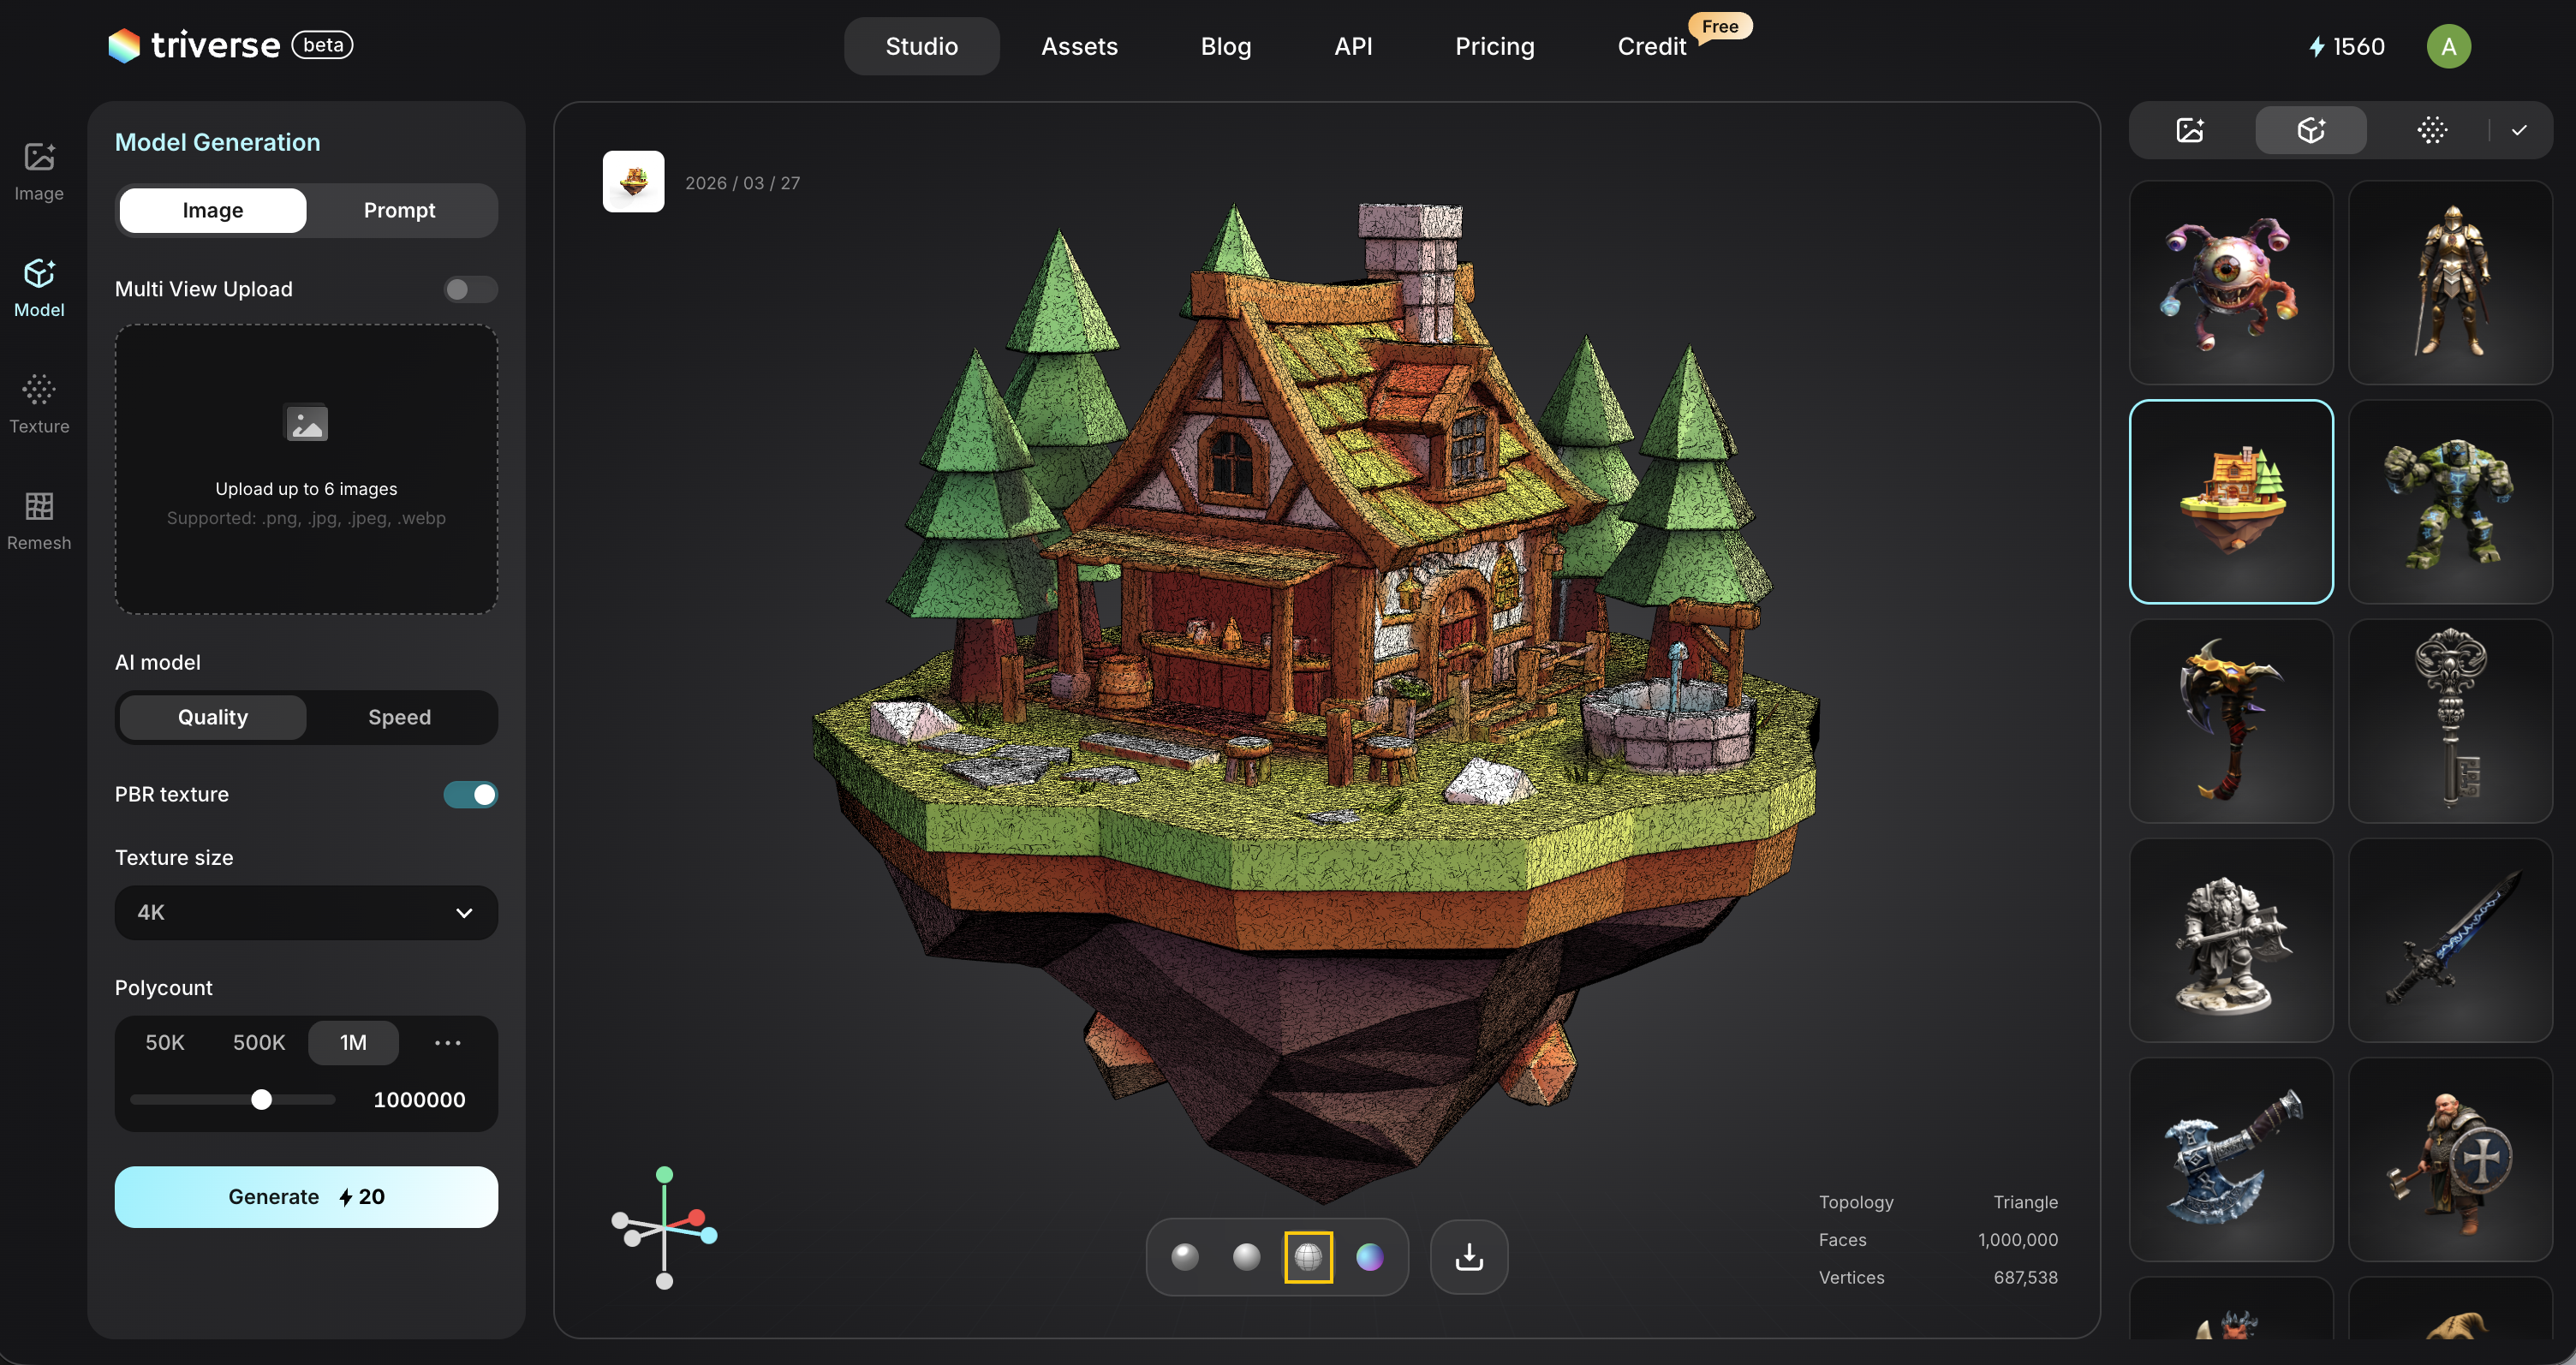
- Normal Map View: Visualize surface normals to inspect fine detail and shading accuracy.
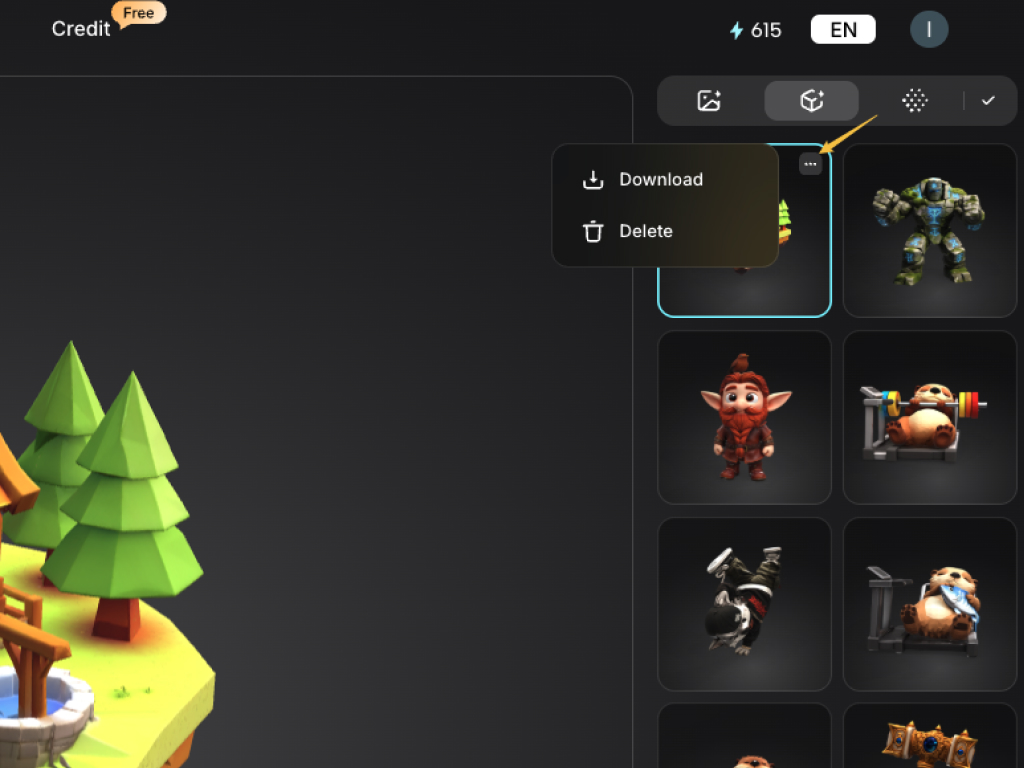
Right-side Asset Library
Browse and manage all your generated images, models, and textures in a grid layout.
In the top-right corner of each asset, there is a three-dot icon.
Click it to open more options, where you can download (export the asset to your device in .glb or .fbx format) or delete the asset (Note: Deleted assets cannot be recovered).