How to Write Better Text to 3D Prompts: Copyable Examples
How to write better text to 3D prompts: 20 copyable prompts by use case, a four-pass rewrite method, and a fix table for weak results.
Most bad 3D models start with a bad sentence. You type "a cool sword, high quality" and get a blob with a handle. The fix is boring and it works: name one object, give it one real material, pick one style, then add one constraint. Put the important words first.
Learning how to write better text to 3D prompts is mostly a matter of having good examples in front of you. So this page is a pile of prompts you can paste as they are. They are grouped by what you are actually making, not by theory. Every one has a note on the single word to change if you want your own version. After the list, there is a slot table, a four-pass rewrite method, and a table of fixes for the results that come back wrong. Skip to whatever you need.
20 text to 3D prompts you can copy right now
Each prompt below names one object. That is the whole trick. A generator reads a scene description and tries to build the scene, so "a knight in a forest at sunset" comes back with terrain you never asked for. Keep one subject per prompt and assemble the set in your engine. The notes tell you which word carries the most weight.
Text to 3D prompts for low-poly game props
low-poly iron lantern, square frame, frosted glass panels, flat shaded, one solid piece, game-ready. Swapironforbrassand the whole prop reads warmer without changing the shape.stylized wooden crate, oak planks, visible grain, metal corner brackets, low-poly, clean edges. Dropmetal corner bracketsand you get a plain box. That is the fastest way to see what one detail buys you.sci-fi energy cell, brushed steel cylinder, one glowing blue band, hard surface, game-ready prop. Keep one glowing band. Three glowing bands turn into a smear once the texture is baked.stone waypoint marker, chiselled granite, shallow carved lines, squat proportions, low-poly, single object. Changeshallow carved linestodeep runesonly if your mesh can hold the depth.hand-painted fantasy shield, round oak body, worn leather rim, steel boss, low-poly, neutral pose. Changeroundtokiteand the silhouette changes while every other word stays put.
Text to 3D prompts for printable objects
sitting barn owl, smooth clay style, compact folded wings, on a flat round base, one solid piece. Changebarn owltofoxand leave the pose words alone. This is the cheapest custom version there is.small cactus planter, matte ceramic, ribbed sides, thick walls, flat bottom, one solid piece. Swapribbedforflutedand the side profile changes completely.desk cable clip, matte plastic look, rounded edges, one closed loop, flat base, no thin parts. Add a second loop only after you check the wall thickness in your slicer.chess pawn, turned wood look, simple lathe profile, wide flat base, single solid piece. Changepawntorookand reuse the rest word for word. That is how a matching set gets built.cat-shaped phone stand, matte stone finish, thick wedge body, flat bottom, one solid piece. Writesteeporshallowfor the wedge. Do not guess an angle in degrees.
Characters and creatures in a fixed pose
chibi forest ranger, oversized head, matte vinyl look, T-pose, single character, no cape. Pick T-pose or A-pose based on what your rigging step expects, not on what sounds nicer.armoured knight, tarnished steel plate, closed helm, A-pose, compact silhouette, one figure. Changeclosed helmtoopen helmand you add a face. That single word raises the mesh cost.low-poly fox, standing on four legs, flat shaded orange fur, simple tail, one object. Changestandingtosittingand the volume moves. Keep the rest frozen while you test it.clay golem, cracked stone body, stubby arms, neutral stance, one solid figure, no base. Deleteno baseand a plinth appears. You will have to remove it before export.stylised robot companion, white plastic shell, single round visor, T-pose, one character. Describe the visor as a shape. Do not ask for glowing letters on it.
Product and packaging concepts
minimal ceramic coffee mug, matte glaze, thick handle, cylindrical body, neutral studio view.thick handleis the word that decides whether the result survives a real print.glass perfume bottle, faceted body, heavy base, brass cap, one object, no label text. Swapfacetedforsmoothand you have a different product line in one edit.wireless earbud case, matte white plastic, rounded rectangle, visible seam line, closed lid. Changeclosed lidtoopen lidand you introduce a hinge. Add that later, on purpose.leather desk organiser, three shallow compartments, stitched edges, flat base, one piece. State the number of compartments.Some compartmentsgives you whatever the model feels like.vintage brass desk lamp, domed shade, short stem, weighted round base, single object. Changedomedtoconicaland the outline changes instantly.
A slot table for weaker text to 3D prompts
Most weak prompts fail in the same slot, not in general. Find the slot you left vague and rewrite only that slot. This table is the fastest diagnostic I know, and it is the piece most guides skip.
Slot | Weak wording | Stronger wording | What changes in the mesh. |
|---|---|---|---|
Subject |
|
| One clear silhouette instead of a guess. |
Material |
|
| The surface has a real reference. |
Style |
|
| Geometry density, not a mood. |
Form |
|
| A bottom you can actually slice. |
Constraint |
|
| Fewer floating parts to clean up. |
Exclusion |
|
| No extra terrain baked into the mesh. |
The last row matters more than it looks. Lighting and camera words come from image prompting. A mesh generator has no camera. Ask for a studio view and you are asking for a picture of a thing, not the thing.
How to rewrite text to 3D prompts in four passes
Random variation is real, but wording is consistent. Change one variable per run and you learn what caused the change. Change four at once and you learn nothing. Here is the loop, with the same object carried through all four passes.
Pass 1: name one object
Start with a lantern. Generate it. It will be generic, and that is fine. You now have a baseline mesh to compare against. If the silhouette is wrong, stop here. No amount of material wording fixes a bad outline.
Pass 2: swap one material
Go to an iron lantern, square frame. One object, one material, one form note. Keep the style and the constraint out of it for now. The point of this pass is to see whether the generator reads the material as geometry or as paint.
Pass 3: freeze the style string
Now add low-poly, flat shaded. Write that exact string down somewhere. When you build a set, you will reuse it word for word on every asset, changing only the subject and material. This is what keeps a prop set looking like one art direction instead of twenty.
Pass 4: add one technical constraint
Finish with low-poly iron lantern, square frame, frosted glass panels, flat shaded, one solid piece, game-ready. One constraint. If you add watertight, no floating parts and T-pose in the same pass, you will not know which one helped. For a longer walkthrough of carrying a whole set through this loop, the generate 3d props from image or text prompts guide goes deeper on the prop workflow.
One variable per run only works if the tool holds everything else still. In Triverse's Text to 3D generator, quality, PBR textures, texture size and polycount are separate settings. Freeze them, change one word in the prompt, and you know exactly what caused the difference. That is the point of the four passes.
Better style words for text to 3D prompts
Style words are the part people overbuy. Plenty of guides, Meshy included, repeat the same subject-plus-material formula. The useful part is the order, not the adjective list. What actually helps is a small bank of concrete, physical words you can swap in.
Material: brushed steel, oak with visible grain, matte ceramic, tarnished brass, worn leather, frosted glass. Style: low-poly, flat shaded, stylized, hand-painted, voxel, hard surface. Constraint: one solid piece, flat round base, T-pose, clean edges, no floating parts, single object. Leave out: 4K, highly detailed, masterpiece, stunning, cinematic lighting. Those come from image specs, not from any official mesh spec.
That last line is the one worth arguing about. Those words came from image prompting. A mesh is geometry plus a material description, and the Khronos glTF overview spells out that split clearly. Mesh density comes from the generator's quality setting, not from an adjective. If you want the underlying structure, the Blender mesh structure manual explains what vertices and faces actually are. Words like intricate push the model toward features too fine to survive the next step. The text to 3d guide covers the same input fields from the tool side.
One wrinkle. Some official example prompts still carry render words like soft lighting or 8K resolution. Those come from the image side of the pipeline, not from the mesh. The guide's own Do's and Don'ts lead with subject, style, material and usage context, so copy those rules and leave the camera words out. Keep the glTF overview link in your asset notes so the next artist knows which format you built for.
Where text to 3D prompts stop working
Be honest about the limits and you save a lot of rework. A prompt describes an object. It does not set a real world size, a wall thickness or a tolerance. Set scale in your slicer or your engine, not in a sentence. The 3D printing overview covers why physical dimensions are a downstream decision. If you need a guaranteed hollow container with an exact wall, a mesh generator is the wrong tool.
Letters on a model rarely come out legible. Ask for a logo or a name and you get lumps. Thin wires, spread fingers and floating parts are the classic failures. So is anything with a scene attached. The polygon mesh fundamentals page is a good reminder that you are asking for a surface, not a photograph of a surface. When a print fails at the bottom, the Prusa first layer guide is a better place to look than your prompt history.
Symptom | Wording that caused it | Edit that fixes it. |
|---|---|---|
Extra terrain and props |
| Add |
Two objects fused together |
| Split into two prompts, then assemble. |
Mushy, unreadable detail |
| Delete them. Check the quality spec in the tool. |
Blobby letters on the surface |
| Add lettering after export, as geometry. |
Thin parts break in cleanup |
| Ask for |
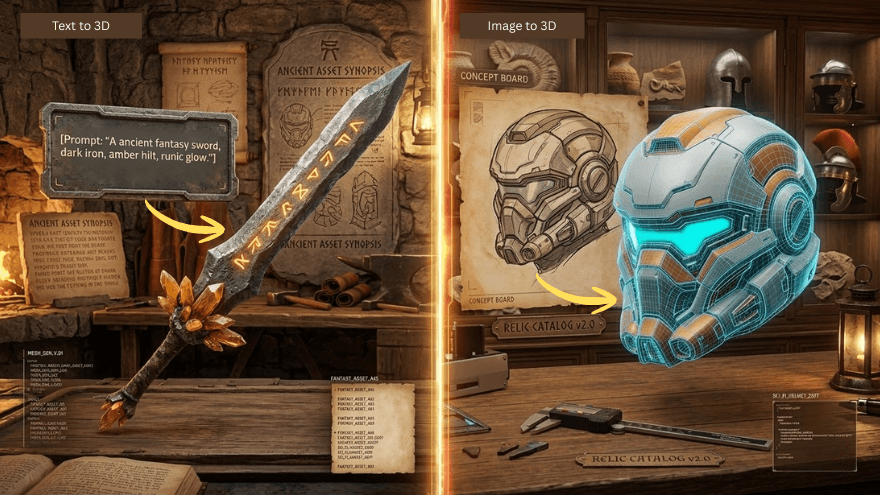
Sometimes the right move is to stop prompting and start from a picture. If you already have concept art or a clean reference image, the image to 3d vs text to 3d comparison lays out when the image route gives you more control.
From text to 3D prompts to engine assets
The prompt is the cheap part of the asset pipeline. The expensive part is what happens after Generate. A raw mesh usually needs a retopo pass before it is pleasant to rig or to run LOD on. Long thin triangles, messy UV seams and a material that only looks right under one light all cost someone an afternoon. This is where a small studio loses the time it saved by generating in the first place.
Export format decides how much of that pain travels with the asset. The glTF 2.0 specification defines how geometry, PBR materials and textures travel together. The Blender OBJ import export manual is the honest option when you only need geometry and no material graph. On the engine side, the Unity importing assets manual and the Unreal static mesh import docs both describe the import settings that will expose a bad mesh immediately.
So write prompts with the downstream step in mind. one solid piece is not a style choice. It is the difference between one asset and a cleanup task. T-pose is not about looks. It is a rigging decision made one step earlier, in a sentence.
A quick way to turn an idea into a model
One person building an entire prop set hits a different bottleneck. It is not the wording. It is jumping between a text tool, an image tool and a converter, then hunting for the file you just made. Every context switch costs a little attention, and by the fifth asset the style string has drifted.
Start with the sentence, not the picture. Paste one line from the list above into a text to 3D generator and check the mesh. If the silhouette is right, you are done. Triverse's Text to 3D workflow keeps the prompt, the settings and the export in one place, so the fifth asset can reuse the same frozen style string as the first. No handoff, no hunting for the file.
The image route is still there when you need it. If you already have concept art, or the shape in your head is easier to draw than to describe, Triverse has a built-in Nano Banana image generation interface. You can make a base image and turn it into 3D from the same workspace. Treat that as an optional branch, not a required first step. Most single-object prompts never need it.
Next step
If you came here to learn how to write better text to 3D prompts, the fastest lesson is one changed word. Pick one prompt from the list, paste it as written, and generate a single object. Then change exactly one word and run it again. That pair tells you more about this tool than any guide. When you want to run that pair without switching tools, open Text to 3D in Triverse Studio.