Tree Supports in 3D Printing: A Complete Guide (2026)
Learn how tree supports in 3D printing work, when to use them over traditional supports, and how to configure settings in Cura, PrusaSlicer, and Bambu Studio for cleaner prints with less material.
April 26, 2026
You finished a six-hour miniature sculpt. Looked perfect in the slicer. Then you pulled the supports, and half the face came off with them.
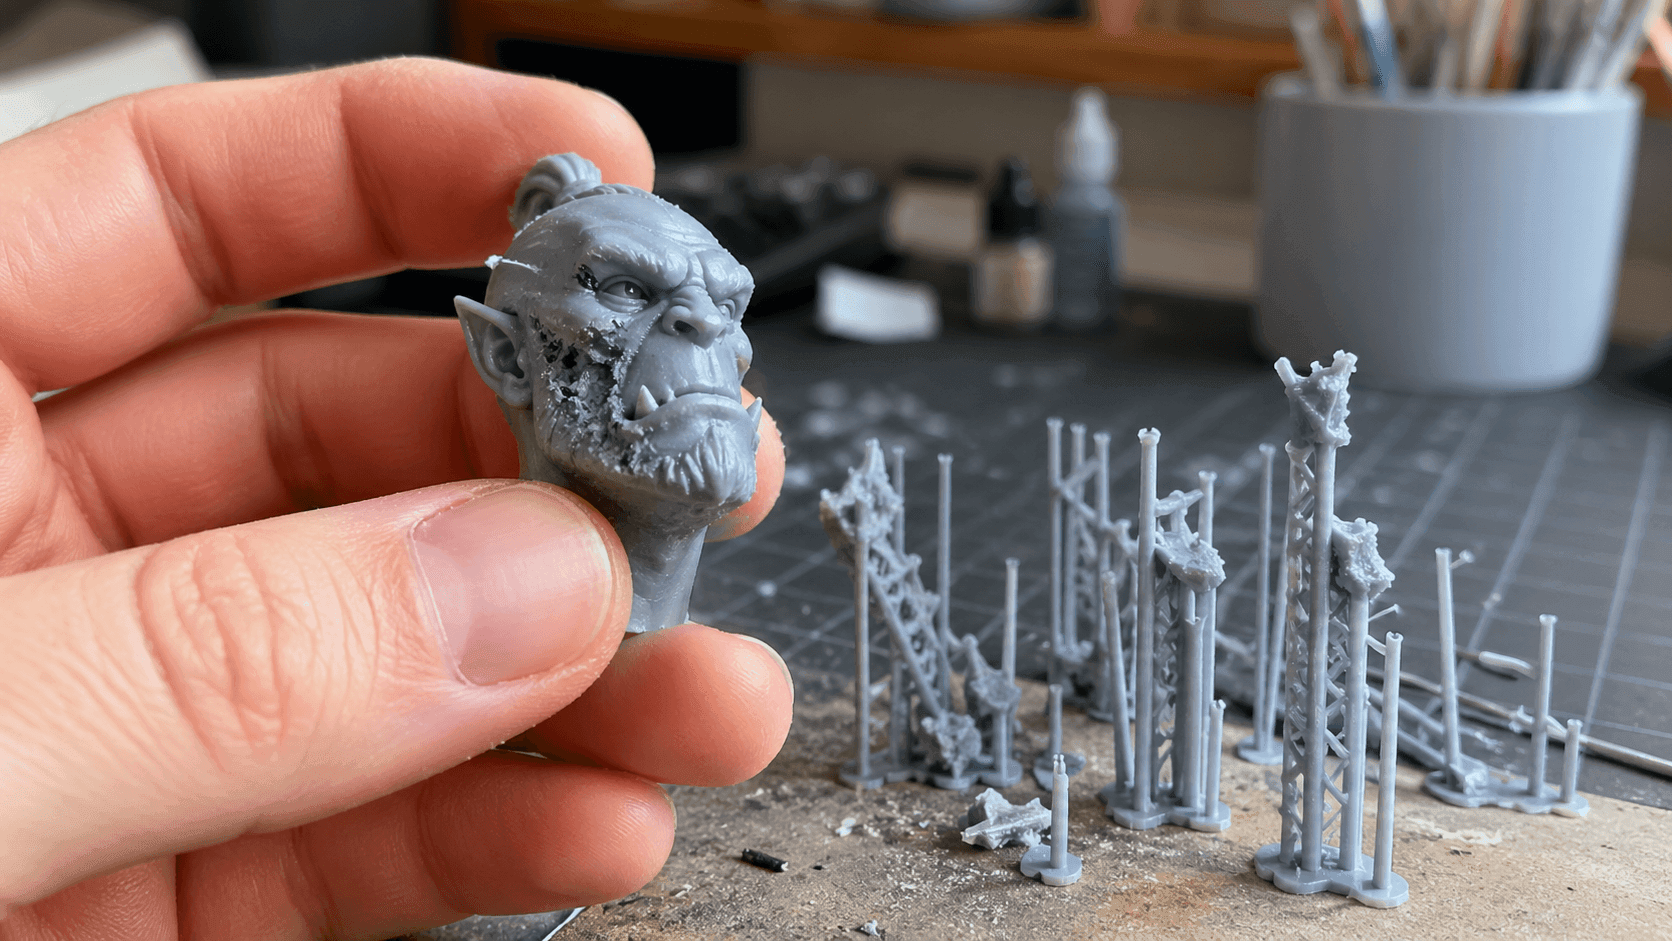
Tree supports exist to close that gap. Instead of vertical columns that touch everything below an overhang, they grow like branches. They reach where needed and touch as little as possible. This guide covers how they work, when they beat traditional supports, how to configure them, and how to avoid common problems.
What Are Tree Supports in 3D Printing?
Tree supports are a support structure generated by your slicer. Standard line or grid supports are vertical columns placed in a uniform pattern beneath overhangs. Tree supports take a different approach: they grow upward from the build plate like branches.
The design is functional: a thick trunk at the base where mechanical stress is highest, progressively thinning as the support extends toward the model. The branch tips make contact with the model at single points rather than across entire surfaces. If you're new to 3D printing workflows, check out our guide to the best CAD software for 3D printing to make sure your models are print-ready before you even get to supports.
This matters because:
- Less contact area = fewer marks on the model. Standard supports touch everything below an overhang. Tree supports touch only what needs supporting.
- Directional reach. Because each branch grows independently, a tree support can angle around model geometry that would block a straight vertical column.
- Less material, faster prints. Thinner branches extrude less filament. Cura's documentation notes up to 50% material reduction in some cases.
The tradeoff: tree supports are structurally weaker than dense line grids. For massive, flat overhangs where load distribution matters, they're not always the right choice.
How Tree Supports Differ From Normal Supports
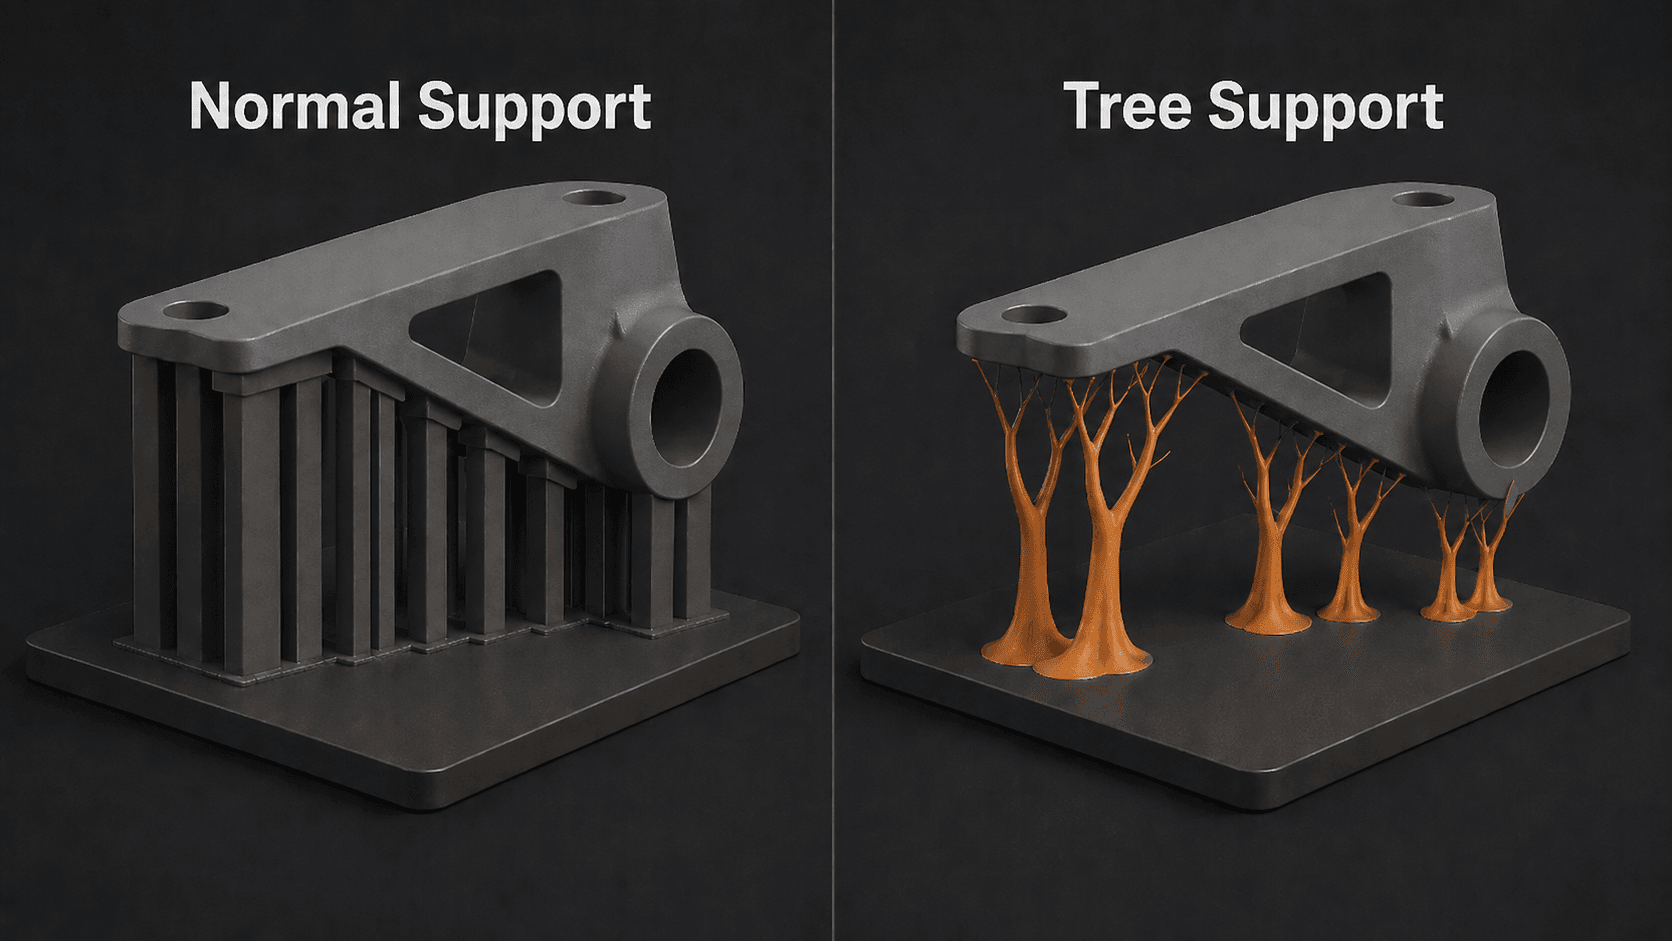
The core difference comes down to geometry and contact strategy.
Normal supports (line, grid, or hexagonal) generate vertical columns in a repeating pattern. They're robust, fast to calculate, and predictable. The problem: they support everything below an overhang, whether it needs it or not. They also create wide contact zones that leave visible marks.
Tree supports use a different approach. Each support grows as a single structure from the build plate to a specific contact point on the model. The algorithm determines the optimal path, accounting for model geometry, and the result is a structure that's tailored to that specific print rather than a generic grid applied uniformly.
The practical difference for most users:
- Standard supports: more marks, more material, harder to remove from tight spaces, better for large flat overhangs
- Tree supports: fewer marks, less material, better at navigating complex geometry, easier removal
The choice isn't about one being universally better. It's about matching the support type to the print geometry.
Comparison Table: Tree Supports vs. Traditional Supports
Factor | Traditional Supports | Tree Supports |
Contact area | Large, uniform grid | Small, single contact points |
Material usage | Higher | 30–50% less |
Print speed | Standard | Faster (less extrusion) |
Surface finish | More marks, requires cleanup | Cleaner, minimal marks |
Geometry navigation | Straight lines only, blocked by obstacles | Branches angle around geometry |
Structural strength | Excellent for large flat overhangs | Weaker for massive flat surfaces |
Removal difficulty | Moderate to difficult | Easier, especially thin branches |
Calculated speed | Fast | Slightly slower |
Best use case | Flat overhangs, functional parts | Steep overhangs, miniatures, complex parts |
Benefits of Using Tree Supports
If you're still on the fence, here's a straightforward breakdown of what tree supports actually give you.
1. Cleaner Surface Finish
The smaller contact point means less area for the support to fuse to the model. On visible surfaces like character faces, raised details, and textured areas, this is the difference between a clean print and one that needs hours of sanding and filling.
2. Less Post-Processing
Fewer marks = less time with a hobby knife, sandpaper, or filler. For production prints where you want to minimize finishing work, tree supports reduce the post-processing bottleneck significantly.
3. Lower Material and Time Costs
30–50% less filament for the same support job means savings across a large print run. Thinner branches also extrude faster, so print times improve even accounting for the slightly more complex path generation. Choosing the right 3D printer filament also affects how well supports adhere and release.
4. Access to Hard-to-Reach Geometry
Tree supports can grow around model features. Standard supports can't. If your print has internal cavities, overhangs under overhangs, or clearance-critical features, tree supports are often the only practical option. For models that start as images, our image-to-STL conversion guide covers how to get print-ready files before you worry about supports. Or skip the modeling step entirely: , can generate print-ready 3D models from text or images, exported as STL or OBJ with clean mesh topology that slices without surprise issues.
5. Easier Removal
The small contact point breaks free more cleanly with rotational force than a wide support block does. The key technique: twist, don't pull. Once you get that down, tree support removal is noticeably faster.
When to Use Tree Supports
Not every print needs tree supports. Here's a practical framework:
Use tree supports when:
- Printing miniatures or figures with cloaks, raised arms, wings, hair, and facial details. The small contact point preserves your fine work.
- Overhangs are steep (greater than 55° from vertical). Standard supports are built for moderate angles. Steep overhangs need the directional reach of branches.
- Surface finish matters. Any print meant to be seen benefits from cleaner contact.
- The model has complex geometry or internal cavities. Tree branches navigate where line columns can't.
- You want to minimize post-processing time. If you print in volume, the time saved per print compounds quickly.
Stick with traditional supports when:
- The overhang is large and flat. Tree branches on a flat surface create more contact points than a grid. Use line or grid supports for large flat surfaces.
- Structural load matters. For functional parts under significant stress, dense line grids are mechanically superior.
- Your slicer keeps crashing. Cura has known bugs with tree supports plus multi-model slicing. Use line supports or try PrusaSlicer.
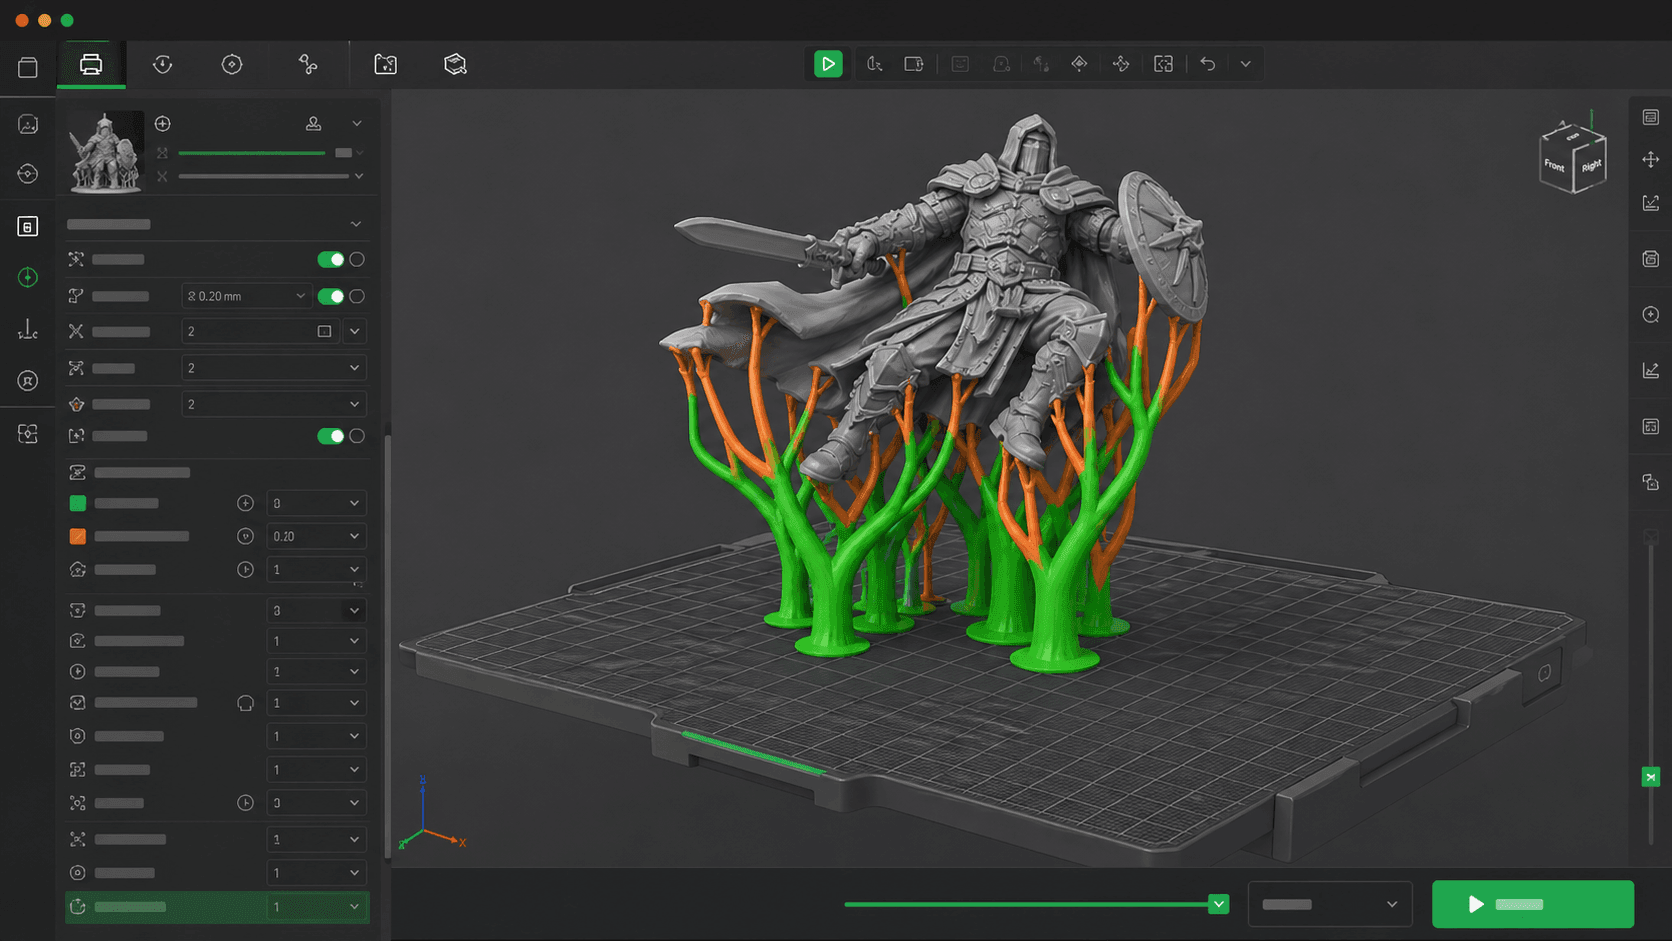
Optimizing Tree Support Settings
Enabling tree supports is easy. Getting them dialed in requires understanding a few key settings. Here's what actually matters.
Cura Settings
Enable Tree Supports: Settings → Configure Visibility → check "All" → Support → Support Type → select Tree → enable Generate Support
Support Branch Angle (most important)
Controls how much the branches lean. Higher values = more vertical = more stable but harder to reach under steep geometry. Lower values = more angled = better reach but thinner branches.
- Default: 50°
- Detailed miniatures: 40–50°
- Functional parts: 50–60°
Support Branch Diameter
The trunk width at the base. Too thin = collapse risk. Too thick = waste material, harder removal.
- Default: 2mm
- Miniatures / cosmetic: 1–1.5mm
- Functional parts: 2–3mm
Support Branch Diameter Angle
Controls tapering speed. A higher value means faster taper, thinner tips, cleaner prints,the but weaker branches. The default works for most prints. Don't adjust unless you're troubleshooting a specific problem.
Support Roof and Support Floor
These add a horizontal plate between the support and the model. They increase the contact area, which means better adhesion but more cleanup.
- Set to 0mm for miniatures and cosmetic prints: rely entirely on branch tips
- Set to 0.2–0.4mm for functional parts with large flat overhangs where layer adhesion is a concern
Tip: If your tree supports are generating but not reaching the model (floating in the preview), increase the Branch Angle to 50–60°. If that doesn't work, try rotating your model.
PrusaSlicer Settings
PrusaSlicer calls tree supports Organic Supports (Print Settings → Supports → Type: Organic).
Key parameters:
- Organic support branch angle: 45–55° default. Adjust based on overhang steepness.
- Organic support branch diameter (bottom): Trunk width, equivalent to Cura's Branch Diameter.
- Organic support branch diameter (top): Tip width, controls contact point size.
PrusaSlicer's organic supports tend to generate slightly cleaner branch structures for complex geometry. If Cura is giving you trouble on a specific model, PrusaSlicer is worth trying. See the PrusaSlicer organic supports documentation for full parameter details.
Bambu Studio Settings
Supports → Enable Supports → Support Style: Tree (Auto)
Bambu's implementation is more automated. The "Auto" mode handles most of the optimization for you. Settings are under Supports → Tree Support Specific Settings:
- Branch angle: how much the branches lean
- Tip diameter: controls contact point size
- Wall thickness: adds a skin around the tree structure for stability
Bambu's tree supports are particularly aggressive about minimizing contact points, which is excellent for surface finish. Check Bambu Studio's support settings guide for model-specific recommendations.
How to Remove Tree Supports from a 3D Print
Tree supports are easier to remove than traditional supports, but the technique matters.
Let the print cool first. Cold PLA snaps cleanly. Warm PLA is gummy and stretches. Some people put prints in the freezer for 10 minutes before removal. It genuinely works.
Twist, don't pull. Grab the branch near the contact point and apply rotational force. The small tip breaks free more cleanly with a twist than with a straight pull.
Use the right tool:
- Thin branches: flush cutters or nippers
- Thicker trunks: needle-nose pliers
- Remaining nubs: sharp hobby knife or fine sandpaper
For stubborn contact points: Warm the area briefly with a heat gun, just enough to soften the support material without affecting the model. Then twist again.
The biggest mistake: Rushing. Forcing a support off the surface of the chips. If it's not coming off, it needs more time, more warmth, or a different angle.
Troubleshooting Common Tree Support Issues
Branches Not Reaching the Model
Almost always a Branch Angle issue. If the angle is set too low (too shallow), branches can't reach steep geometry before running out of space. Increase to 50–60° and re-slice. If that doesn't work, rotate your model orientation.
Tree Supports Collapsing Mid-Print
The trunk diameter is too thin for the load. Increase Support Branch Diameter by 0.5–1mm. Also check: is the first layer printing correctly? Poor first-layer adhesion propagates through the entire print and makes support collapse more likely.
Cura Crashing When Using Tree Supports
This is a known bug in Cura. Tree supports combined with multiple models on the bed can cause crashes or nonsensical support generation. Solutions:
- Slice models one at a time
- Switch to PrusaSlicer or Bambu Studio for that print
- Use traditional line supports for multi-model prints
Support Fusing to the Model Surface
Usually caused by one of two things:
- Contact point too large. Reduce tip diameter in your slicer settings.
- Printed too hot. Lower nozzle temperature by 5–10°C. PLA at 200°C fuses more aggressively than at 190°C.
- Insufficient cooling. Increase cooling fan speed for the support layers.
Rough Surface Finish on Supported Areas
Even tree supports can leave marks. If you're still seeing roughness:
- Ensure Support Roof / Floor is set to 0mm (no plate touching the model)
- Try reducing Support Interface Wall Thickness if available in your slicer
- Orient the model so the most detailed surface faces away from the build plate. Upward-facing surfaces show the most support marks.
Improving Stability and Structural Integrity
Tree supports are weaker than traditional supports for heavy loads. Here's how to get the most out of them where strength matters.
Increase the trunk diameter. The base carries the most load. Going from 2mm to 3mm trunk diameter significantly increases load-bearing capacity with minimal material cost increase.
Add a support roof for large flat areas. A thin horizontal plate (0.2–0.4mm) distributes load more evenly across flat overhangs where branch tips alone might deform under pressure.
Angle the build plate slightly. Most slicers let you tilt the model. A slight angle (5–15°) changes which surfaces need support and often reduces the total support volume required.
Use a stronger material for supports. If your printer has dual extrusion, printing supports in a different material (e.g., PETG supports for PLA prints, or soluble PVA for PLA prints) allows chemical or thermal removal without mechanical force that risks surface damage.
Simplifying Support Removal
Beyond the basic twist technique, these approaches make removal faster and safer:
Optimize contact point size first. This is the setting that has the biggest effect on removal difficulty. Smaller contact = cleaner break. Most slicers let you set this directly.
Reduce support density. More supports = more adhesion points = more surface damage. For tree supports, 10–15% density is sufficient for most prints. Increase to 15–20% only for steep overhangs. More than that is usually counterproductive.
Orient strategically. The surfaces closest to the build plate (facing down) always need the most support and will always have the most visible marks. Orient so your most critical surfaces face upward or sideways, where tree supports can reach them at shallow angles with minimal contact.
For resin prints: tree-style supports in resin are about optimizing the pull angle and reducing suction forces, not structural support. Settings in ChiTuBox, Lychee Slicer, and PrusaSlicer's resin mode should prioritize drainage holes and hollowing to eliminate internal supports entirely where possible. For FDM users choosing a first printer, our best 3D printer for kids guide covers enclosed, safe options that also work well for support-heavy prints.
Reducing Material Waste and Preventing Fusion
Using Less Material
Tree supports are already efficient by design, but you can push further:
- Start with model orientation. A 45° tilt often reduces total support volume more than any setting adjustment. If your model is in 3MF format, see our 3MF to STL conversion guide to get it into a slicer-compatible format first.
- Use the thinnest practical branch diameter. For miniatures: 1–1.2mm is often sufficient. Thinner = less material, faster print.
- Disable support roof/floor unless you specifically need them for layer adhesion.
Preventing Support Fusion
Fusion happens when support material bonds to the model surface, usually from heat, pressure, or insufficient cooling.
- Lower nozzle temperature by 5–10°C to reduce bonding tendency
- Increase cooling fan speed for support layers (50–100% for PLA)
- Reduce layer height for the support interface so thinner layers cool faster
- Add a gap: Some slicers allow you to set a Z gap (vertical offset) between the support and the model surface. Even 0.1mm reduces fusion without compromising support effectiveness
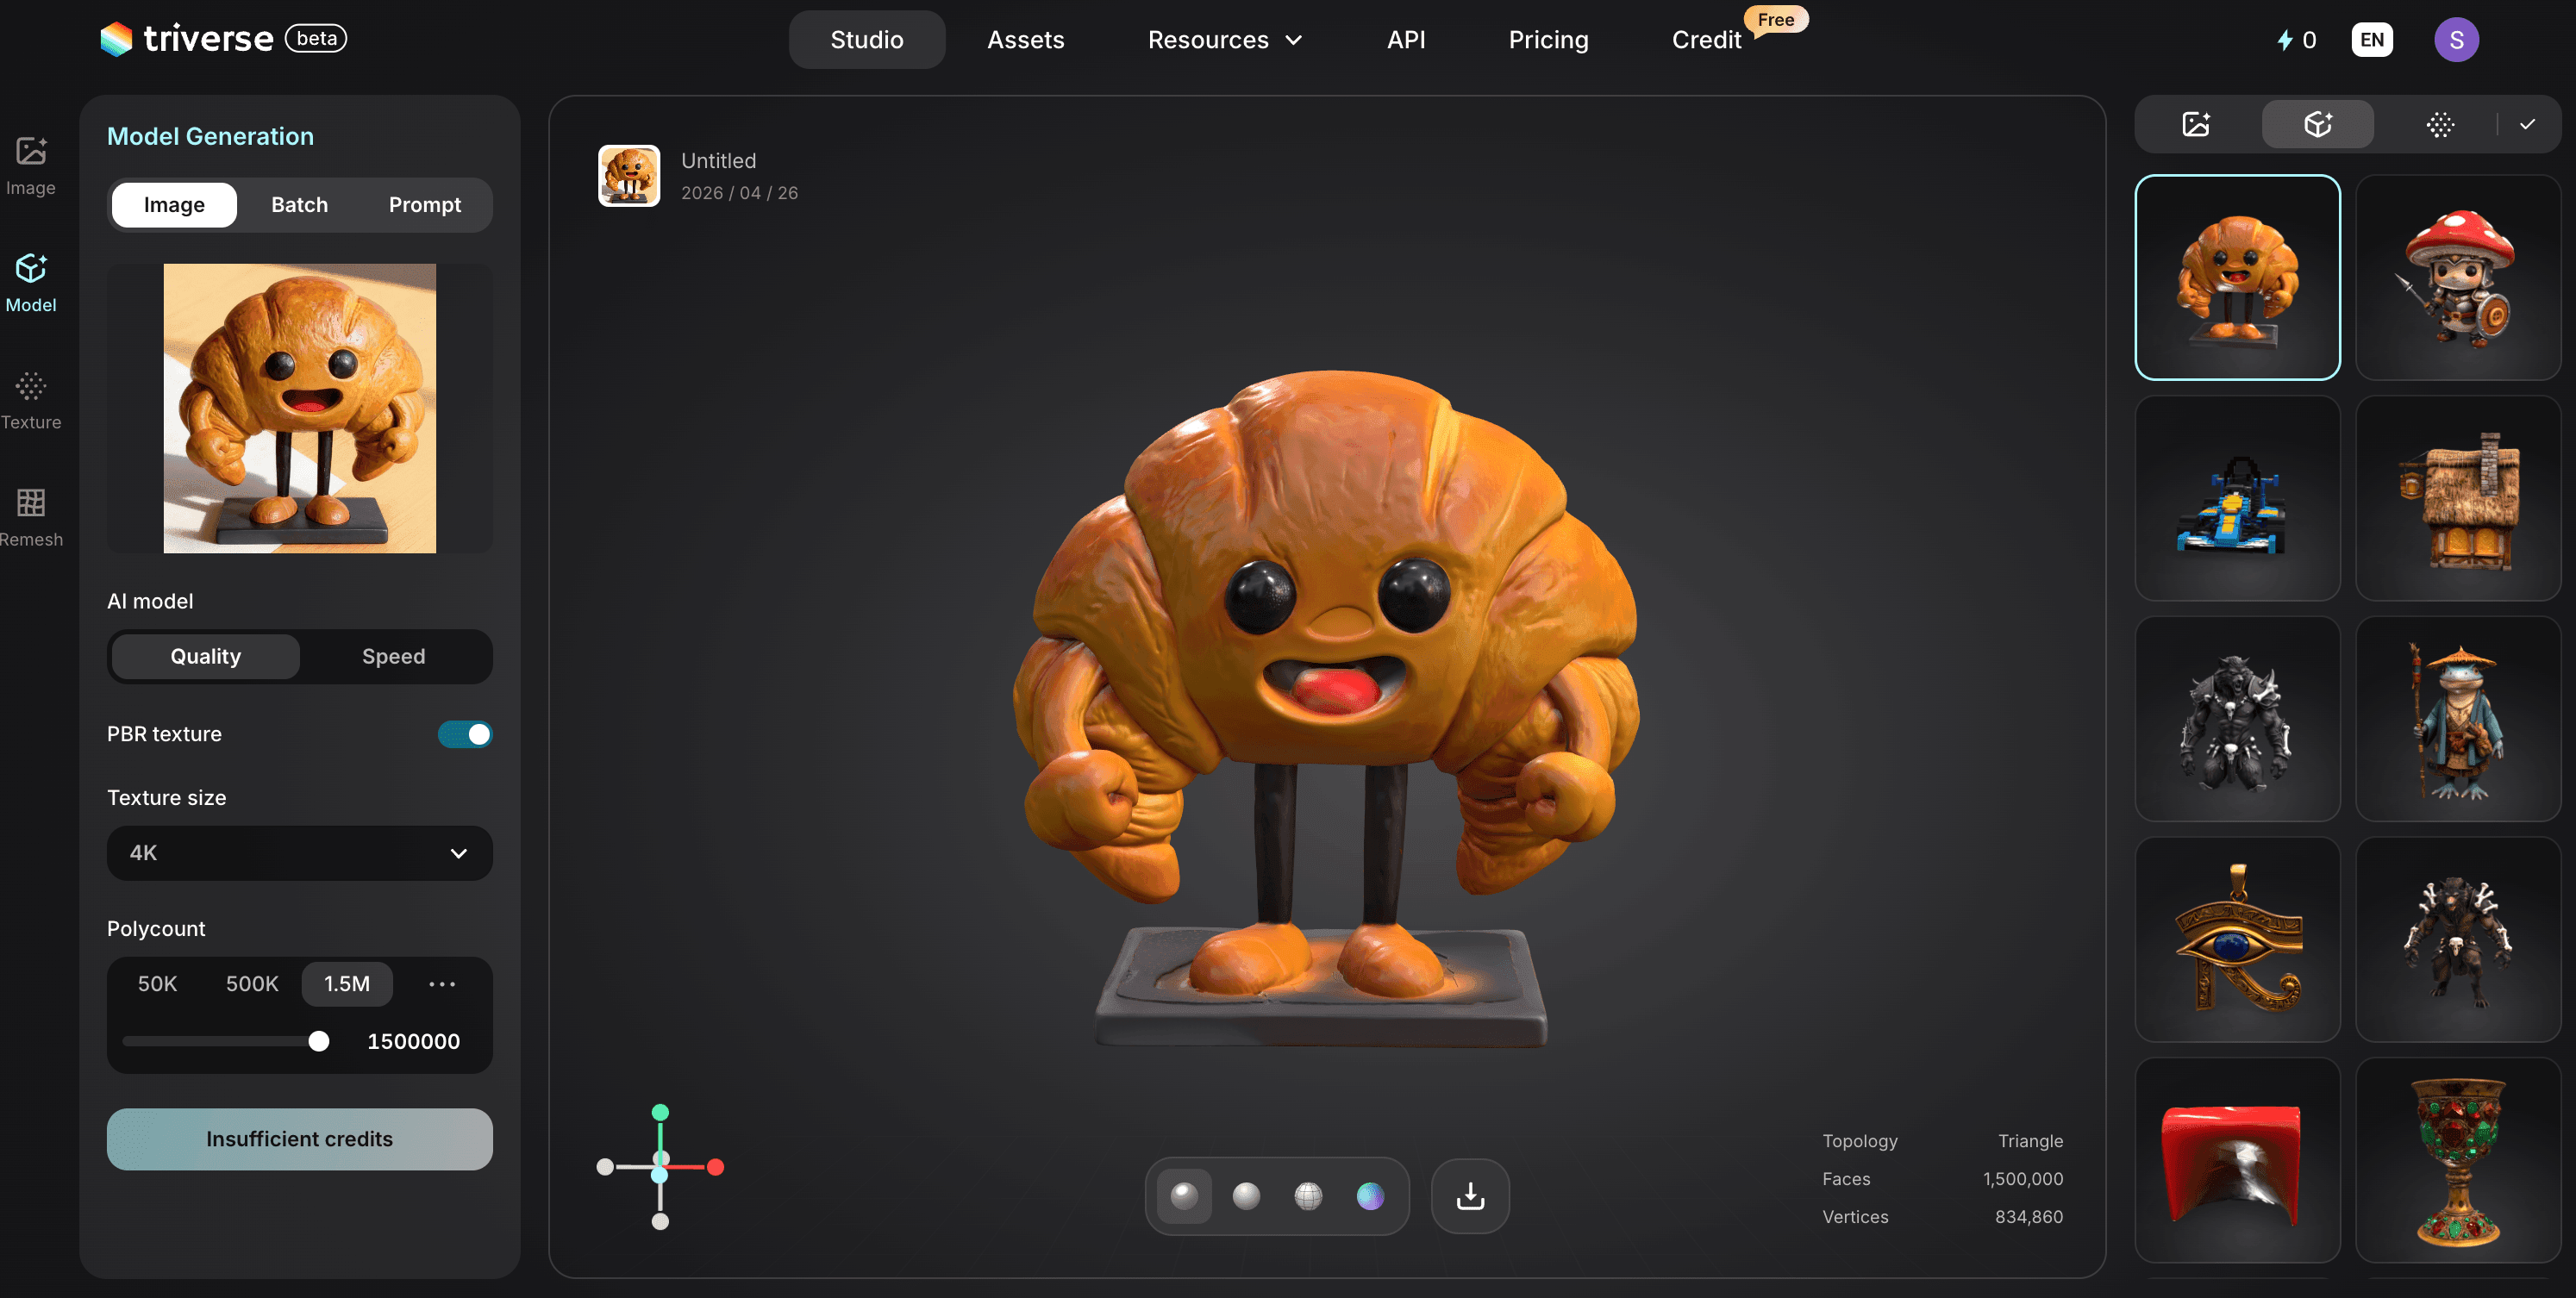
Generating Support-Friendly 3D Models with Triverse AI
Here's something most support guides skip: the model itself decides how much support you need.
A mesh with non-manifold edges, inverted normals, or internal self-intersections forces the slicer to generate support in places it shouldn't. You end up fighting the geometry instead of optimizing it. Clean mesh topology means the slicer reads overhang angles correctly, generates support only where necessary, and produces cleaner results with less waste.
This is where Triverse AI fits into the 3D printing workflow. You can generate a 3D model from a text description or a single reference image, and most exports come out clean enough to slice without extra repair work. For complex or highly detailed geometry, you may still want to check and touch up the mesh in Blender, but the bulk of the cleanup is handled for you.
Why mesh quality matters for supports:
- Watertight meshes slice cleanly. No gaps, no inverted faces, no mystery support structures appearing where they shouldn't.
- Clean topology = predictable overhangs. The slicer calculates overhang angles accurately. You get support only where the geometry actually needs it.
- STL and OBJ export. Triverse outputs standard formats compatible with Cura, PrusaSlicer, and Bambu Studio. Drop the file into your slicer, enable tree supports, and go.
- Less time fixing, more time printing. For anyone who's spent an hour repairing a downloaded mesh only to find it still generates broken supports, this is the actual bottleneck being solved.
If you're printing miniatures, game assets, or decorative objects (the exact use cases where tree supports shine), starting with a clean model eliminates a whole class of support problems before they start.
Frequently Asked Questions about Tree Supports
What's the difference between tree supports and organic supports?
They're the same thing. Cura calls them "Tree Supports." PrusaSlicer calls them "Organic Supports." Bambu Studio calls them "Tree (Auto)." The underlying algorithm is similar across all three: branches grow from the build plate toward the model, thinning as they extend, and touch at minimal contact points.
Do tree supports use less material than traditional supports?
Yes. Tree supports typically use 30–50% less filament than equivalent line or grid supports for the same job, because they're thinner and only touch where needed. This also means faster print times and lower material cost per print.
Can tree supports support flat overhangs?
They're not ideal for large, flat overhangs. Tree branches on a flat surface create multiple contact points, the opposite of what you want. For flat wide overhangs, use traditional line or grid supports. Tree supports excel for steep and complex overhangs.
Why are my tree supports not reaching the model?
Most likely the branch angle is set too shallow. Increase it to 50–60° and re-slice. If that doesn't work, try rotating the model to a different angle. Orientation often matters more than any setting.
Are tree supports strong enough for functional parts?
They're weaker than dense line supports for large flat overhangs under load. For functional parts with steep or complex overhangs, tree supports can work well with a thicker branch diameter. For large flat functional overhangs: use line or grid supports.
How do I minimize support marks on detailed prints?
Three things: use tree supports with a small branch diameter (1–1.5mm), set support roof/floor to 0mm so only the branch tip touches, and orient the model so the most detailed surfaces face away from the build plate.
What's the best slicer for tree supports?
PrusaSlicer's organic supports tend to generate the most reliable branch structures for complex geometry. Bambu Studio is excellent and more automated. Cura works well but has known bugs with tree supports plus multiple models. All three are viable. If one gives you trouble on a specific model, try another.
Can I use tree supports with multiple models on the bed?
Cura has known bugs with tree supports + multiple models (crashes, nonsensical generation). Slice one model at a time, or switch to PrusaSlicer or Bambu Studio for multi-model prints.
Conclusion
Tree supports aren't a universal replacement. They're a specialized tool. For miniatures, complex geometry, and surface-finish-critical prints, they outperform line and grid supports. For large flat overhangs, traditional supports remain the better choice.
The skill is knowing when to use each. Most slicers make switching trivial, and the difference in post-processing time is immediate. Try tree supports on your next print with steep overhangs. Ten minutes of setup, and you'll know right away if it's the right tool. And if you want to skip the modeling step and go straight to slicing, Triverse AI generates print-ready 3D models from a text prompt or a single image, exported as STL with clean mesh geometry.