Image to 3D
March 23, 2026Triverse AI's Image to 3D feature helps you convert a 2D image into a 3D model with one click.
Image Guidelines (Do's & Don'ts)
For the best quality, clean geometry, and accurate textures, follow these quick tips before uploading your image:
Do's (Best Practices) | Don'ts (Things to Avoid) |
✅ Use high-resolution images with flat, even lighting (neutral studio lighting works best). | ❌ Avoid including text, watermarks, or UI elements in the image. |
✅ Choose clear, opaque shapes with readable silhouettes. | ❌ Avoid highly reflective or transparent materials |
✅ Use solid, plain, or transparent backgrounds (.PNG with alpha is ideal). | ❌ Avoid overlapping parts, as they may merge into a single, fused shape. |
✅ Include the full object with a small margin around it. | ❌ Avoid cropped or incomplete views, as cut edges may be interpreted as flat surfaces in 3D. |
✅ Character-specific: Use an A-pose or T-pose to keep limbs separated from the torso. | ❌ Avoid very fine or delicate details (e.g., loose hair strands, thin wires, or spiderwebs). |
❌ Avoid extreme camera angles (e.g., fisheye distortion or top-down views). | |
❌ Avoid strong or heavy shadows, as they may be baked into the texture or mistaken for geometry. |
How to Use Image to 3D in Triverse
Let's walk through how to convert a 2D image into a 3D model using a fantasy stone monster concept art.
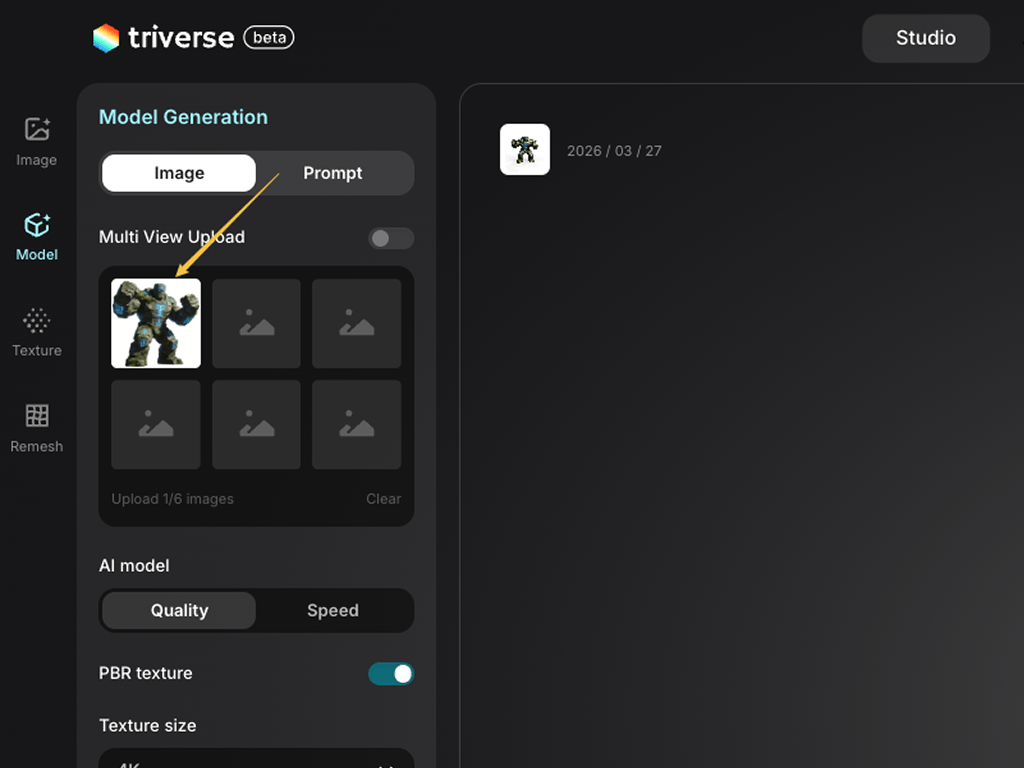
Step 1: Upload the Image
Go to Triverse Studio → Model Generation → Image to 3D. We use a high-resolution, front-facing monster .png with a clean background. Here, supported image formats are: .png, .jpg, .jpeg, and .webp.
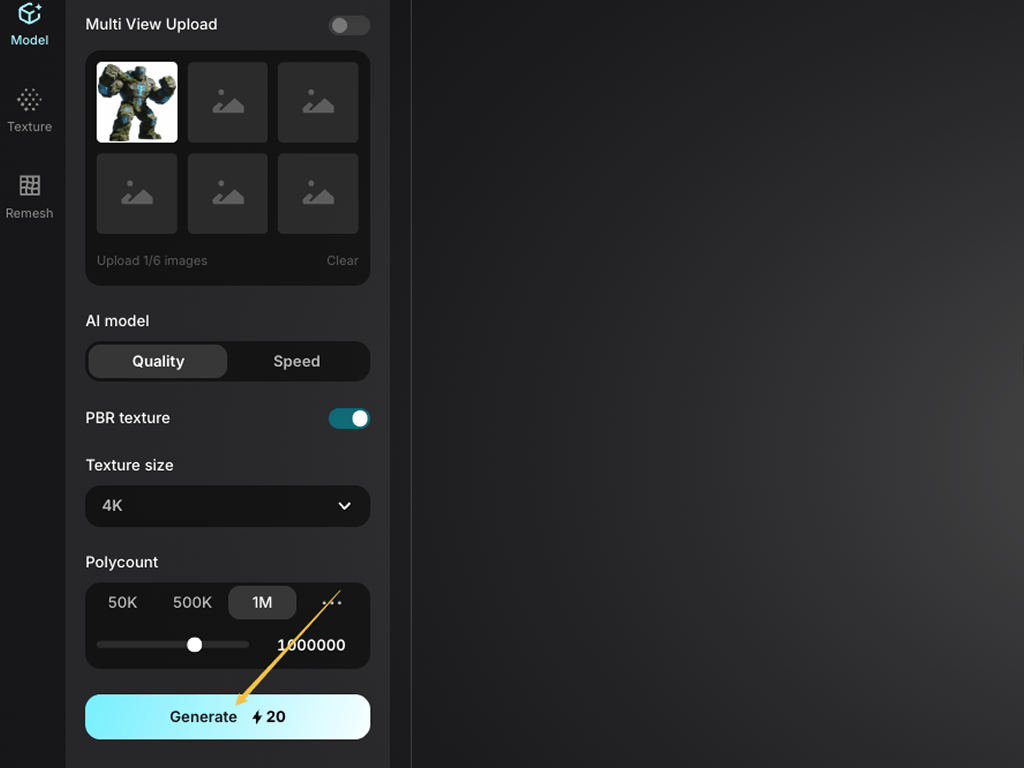
Step 2: Adjust Settings (or Keep the Defaults)
By default, Triverse uses: Quality model · PBR textures on · 4K texture · 1M polycount.
For this example, we keep the defaults — they're a solid starting point for a hero character asset. And then click Generate.
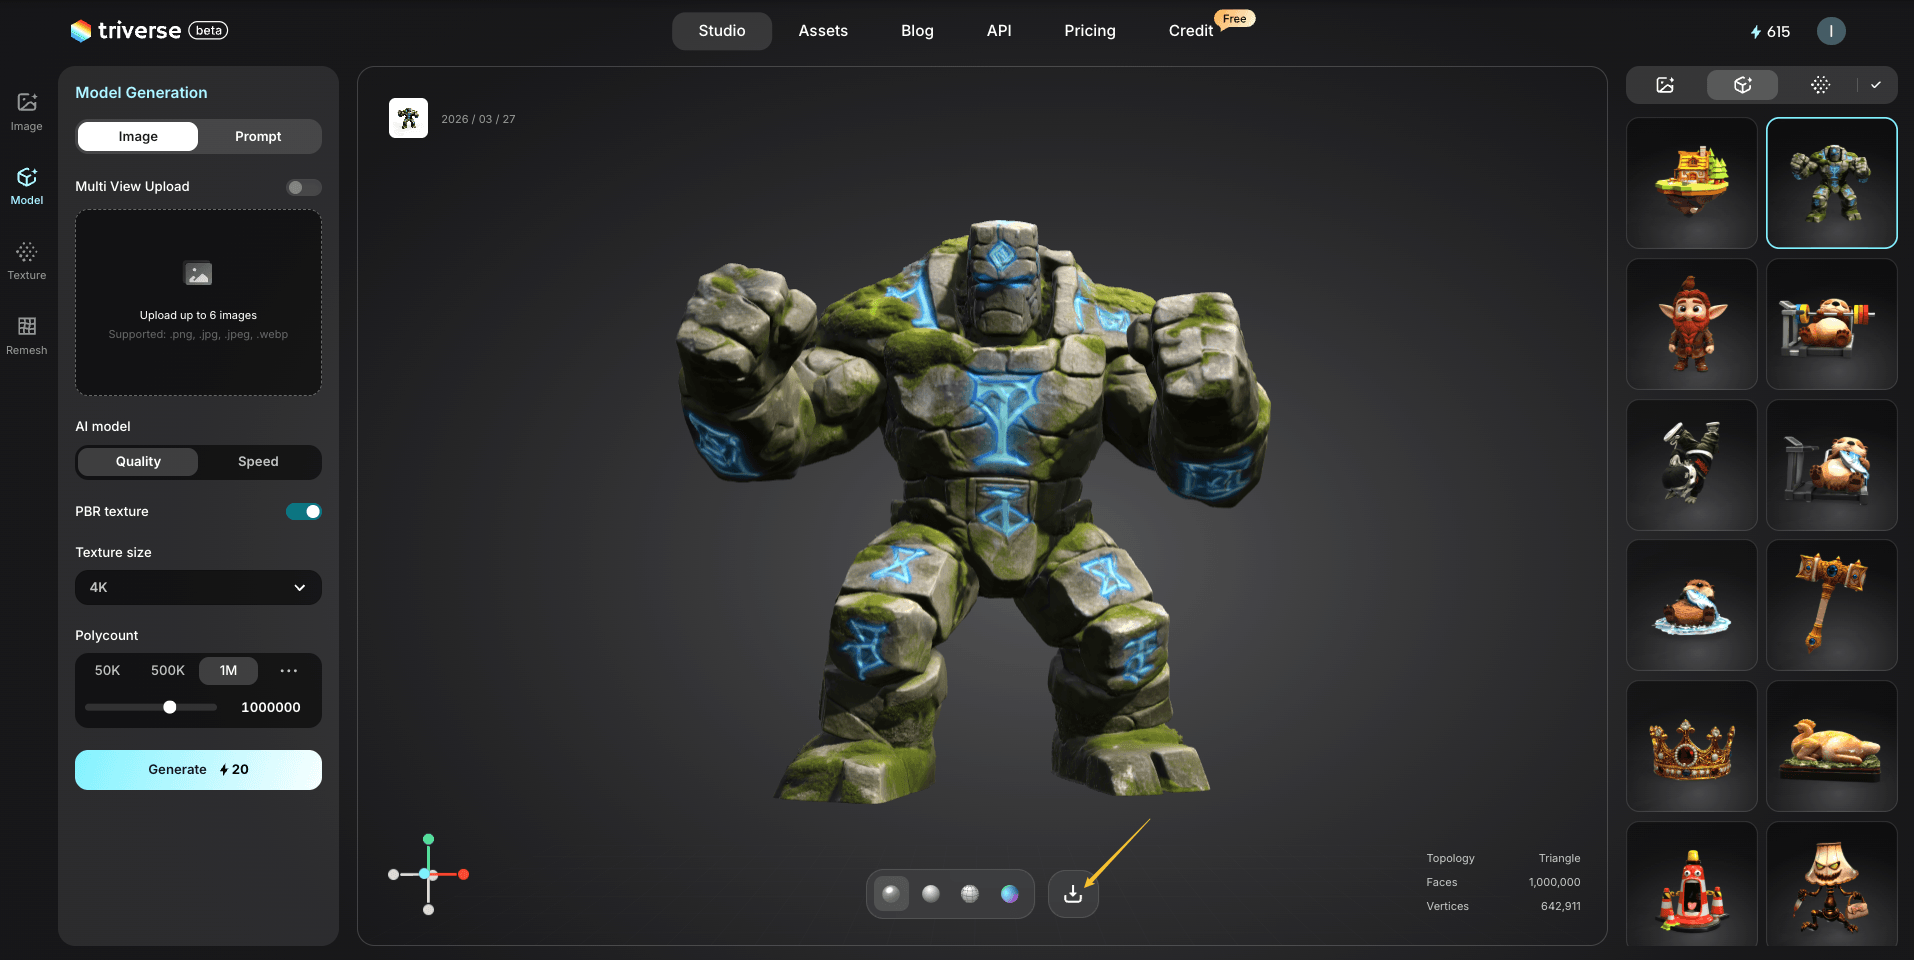
Step 3: Export
Once the model is generated, export it in .GLB / .OBJ / .STL / .3MF / .FBX / .USDZ format for further use.
💡 Bonus: Don’t have an image?
You can generate one using ChatGPT or Triverse’s built-in Text to Image feature.
To generate a high-quality image, your prompt should include:
- Style (e.g., realistic, stylized)
- Color (e.g., blue and white)
- Key details (e.g., shape, material, features)
- Background (e.g., plain background, studio lighting)
Below is a sample prompt; you can copy and try to generate a picture directly:
a muscular fantasy ogre, crouching pose, large fists on the ground, rough stone-like skin, small tusks, angry face, wearing a torn cloth, stylized realistic 3D character, clean white background, soft studio lighting, high detailYou can refine the prompt if the result doesn’t meet your expectations.
Generation Settings
Now that you've seen the full workflow, here's what each setting actually does, and when to change it.
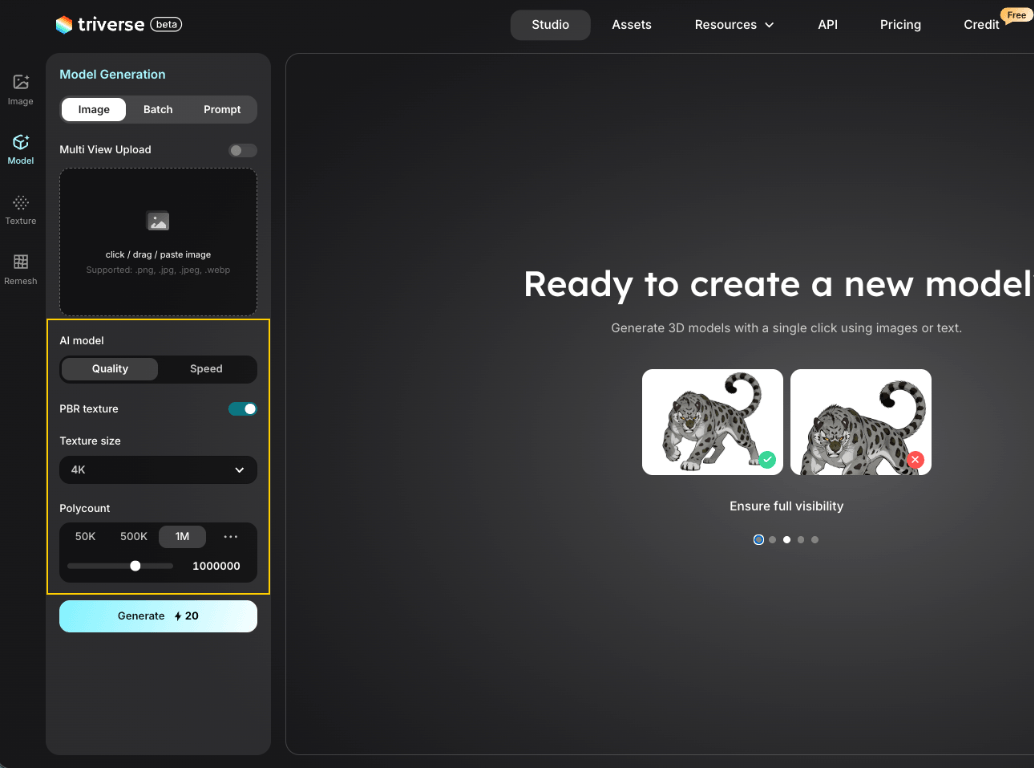
AI Model: Quality vs. Speed
Quality | Speed | |
Generation time | ~90s | ~60s |
Mesh accuracy | High | Medium |
Best for | Hero assets, characters | Prototyping, background props |
- Quality mode takes longer but produces more accurate geometry — better edge loops, cleaner topology, more faithful proportions.
- Speed mode is great when you need to iterate fast or generate a batch of background props. The output is slightly rougher, but often good enough.
PBR Texture: On vs. Off
PBR (Physically Based Rendering) adds realistic material properties to your model — color, surface roughness, metallic sheen.
- PBR On: The stone monster looks like actual stone. Rough, matte, with subtle color variation across the surface.
- PBR Off: The model has basic color only. It looks flat — like a painted plastic toy.
For game assets, keep PBR on. Turn it off only if you need a clean untextured mesh for further manual texturing in Blender or Substance Painter.
Texture Size: 1K / 2K / 4K
Texture size controls how sharp the surface detail looks up close.
1K (1024×1024) | 2K (2048×2048) | 4K (4096×4096) | |
File size | Small | Medium | Large |
Detail | Low | Medium | High |
Best for | Mobile, background props | General use | Hero assets, close-up renders |
- When to use 4K: Main characters, hero props, anything the camera gets close to.
- When to use 1K: Background objects, mobile games, assets the player rarely looks at closely.
Polycount: 50K – 1.5M
Polycount controls how much geometric detail the mesh has. More polygons = more accurate shape, but heavier on performance.
50K | 500K | 1M | |
Performance | Very light | Balanced | Heavy |
Shape accuracy | Low | Good | High |
Best for | Mobile, background | General use | Hero assets, rendering |
- 1M polygons is the default — suitable for main characters and high-end rendering. And Triverse can support you in adjusting the settings up to 1.5M.
- 50K–500K is better for low-poly background props, mobile games, or anything that appears small on screen.
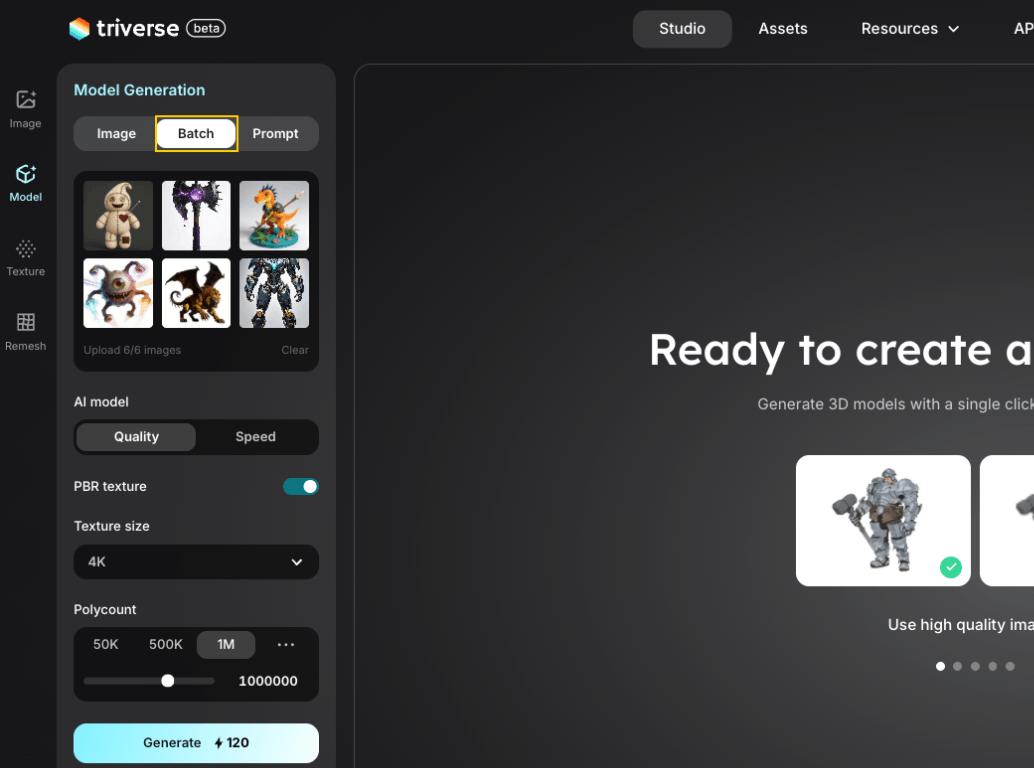
💥 Batch Image to Model: Generate Multiple Models at Once
Need to convert several images to 3D at once? Triverse AI also supports batch processing — upload up to 6 images simultaneously and generate multiple models in a single batch.
When to Use
- Quick prototyping: generate a full set of props, weapons, or characters in one go
- Style consistency: create a collection of assets that share visual coherence
- Time savings: no need to repeat the workflow for each individual model
How to Use
- Go to Triverse Studio → Model Generation → Batch
- Select multiple images (max 6)
- Adjust settings or keep defaults — batch applies the same settings to all
- Click Generate
- Download each result individually when complete.
💡 Tip: Keep batch sizes reasonable. Processing 6 high-resolution images simultaneously takes longer than generating one. For best results, use consistent image quality across the batch.
Advanced: Multi-View Enhancement (Coming Soon)
Got multiple angles? Get better results.
Instead of relying on a single image, upload up to 4 views of the same object, including front, back, left, and right. Triverse AI uses all perspectives simultaneously to produce a more accurate 3D model.
When to Use Multi-View
- Complex or ambiguous silhouettes from one angle (vehicles, armor, creatures)
- Higher accuracy required — single-image inference involves guesswork
- Characters or figures where back/side details matter
- Reduce revision cycles by getting closer on the first try
How to Use Multi-View
- Enable the Multi View Upload option in Model Generation at Triverse Studio.
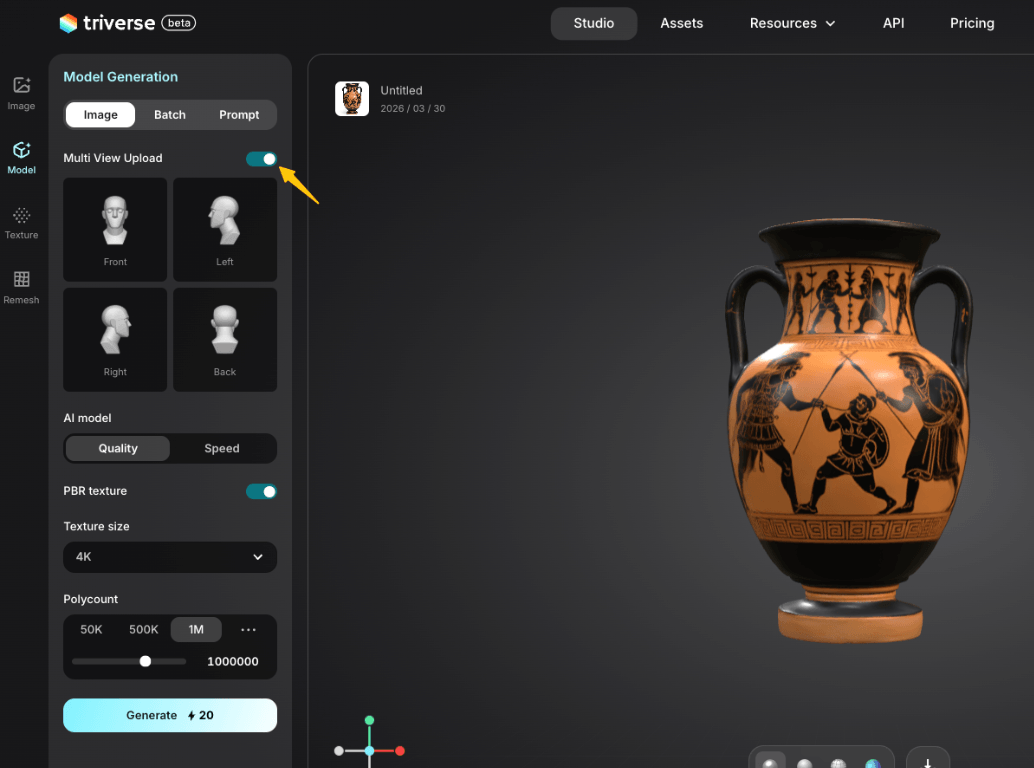
- Upload your views:
- Front view (required) — primary reference.
- Back view (optional) — rear details.
- Left / Right view (optional) — add one or both sides.
- Keep all views consistent: same object, similar lighting, similar background, similar scale
- Click Generate. Triverse fuses all perspectives into one coherent model
⚠️ All views must be of the same object. Mixed references (different poses or sizes) will confuse the AI.
Quick Tips
✅ Consistent lighting across all views
✅ Object centered and similarly scaled in each frame
✅ Aligned shots at similar height/angle
❌ Don't mix different poses
❌ Don't use 4 views when a single clean front shot works fine
Best Use Cases
Image to 3D is a versatile starting point. Here are the scenarios where it shines:
- Game Asset Production
Rapidly convert concept art or fan art into game-ready 3D models. Use for NPCs, props, weapons, and environment pieces. Adjust polycount based on whether it’s a hero asset or background filler. - 3D Printing & Miniatures
Turn illustrations or product photos into printable 3D models. Great for tabletop game miniatures, custom figurines, or product prototypes. Scale and hollow as needed in your slicer software afterward. - Product Design & Prototyping
Quickly visualize 2D concept sketches as 3D forms. Useful in early ideation phases to evaluate silhouette and proportions before committing to full 3D modeling. Share with stakeholders for fast feedback. - Architectural & Interior Visualization
Convert sketches of furniture, fixtures, or architectural elements into 3D models for renders and virtual walkthroughs. PBR textures help materials feel authentic. - VR/AR Content Creation
Generate 3D objects for virtual reality experiences or AR applications. Mobile AR often requires simple, low-poly geometry — adjust polycount settings accordingly. - Tabletop & Board Game Design
Create custom game pieces, terrain tiles, or decorative elements from artwork. Low-poly output works well for stylized board game aesthetics. - Marketing & Advertising
Transform product photos or illustrated mascots into 3D versions for commercials, promotional materials, or interactive web experiences. - Educational & Historical Reconstruction
Reconstruct 3D representations from historical artwork, scientific illustrations, or museum specimens. Useful for digital archives and educational content. - Character Design Exploration
Explore multiple character designs quickly. Use Image to 3D as a springboard, then refine in Blender or ZBrush. Especially useful for stylized or non-realistic characters. - Indie Developer Workflow
Solo developers and small studios can move from 2D concept to 3D prototype in minutes — no dedicated 3D artist required for early prototypes.
Try It Now
Head to Triverse Studio and generate your 3D models for free now!