Best 3D Modeling Software for Beginners (2026)
9 beginner-friendly tools for AI 3D, 3D art, CAD, game models, and more, with clear guidance on learning curve, cost, and where each tool can take you.
September 21, 2026
For many beginners, choosing a 3D modeling program is more confusing than modeling itself. Tools differ widely in how they work, what they can do, and how much they take to learn. A feature-rich application can make the first steps harder, while an overly simple one may reach its limits quickly.
Ease of use is only part of the decision. What the software is built to create, which concepts it requires, how far you can progress after the basics, and whether its pricing fits your plans all shape the learning experience.
This guide compares 9 3D modeling programs for beginners across core features, key advantages, learning curve, room to grow, pricing, and best use cases. The goal is to find a tool that fits what you want to make now and can support what you want to learn next.
3D Modeling Software for Beginners: Quick Comparison
Software | Best for | How It Works | Learning Curve | Price or Free Access |
|---|---|---|---|---|
Tinkercad | First-time modeling and simple 3D printing | Combine, subtract, and resize preset geometric shapes | Low | Free to use; confirm the applicable terms before commercial use |
Triverse AI | Generating a starter model from an image or text | Use AI to create a model from a reference image or description | Low | Free credits are available; generating models and textures consumes them |
Blockbench | Low-poly, pixel-art, and Minecraft models | Build low-poly forms and paint pixel textures directly | Low to moderate | Fully free and open source; original work can be used commercially |
SketchUp | Architecture, interiors, and furniture design | Draw flat outlines, then push and pull them into solid forms | Low to moderate | The free web version is for non-commercial use only; professional features require a paid plan |
Nomad Sculpt | Sculpting characters, animals, and figurines | Use touch-based brushes to push and shape a model's surface | Low to moderate | Sold as a one-time purchase on each platform; limited trials are available on some platforms |
Onshape | Browser-based parametric CAD and collaborative design | Build precise parts with sketches, dimensions, and constraints | Moderate | The free plan is limited to non-commercial use, and every document is public |
Autodesk Fusion | Functional parts, product design, and an introduction to manufacturing | Organize designs with sketches, parameters, a timeline, and components | Moderate | A feature-limited free version is available to eligible personal, non-commercial users |
Blender | 3D art, characters, scenes, and animation | Start with mesh modeling or sculpting, then progress into a complete production workflow | High | Fully free and open source for both personal and commercial work |
FreeCAD | Local, open-source parametric CAD | Build engineering models with sketch constraints, features, and workbenches | High | Fully free and open source, with commercial use and private local files supported |
How to Choose Your First 3D Modeling Tool
Your first 3D modeling program should help you complete a specific project while teaching skills you can continue to use. Start with the following four questions.
- Decide What You Want to Make
Where the model will be used directly affects the software choice. Parts that need repeated dimensional changes are better suited to parametric CAD. Characters and artistic forms usually call for digital sculpting or mesh modeling, while architecture and interiors rely more on spatial modeling. If you already have a reference image and want to test the look first, AI can generate a starter model.
- Choose a Modeling Method That Suits You
Different programs ask you to think in different ways. Shape assembly, push/pull modeling, and touch-based sculpting all provide immediate visual feedback. Parametric CAD depends on dimensions, constraints, and feature relationships, while comprehensive mesh software introduces topology, interaction modes, and model organization. AI reduces the manual work at the start, but the generated structure still needs to be checked and refined for its intended use.
- Think About What You Want to Learn Next
If you only want to make a few simple models, a focused tool will usually get you there faster. If you plan to take 3D modeling further—whether into 3D art, product design, or manufacturing—a steeper learning curve may be worthwhile when the same software can support those later stages.
- Check Your Device, Budget, and Usage Restrictions
Check that the software supports your usual device and that its browser, desktop, or touch workflow suits how you prefer to work. Free plans may restrict commercial use, file privacy, export formats, or advanced features. One-time-purchase and subscription products may also use different licenses or purchases across platforms.
Prioritize software that can take you through your first complete project and offers a clear path forward. That matters more than the length of its feature list.
How We Selected These Tools
We reviewed each program's published features, pricing, learning materials, and common workflows, then evaluated its suitability for beginners using the following criteria:
- Core features and starting method: How a beginner starts modeling and what that approach is designed to create.
- Learning curve: Which operations and concepts are needed for a basic model, and where the main obstacles appear.
- Room to grow: What remains to learn after the basics and how far the same program can support that progress.
- Price and usage conditions: Whether the software is free and whether commercial use, file privacy, or important features are restricted.
The products are organized by modeling approach and creative direction rather than ranked from best to worst. The following sections examine how each tool works, what its learning path looks like, and who it suits best.
Tinkercad (Simple Shape-Based 3D Modeling for Beginners)
Ease of Learning: ⭐⭐⭐⭐⭐丨Room to Grow: ⭐⭐
Tinkercad is an online tool for building models from preset geometric shapes. Drag a shape into the workspace, adjust its size, and the result appears immediately. That direct feedback helps beginners understand spatial relationships and basic structure, making Tinkercad a useful introduction to simple modeling and CAD for 3D printing. More complex designs eventually call for a more flexible approach.
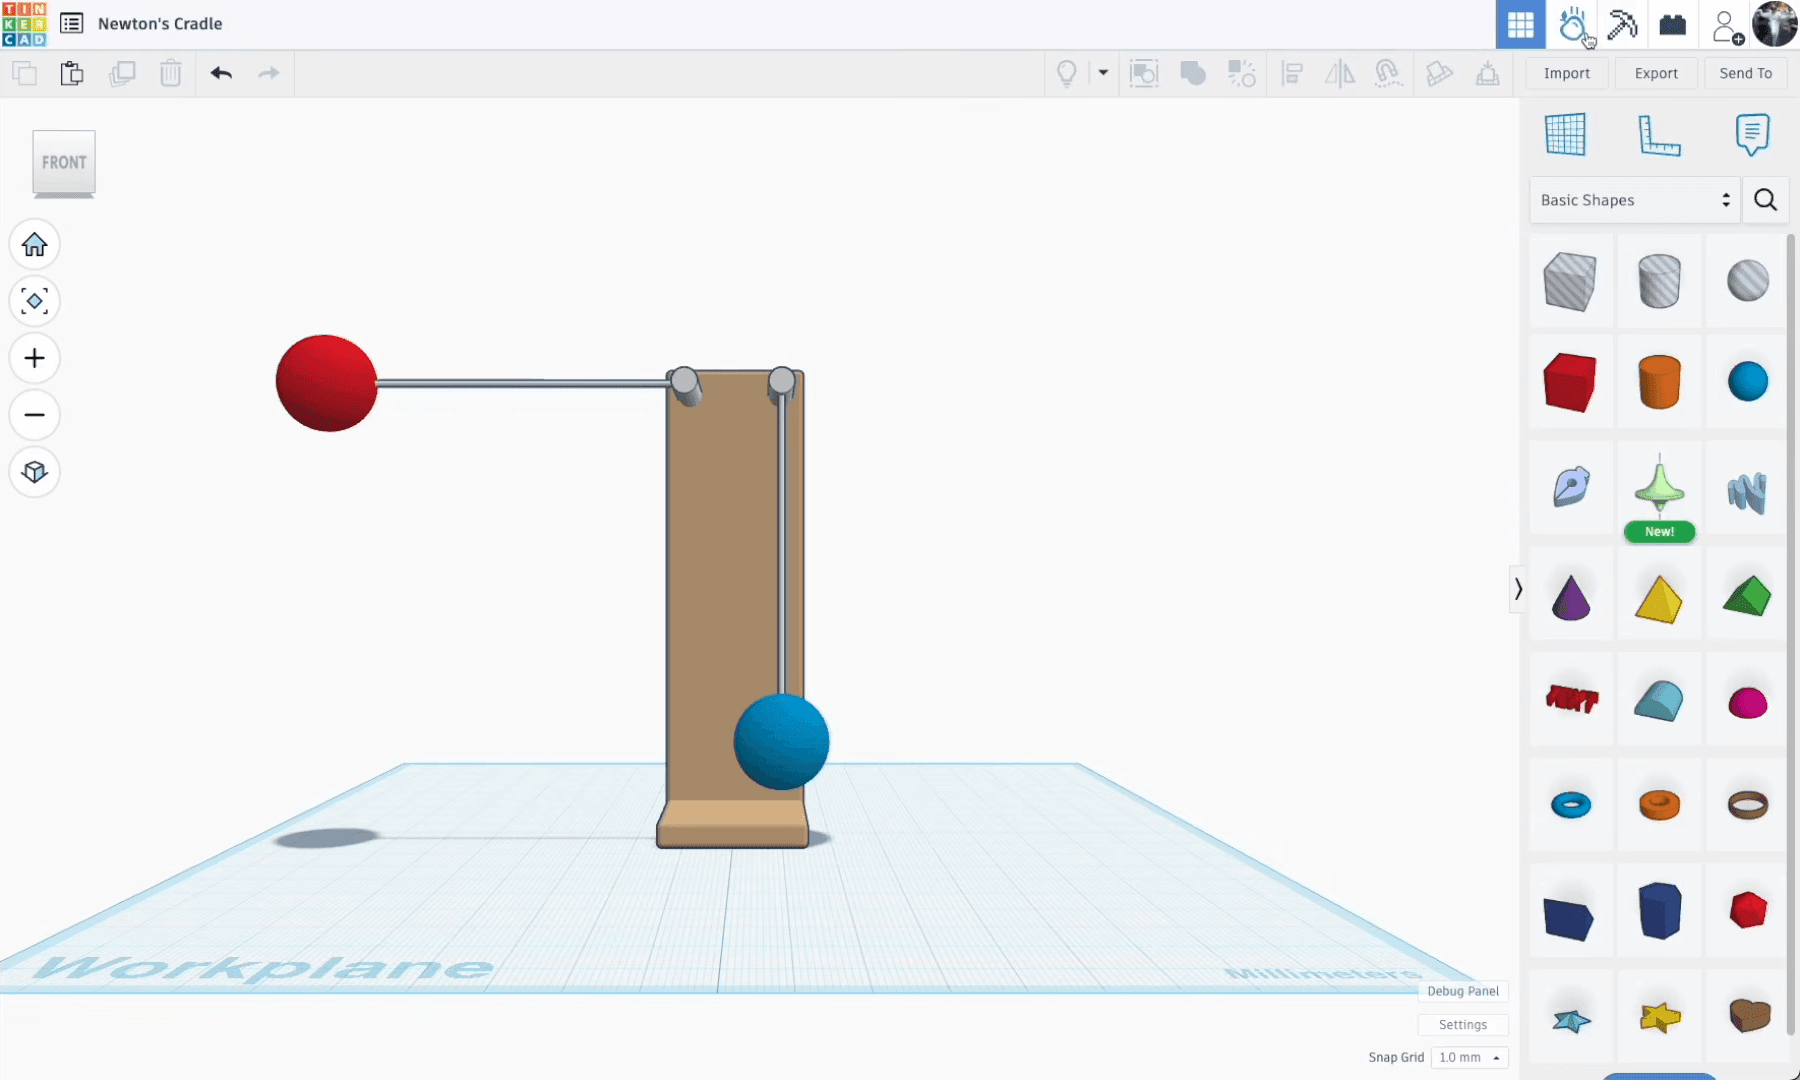
(image source: Tinkercad official)
⭐Core Features
- Build models from ready-made shapes: Combine, layer, or subtract boxes, cylinders, and other primitives to create the required structure without complex vertex, edge, or face editing.
- Control dimensions and positions directly: Use numeric values, movement, and alignment tools to size and place shapes accurately.
- Move quickly into 3D printing: Export the model in a common format such as STL, then take it directly into slicing and printing.
✅Pros
- Changes are easy to read: Moving or resizing a shape produces an immediate visual result, helping beginners develop spatial awareness.
- Runs in a browser: Open the editor on a home computer or classroom device without installing a desktop application.
📖Learning Curve
- Difficulty: Low. Most models are built by dragging, resizing, and combining ready-made shapes, so the controls map directly to what happens on screen and introduce very few rules at the start.
- Main challenge: Judging positions in 3D space. Shapes that appear aligned from one angle may be floating, overlapping, or disconnected when viewed from another.
- Learning resources: Extensive and well suited to step-by-step learning. Official activities lead users through specific models, while supporting tutorials and lesson plans make it easy to learn one task at a time.
💡Room to Grow
After mastering the basic controls, users can learn numeric dimensions, workplanes, alignment, and repeated structures to create more complex and accurate printable models. Parametric CAD becomes the better next step when hole positions or spacing need to update automatically with the main dimensions.
💰Pricing
Tinkercad is free to use, including basic modeling, design storage, and export to common formats. Autodesk primarily positions the service for education and personal creation, so anyone planning to sell their work should confirm which terms apply.
👍🏻Best For
Tinkercad is best for first-time 3D modelers who want to understand spatial relationships through simple controls, as well as people just getting started with 3D printing. Small printable objects built from basic geometry make good practice models.
Triverse AI (AI-Powered 3D Generation from Images or Text)
Ease of Learning: ⭐⭐⭐⭐⭐丨Room to Grow: ⭐⭐⭐
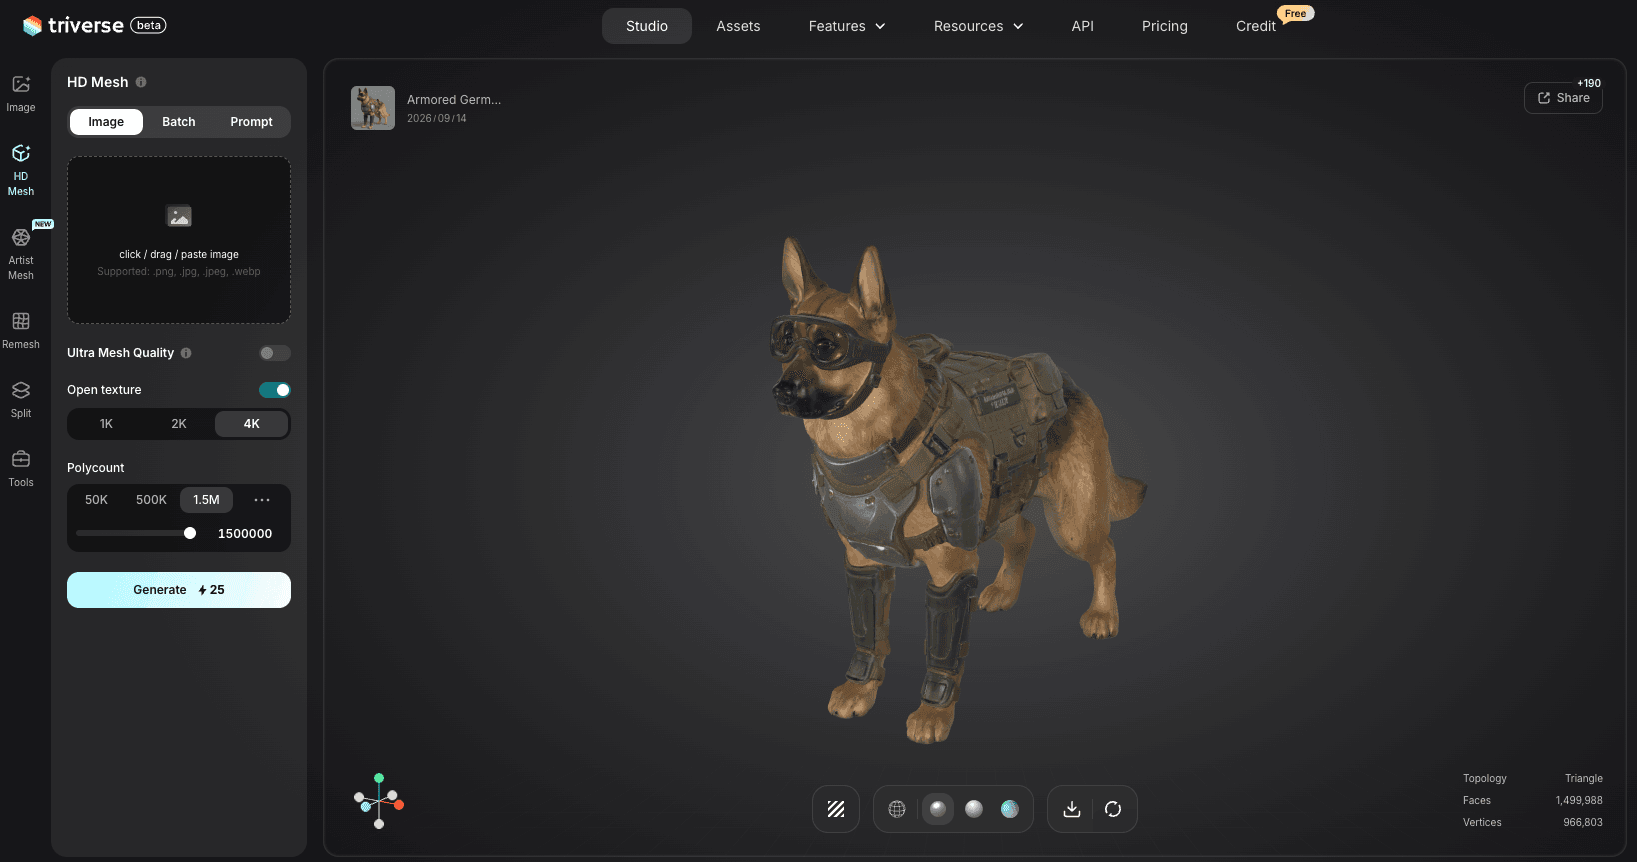
Triverse AI is an online AI tool that creates starter 3D models using image-to-3D or text-to-3D generation. Beginners can first obtain a model they can rotate and inspect, then decide how it needs to be refined. The generated structure and detail still require careful review. Triverse AI uses a credit-based system and provides several ways to earn free credits.
⭐Core Features
- Generate a model from an image or text: Use image-to-3D or text-to-3D to produce a starter form, reducing the amount of geometry that has to be built by hand.
- Generate textures and surface appearance: Use an image or text prompt to add color, patterns, and material qualities, making the overall visual direction easier to judge.
- Adjust the mesh and continue editing: Inspect the model structure, change the polygon count and mesh type, then import the result into Blender or another application for detailed refinement.
✅Pros
- Turns an idea into a 3D form quickly: Beginners can inspect a generated model before committing to manual modeling, placing the early focus on evaluating and improving the result.
- Different visual directions are easy to compare: Replace the reference image or revise the description to generate another option without rebuilding each model by hand.
📖Learning Curve
- Difficulty: Low. Uploading an image or entering text is enough to start. Beginners can obtain a model first, then gradually learn concepts such as vertices, edges, faces, and mesh structure.
- Main challenge: Evaluating and controlling the result. The AI must infer backs, occluded structures, and unclear details, so each generation may differ. Users need to inspect the model from several angles, then troubleshoot generation issues before continuing to refine the geometry.
- Learning resources: The fundamentals are well covered. Official tutorial, interface documentation, and video demonstrations cover input image preparation, generation, inspection, and export. Further refinement requires tutorials for the 3D application used in the next stage.
💡Room to Grow
After generating a starter model, users can learn to choose better references, evaluate inferred backs and occluded areas, generate textures, inspect the mesh, and control model complexity. Once imported into Blender or another 3D application, the model can be cleaned up and refined before further editing, texturing, or animation.
💰Pricing
Triverse AI currently offers a free way to get started. Registration and task completion provide credits, while generating models and textures consumes them. The company states that generated models can be used commercially. Paid plans are still listed as coming soon, so download, publication, and attribution conditions should be checked against the final terms.
👍🏻Best For
Triverse AI is best for beginners and independent creators who already have a written idea or reference image and want to reduce the manual work needed to obtain a starter model. It is particularly useful for testing the direction of a character, prop, or other visual concept before refining the result for its final use.
Blockbench (Beginner-Friendly Low-Poly Modeling and Pixel Texturing)
Ease of Learning: ⭐⭐⭐⭐丨Room to Grow: ⭐⭐⭐☆
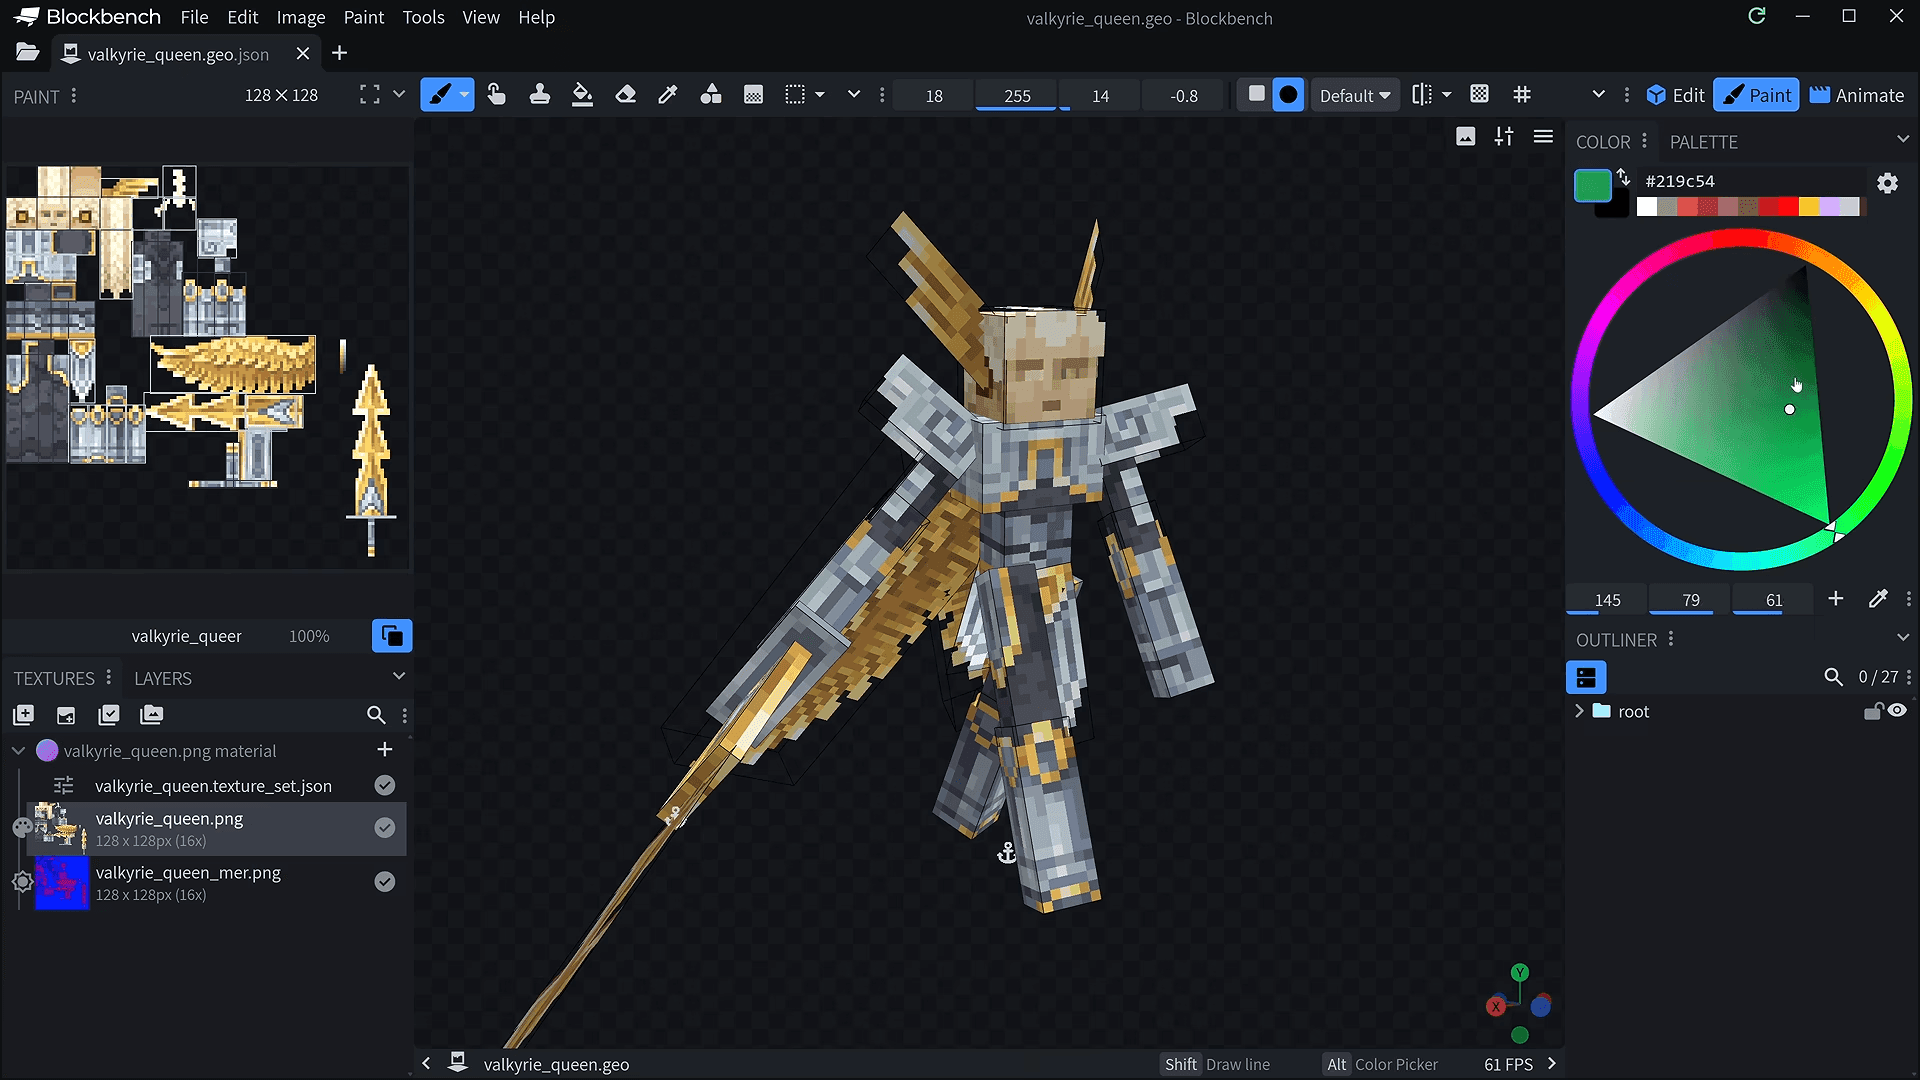
Blockbench gives beginners a focused way to create low-poly and block-based game models, with modeling, texture painting, and basic animation in one interface. Basic forms are easy to understand, while format selection, skeletal animation, and export rules take more study. The software is free and open source, making it a natural starting point for Minecraft and pixel-art work.
(image source: Blockbench official)
⭐Core Features
- Focused on low-poly and block-based forms: Start with simple geometry, then edit vertices, edges, and faces when the model needs more control.
- Paint pixel textures directly: Modeling and texture painting share one workspace, so the form and surface pattern can develop together.
- Game-oriented formats and animation support: Blockbench supports bones and keyframes, with dedicated formats for targets such as Minecraft. The selected format determines which animation and export features are available.
✅Pros
- A focused learning path: The tools are organized around low-poly forms, textures, and animation, giving beginners a clear sequence to follow.
- Modeling and texturing stay connected: Surface patterns can be painted as the form changes, making shape and color easier to judge together and reducing application switching.
📖Learning Curve
- Difficulty: Low to moderate. Basic low-poly modeling and pixel texturing are relatively easy to understand. Animation and game-model production also require familiarity with project formats, model structure, and export rules.
- Main challenge: Choosing the right format. Different formats expose different modeling, animation, and export capabilities. The wrong choice may require file conversion or structural changes later.
- Learning resources: Extensive, but best searched by format. The official quick-start guide covers the interface and basic modeling, while the Minecraft sections of the Wiki explain structure, animation, and export rules for different content types.
💡Room to Grow
After learning basic low-poly modeling, users can progress into pixel texturing, skeletal animation, and different game formats, with plugins adding further tools and export options. Blockbench can take low-poly characters and props into a game. Realistic materials, detailed sculpting, and complete scenes call for Blender or another comprehensive 3D application.
💰Pricing
Blockbench is fully free and open source. Both the web and desktop versions include modeling, texture painting, animation, and export, and original work can be used commercially.
👍🏻Best For
Blockbench is best for beginners interested in low-poly, pixel-art, and block-based styles, as well as Minecraft creators and independent game developers. Minecraft models, pixel-textured characters, and low-poly content with simple animation all make useful practice work.
SketchUp (Push/Pull Modeling for Architecture and Interiors)
Ease of Learning: ⭐⭐⭐⭐丨Room to Grow: ⭐⭐⭐⭐
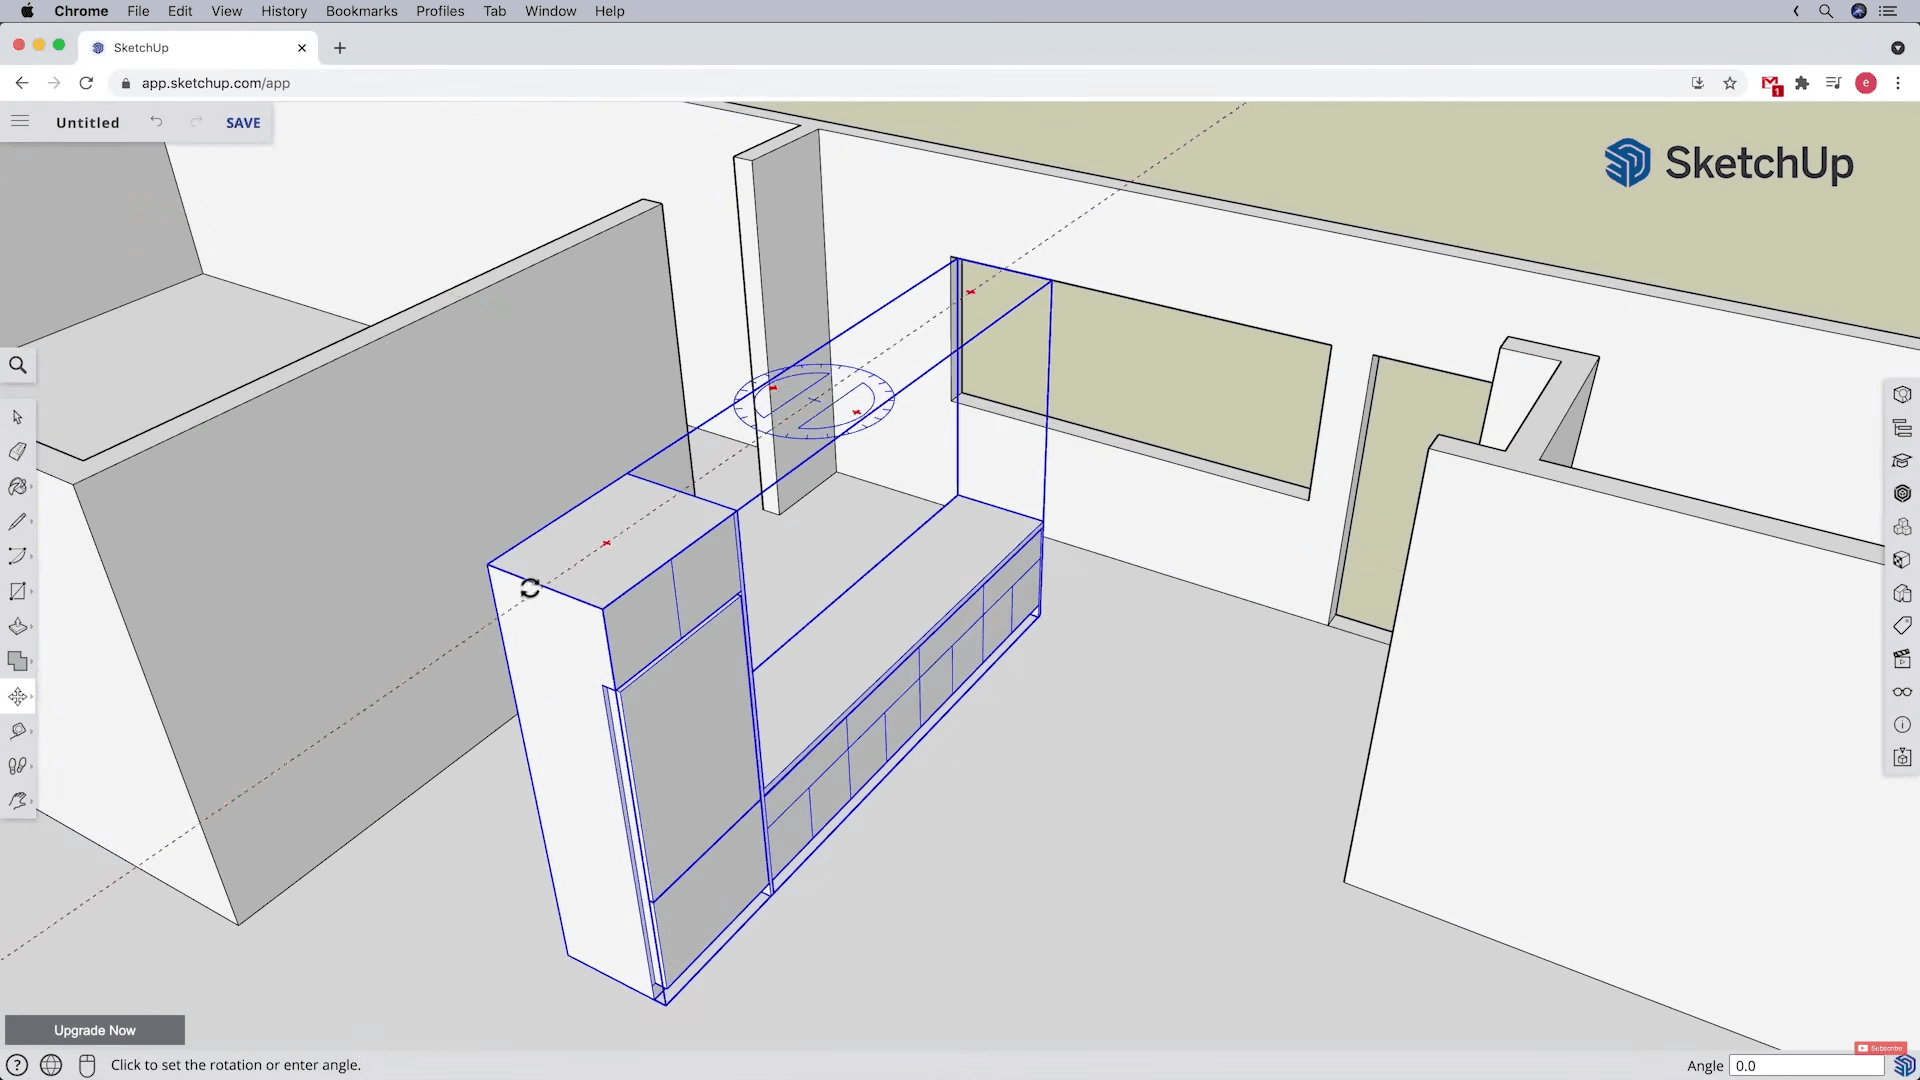
SketchUp starts with flat outlines, then uses Push/Pull to turn them into three-dimensional space. The basic modeling logic is easy to understand, while larger models require a stronger grasp of groups, components, and geometry organization. It is a useful introduction to spatial design, and its free web version is limited to non-commercial use.
(image source: SketchUp School)
⭐Core Features
- Push/pull modeling: Draw a 2D outline, then push or pull it into walls, floors, and furniture volumes. The process mirrors the way many beginners move from a plan to a space.
- Groups and components: Groups separate different structures, while components manage objects that need to be reused or updated together.
- 3D Warehouse model library: Ready-made architectural elements and furniture can be placed directly into a design, reducing repetitive modeling.
✅Pros
- Turns spatial ideas into models quickly: Room layouts, building masses, and furniture dimensions can be developed into a three-dimensional design with little setup.
- Spatial designs come together efficiently: Basic modeling tools and ready-made models make it quick to create a design that can be reviewed and revised.
📖Learning Curve
- Difficulty: Low to moderate. Drawing an outline and pulling it into volume is intuitive, so beginners can complete a first room or building model quickly.
- Main challenge: Sticky geometry and model organization. Without groups and components, moving one structure may affect neighboring geometry. The problem becomes harder to manage as the model grows.
- Learning resources: Extensive and organized by field. SketchUp Campus and the Help Center cover the basic tools systematically, while community tutorials provide plenty of examples in architecture, interiors, and woodworking.
💡Room to Grow
After mastering Push/Pull, users can learn group and component management, more complex spatial structures, presentation, and design documentation. Paid versions and extensions can carry the same model into construction communication and professional drawing workflows, allowing SketchUp to remain the main tool for architecture, interiors, or furniture design.
💰Pricing
SketchUp Free runs directly in a web browser but is restricted to non-commercial use. Commercial work, desktop modeling, extensions, and LayOut require the appropriate paid plan.
👍🏻Best For
SketchUp is best for beginners who want to communicate architectural, interior, and furniture layouts quickly, as well as design students who do not yet need complex engineering rules. Spatial layouts, building masses, and simple furniture concepts make suitable introductory work.
Nomad Sculpt (Beginner-Friendly Touch-Based Sculpting)
Ease of Learning: ⭐⭐⭐⭐丨Room to Grow: ⭐⭐⭐☆
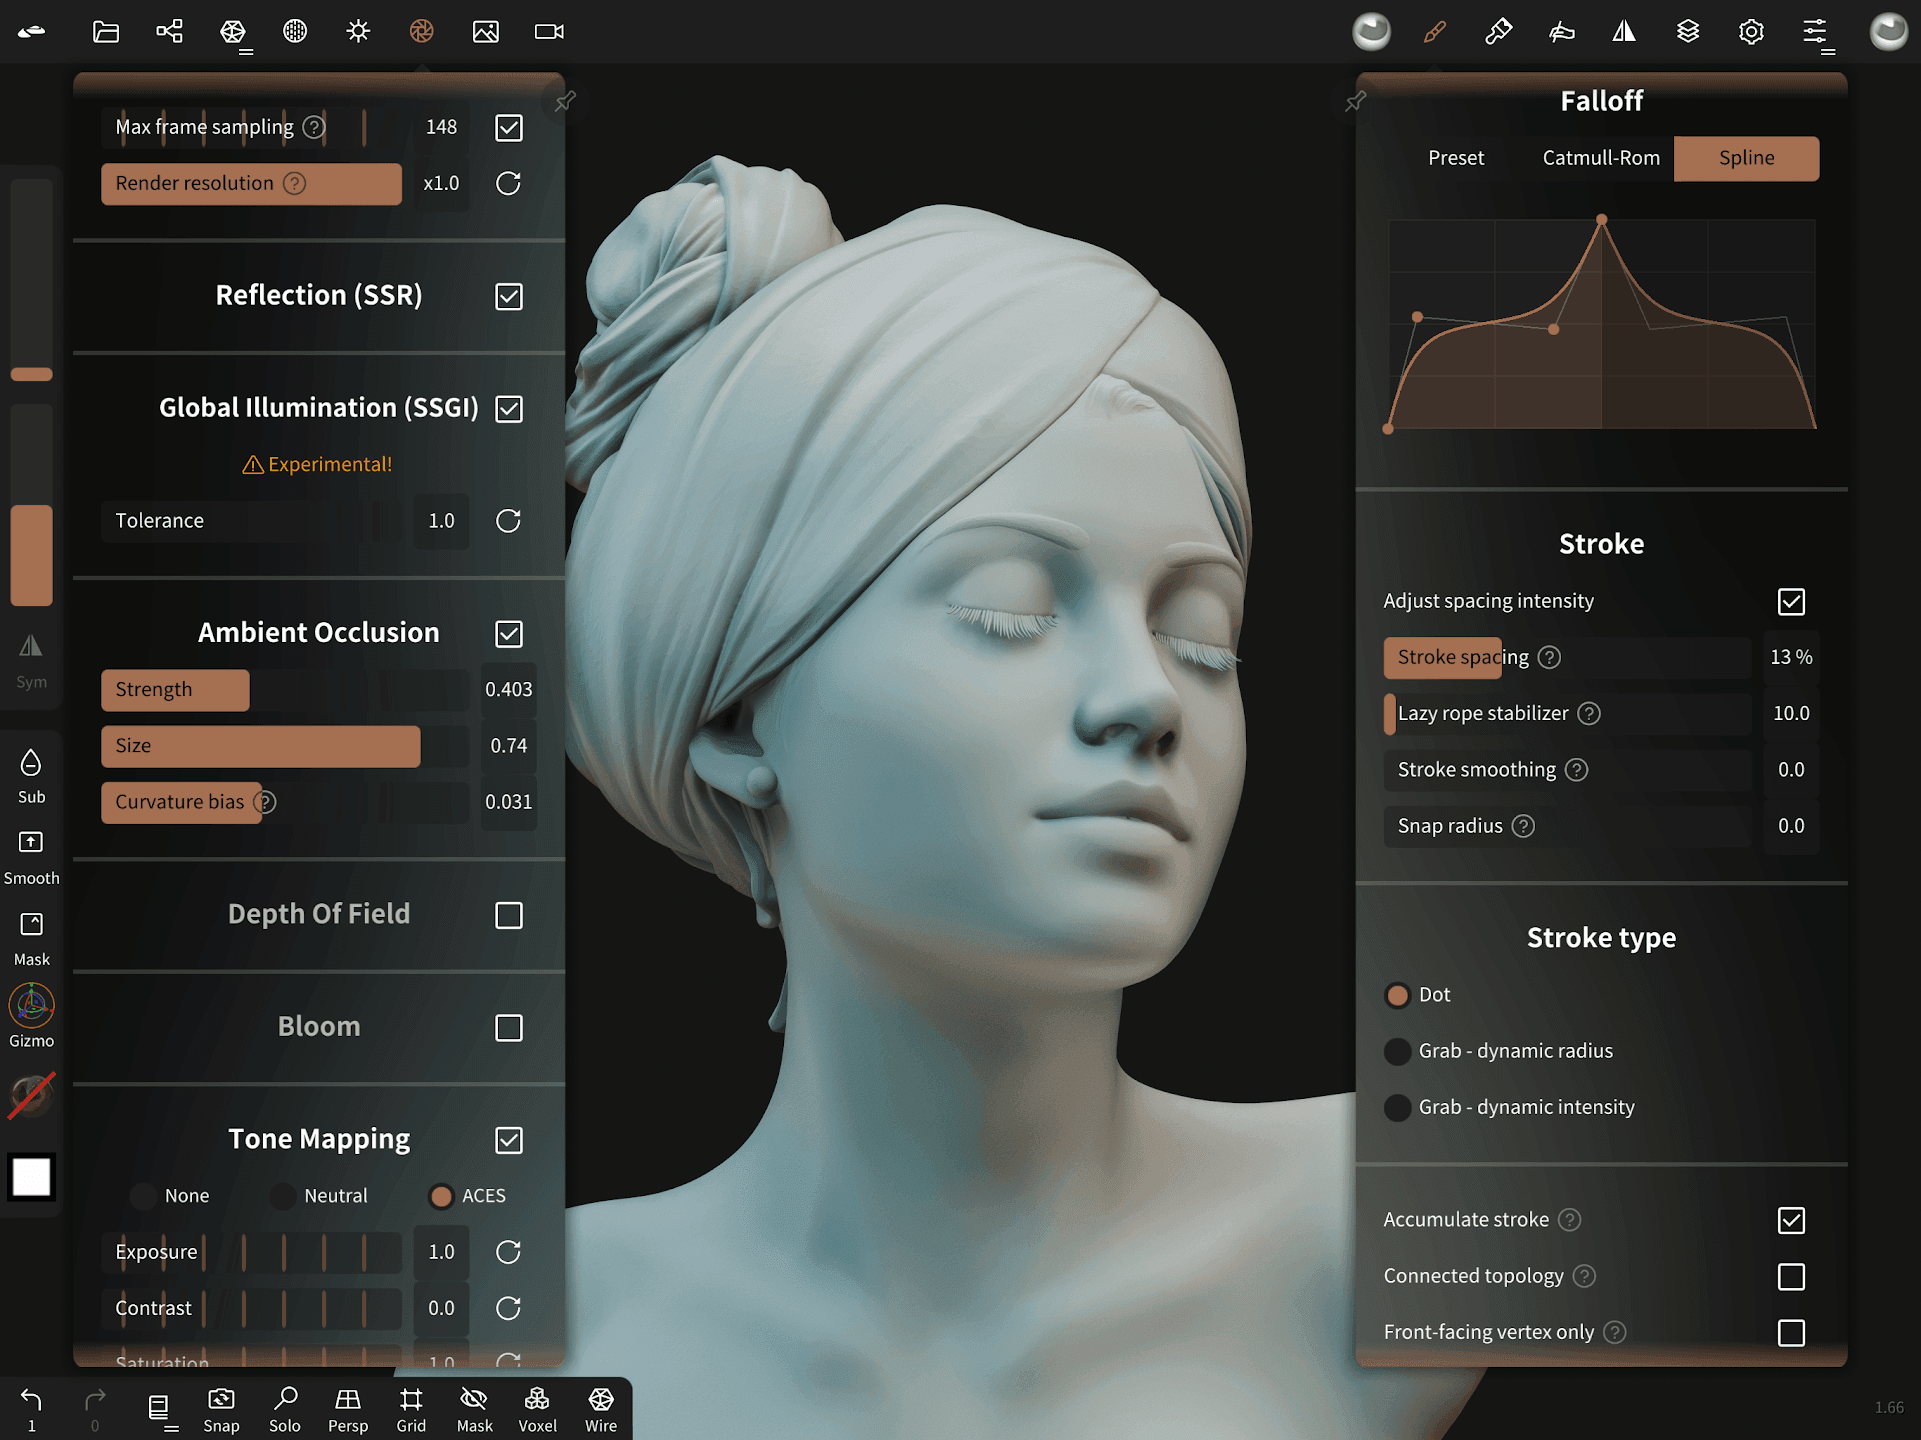
Nomad Sculpt is a digital sculpting application that feels much like shaping clay on screen, making it particularly well suited to tablets and styluses. The basic brushes are easy to understand, but convincing proportions and detail still take practice. Nomad Sculpt is sold as a one-time purchase on each platform, and some versions offer a limited trial.
(image source: Nomad Sculpt official)
⭐Core Features
- Sculpt the model surface directly: Push, pull, smooth, and shape the surface with brushes designed for touch-based organic modeling.
- Develop broad forms before fine detail: Symmetry, subdivision, and mesh-complexity controls help users begin with simple masses and gradually refine proportions and surface detail.
- Paint color and material properties directly: Apply color to the sculpture and adjust roughness and metallic appearance to create a basic finished look in the same application.
✅Pros
- Stylus interaction feels direct: The brush stroke and resulting form correspond clearly, making the workflow especially approachable for people with drawing or traditional sculpting experience.
- The main workflow fits on a tablet: Sculpting, painting, and presentation can all happen on a mobile device, making it easy to continue refining the model wherever you work.
📖Learning Curve
- Difficulty: Low to moderate. Pushing, pulling, smoothing, and painting are easy to understand, and the toolset remains relatively focused.
- Main challenge: Controlling proportion and the order of detail. Beginners often add local detail too early, then have to redo it when the larger form changes. Repeated subdivision can also make the model unnecessarily heavy. The difficulty comes mainly from observation and sculpting skill rather than the software itself.
- Learning resources: Strong for technical instruction. The official manual is useful for looking up brushes and settings, while complete sculpting videos from Dave Reed, Small Robot Studio, and other educators show how broad forms develop into local detail. Tutorials can teach the technique, but the final quality still depends on observation and artistic fundamentals.
💡Room to Grow
After learning the basic brushes, users can progress into detailed sculpting, layers, mesh reduction, and surface painting to create richer static models. Rigging, animation, and complete scenes require moving the model into a comprehensive 3D application.
💰Pricing
Nomad Sculpt is sold as a one-time purchase. The US iOS version is listed at approximately $19.99, while the Windows and macOS desktop versions cost about $35; some optional features may be sold separately. Check the license for the current platform and version before using the application in commercial work.
👍🏻Best For
Nomad Sculpt is best for beginners who enjoy drawing, sculpting, or stylus-based interaction and want to enter 3D creation through direct shaping. Character busts, stylized forms, and figurines all make suitable introductory work.
Onshape (Collaborative Browser-Based Parametric CAD)
Ease of Learning: ⭐⭐⭐丨Room to Grow: ⭐⭐⭐⭐☆
Onshape is a browser-based parametric CAD system for parts and multi-part structures with clearly defined dimensions. Beginners learn through sketches, dimensions, and geometric constraints, giving it a moderate learning curve. The free plan can be used for non-commercial learning, but every document created with it must be public.
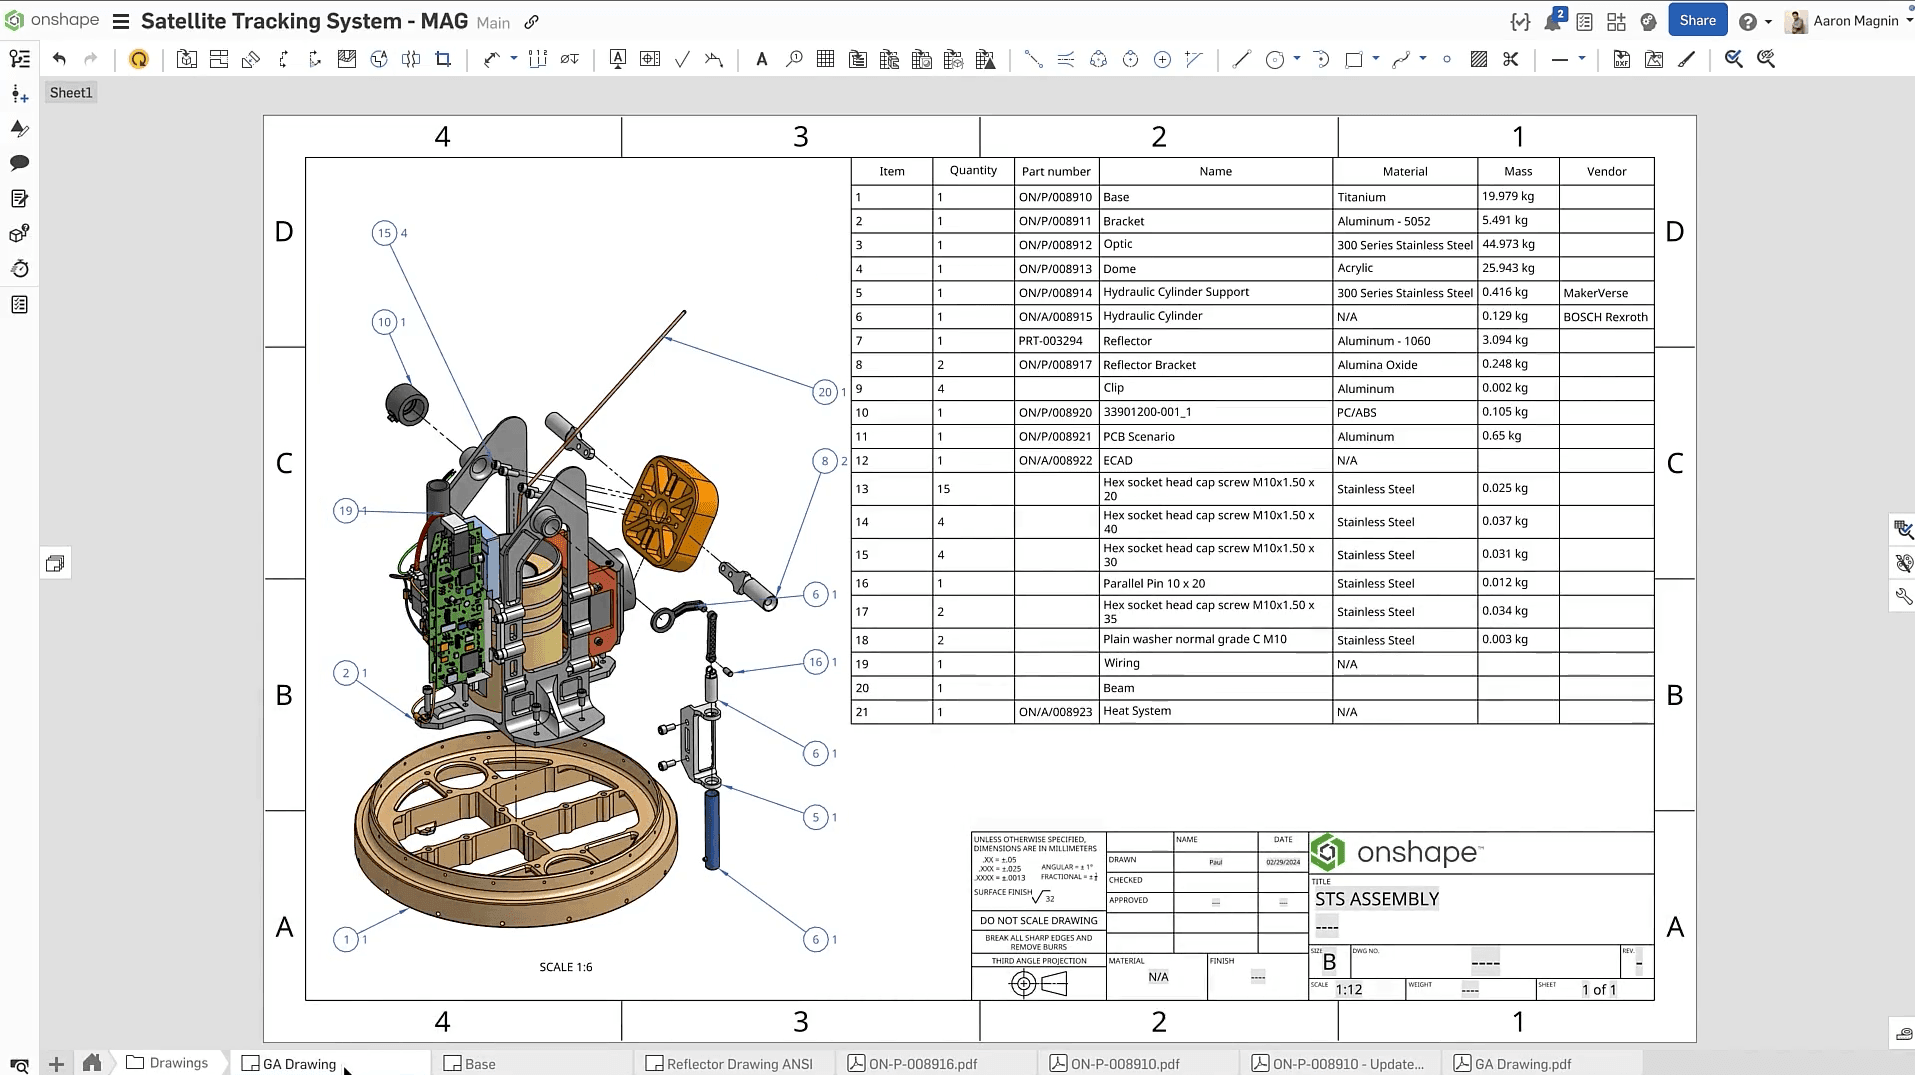
(image source: Onshape official)
⭐Core Features
- Browser-based parametric design: Build precise parts through dimensions and geometric relationships, then change the parameters to update the model structure.
- Multi-user editing: Once a document is shared, instructors, classmates, or team members can view, comment on, and edit the same design.
- Version and assembly management: Changes are recorded automatically, making it possible to inspect or restore earlier versions. Multiple parts can also be assembled to check connections and movement.
✅Pros
- Easy to continue across devices: Sign in through a compatible browser to access the same design from another computer.
- Makes feedback and troubleshooting easier: A shared document includes the sketches, parameters, and modeling steps, allowing an instructor to inspect the structure and locate revision problems directly.
📖Learning Curve
- Difficulty: Moderate. Basic sketching and solid modeling are not particularly difficult, but beginners need to understand how dimensions, constraints, and features control the model rather than focusing only on its current shape.
- Main challenge: Understanding parameter relationships. Changing one dimension or geometric relationship updates connected geometry and may break downstream features. Users need to identify which parameters truly control the design.
- Learning resources: Extensive and well structured. Onshape's Learning Center provides self-paced courses with exercises that move from sketches to parts and assemblies, helping beginners develop a parametric mindset instead of learning isolated commands.
💡Room to Grow
After learning sketch constraints and basic features, users can progress into complex parts, assemblies, and technical drawings. Versioning, branching, and collaboration then support a more complete product-design process. The learning path grows from individual parts into editable, traceable multi-part designs.
💰Pricing
Onshape Free is limited to non-commercial use, and all documents are public. Eligible students and educators can apply for a free Education plan. The Standard plan costs $1,500 per user per year and supports commercial work and private documents.
👍🏻Best For
Onshape is best for beginners who want to learn parametric CAD systematically in a browser, access designs across devices, or share models regularly with instructors and teammates. Dimension-driven functional parts and simple assemblies make suitable practice work.
Autodesk Fusion (An Introduction to Precise Parts and Manufacturing)
Ease of Learning: ⭐⭐☆丨Room to Grow: ⭐⭐⭐⭐⭐
Autodesk Fusion (formerly Fusion 360) is built for product design and manufacturing, with strong support for dimensionally precise parts and multi-component structures. Beginners need to understand how dimensions, constraints, the timeline, and components work together, giving Fusion a moderate learning curve. Eligible personal, non-commercial users can access a feature-limited free version, while commercial use and some advanced capabilities require a paid license.
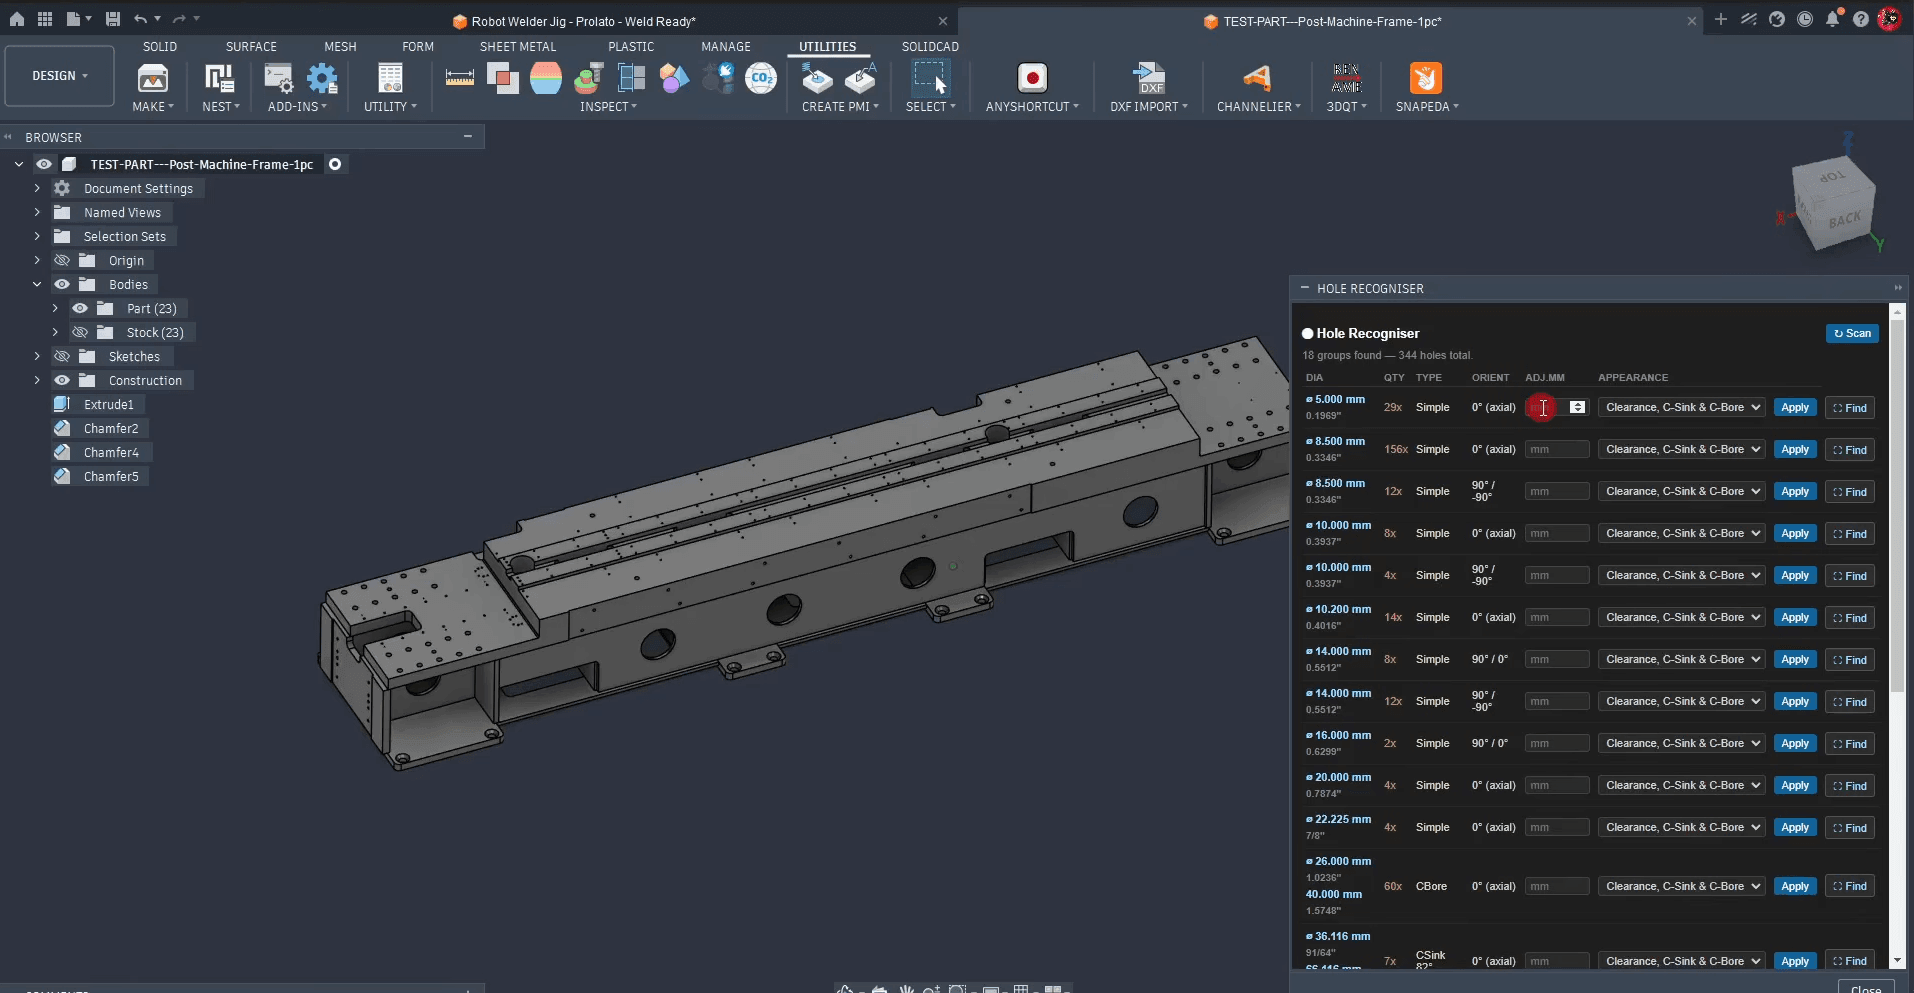
(image source: Autodesk Fusion official)
⭐Core Features
- Manage modeling through a timeline: Fusion records each operation in sequence, allowing users to return to an earlier step, revise a dimension or structure, and update the features that follow.
- Organize product structures with components: Separate parts can be managed as components and given relationships, allowing a single part to develop into a multi-component product.
- Connect design to manufacturing: Once a model is complete, it can move into preparation for 3D printing or CNC machining, keeping part design, drawings, and manufacturing setup in the same platform.
✅Pros
- Dimensions are easy to revise repeatedly: Parameters and modeling operations remain in the timeline, allowing the model to be adjusted after test fitting or prototyping without rebuilding it.
- Design connects directly to physical production: Modeling, technical drawings, and manufacturing tools share one platform, which suits users who want to learn how products move from design into fabrication.
📖Learning Curve
- Difficulty: Moderate. Basic parts are relatively easy to create, but more complex independent work requires an understanding of how parameters, the timeline, components, and modeling order interact.
- Main challenge: Managing the timeline and component structure. Editing an early timeline operation can affect later features. If separate parts are not organized as components, revision and assembly also become more difficult.
- Learning resources: Extensive and systematic. Autodesk's introductory courses teach parameters, timelines, and components in sequence, while complete examples from Product Design Online and similar educators show how these concepts apply to real parts and manufacturing preparation.
💡Room to Grow
After mastering basic parametric part design, users can continue into component assemblies, technical drawings, surface modeling, machining, and simulation, taking a model from concept into prototyping and manufacturing preparation. Progress centers on building stable parameters, timelines, and component structures that can withstand repeated revisions.
💰Pricing
Autodesk Fusion for personal use is free for eligible home-based, non-commercial users. Autodesk requires annual revenue below $1,000 and limits some drawing, manufacturing, and other advanced features. The commercial version is listed at $680 per year or $85 per month, and commercial work requires the corresponding license.
👍🏻Best For
Autodesk Fusion is best for functional 3D-printing enthusiasts, hands-on product makers, and beginners who want to progress from precise parts into product structures and manufacturing. Functional components that need repeated dimensional changes and several prototypes make especially useful practice work.
Blender (A Long-Term Path into 3D Art and Animation)
Ease of Learning: ⭐⭐丨Room to Grow: ⭐⭐⭐⭐⭐
Blender is a comprehensive 3D creation suite for game models, characters, scenes, and animation. It covers the full process from basic modeling to materials, lighting, and final output, but beginners also face more concepts at the start. Blender is free and open source, and every core feature can be used commercially.
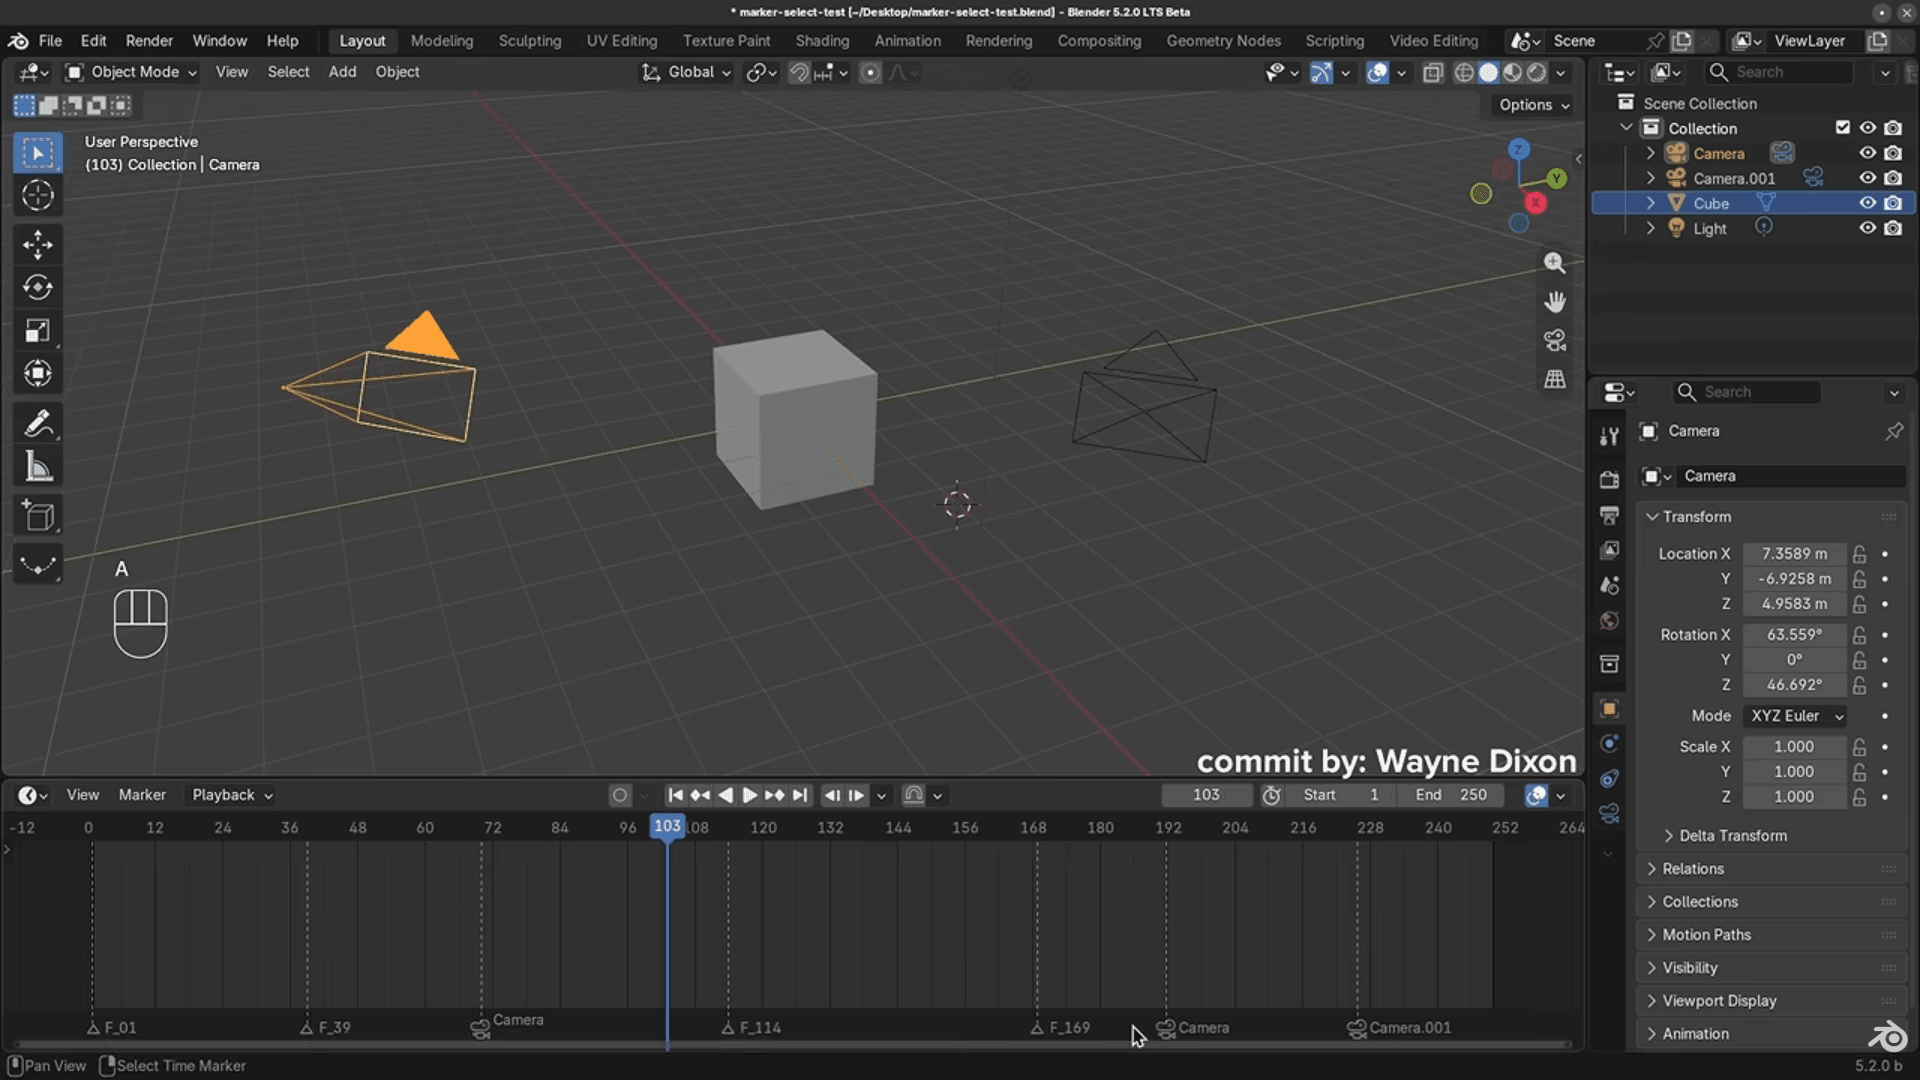
(image source: Blender official)
⭐Core Features
- Mesh modeling and digital sculpting: Edit vertices, edges, and faces precisely or use sculpting brushes to shape forms freely, covering the main approaches used in 3D art.
- Modifiers and node systems: Mirror, Array, Subdivision, and other modifiers adjust the model while preserving its underlying structure, while node systems create procedural geometry and materials.
- A complete 3D production workflow: Once a model is finished, users can continue into materials, rigging, animation, lighting, and rendering without changing applications.
✅Pros
- Multiple production stages stay together: Materials, lighting, and animation can follow modeling directly, keeping the work in one application.
- Advanced tools are fully available: The same free application supports progression from static models into characters, animation, and complete scenes.
📖Learning Curve
- Difficulty: High. Selection, movement, and basic modeling are not difficult on their own, but Blender contains multiple interaction modes and modeling methods, then extends into materials, animation, and rendering. Beginners need time to learn which tools fit each task.
- Main challenge: Moving from tutorials to independent decisions. Reproducing a model step by step is manageable. Independent work requires choosing a modeling method and deciding whether a problem comes from the object, the current mode, a tool setting, or the model structure.
- Learning resources: Exceptionally extensive, but time-consuming to filter. The official manual is useful for looking up tools, while beginner projects can provide a more structured starting point. A short Blender project tutorial can help beginners get familiar with the interface and basic modeling workflow.After that, beginners are better served by choosing one modeling direction and following a continuous course for the same Blender version rather than jumping between unrelated subjects.
💡Room to Grow
Starting with basic modeling, users can progress into sculpting and materials, then procedural modeling, character rigging, animation, and rendering. The same program can take them from individual models to complete scenes. Blender supports a long 3D-art learning path. At an advanced stage, choosing a direction and completing sustained work matters more than finding another application.
💰Pricing
Blender is fully free and open source. It can be used for personal and commercial work, with every core feature available without payment.
👍🏻Best For
Blender is best for beginners who want to study 3D art over the long term and gradually expand from individual models into characters, scenes, and animation. Game models, product visualization, and short animation can all become long-term directions.
FreeCAD (A Long-Term Path into Open-Source Parametric CAD)
Ease of Learning: ⭐☆丨Room to Grow: ⭐⭐⭐⭐☆
FreeCAD is an open-source parametric CAD system for parts and product structures with defined dimensions that need repeated revision. In addition to sketch constraints and feature-based modeling, beginners need to understand how its workbenches and model tree are organized, giving FreeCAD a relatively steep learning curve. The software supports free commercial use, and design files can be stored locally.
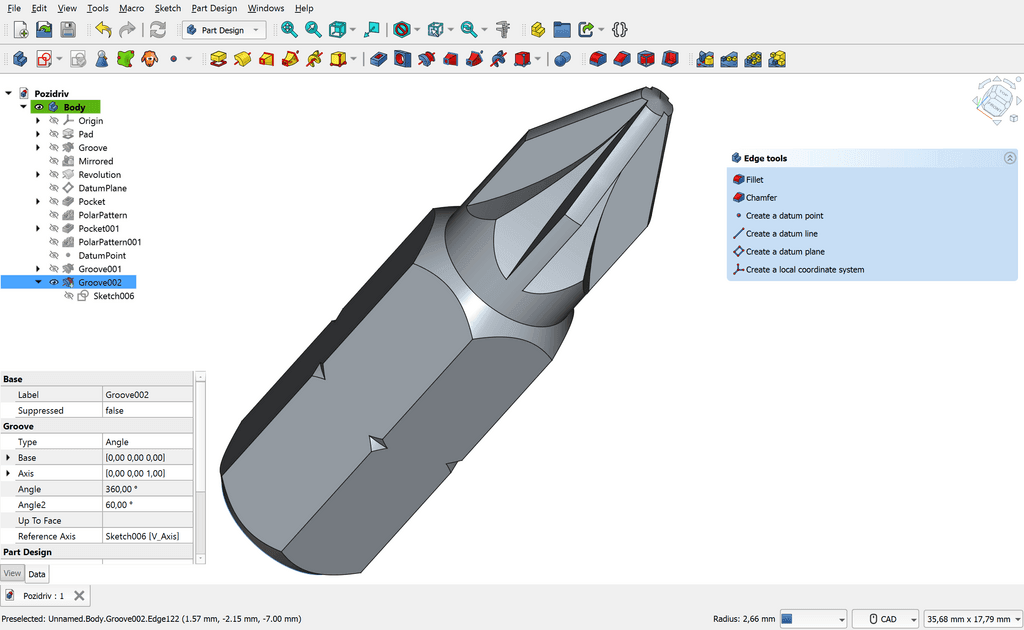
(image source: FreeCAD)
⭐Core Features
- Parametric part design: Control parts through dimensions, constraints, and feature parameters, then return to an earlier step to revise the model.
- Switch workbenches by task: Sketching, part design, technical drawings, and other functions live in separate workbenches, allowing users to change tool environments as the work progresses.
- Extend engineering capabilities through an open-source architecture: Assembly, sheet-metal, analysis, machining, and other workbenches can be added to the core CAD environment, while the core capabilities remain free and open source.
✅Pros
- Supports local storage and offline work: Once installed, FreeCAD works offline, and design files stay on the user's device for independent management and backup.
- The free license supports long-term use: The same application can support both personal practice and commercial work, with no plan-based limit on active documents.
📖Learning Curve
- Difficulty: High. Beyond the dimensional relationships and modeling order of parametric CAD, beginners need to understand how workbenches divide responsibilities and how the model tree is structured. That creates a large set of concepts at the outset.
- Main challenge: Choosing an approach and diagnosing revision problems. Similar tasks may appear in different workbenches and use different methods. After changing an early design step, users also need to trace the model tree to identify which downstream features were affected.
- Learning resources: Ample, but version and workbench differences add filtering effort. The official documentation is useful for checking tools and modeling rules, while continuous courses from MangoJelly and other educators are easier to follow in practice. Choose tutorials that match the current FreeCAD version and workbench so the interface and commands line up.
💡Room to Grow
After mastering sketch constraints, feature modeling, and the model tree, users can progress into technical drawings, assemblies, and manufacturing workbenches. Advanced learning focuses on building stable model structures so downstream features continue to update reliably when early parameters change.
💰Pricing
FreeCAD is fully free and open source. Individuals, businesses, and institutions can use it without a subscription or recurring renewal.
👍🏻Best For
FreeCAD is best for CAD learners who value open-source licensing, offline access, local file control, and free commercial use, as well as Linux users and makers designing their own parts. Functional and mechanical models that need repeated dimensional changes make suitable practice work.
Conclusion
The right first 3D modeling program should let you complete a full project with a manageable learning investment while giving you a clear direction for the next stage. Start by deciding whether the modeling method fits your goal, then compare the learning curve, room to grow, and price.
After finishing your first project, it becomes much easier to tell whether you need precise dimensional control, freer form-making, or a complete materials, animation, and rendering workflow. You can then decide whether to go deeper with the current software or move to another tool.
If you want a faster way to get your first model on screen, Triverse AI can generate a starter model from an image or text prompt.
Frequently Asked Questions about Beginner-friendly 3D Modeling Software
What Is the Easiest 3D Software for Beginners?
Tinkercad is generally the easiest place to start because basic shapes make spatial and dimensional relationships easy to understand. Triverse AI is another option when you want to create a starter model quickly from an image or text, although the generated result still needs inspection and cleanup.
Can I Learn 3D Modeling on My Own?
Yes. Choose software that matches your goal, begin with a small project and a structured course, then gradually learn the complete workflow through independent work.
How Long Does It Take to Learn 3D Modeling?
Learning the basic controls and completing a simple model may take a few days to several weeks. Producing complex work independently usually requires months of practice. The actual time depends on the software, the modeling direction, and how often you practice.
Is Blender Good for Beginners?
Blender is a good choice for beginners who want a long-term path into modeling, materials, animation, and rendering, but its broad toolset and multiple interaction modes take time to learn. Building skills around one specific project makes the path easier to follow.
Should a Beginner Learn CAD or Blender?
Both CAD and Blender can be good starting points for beginners, but they teach different kinds of 3D thinking. Choose parametric CAD if your first projects involve precise parts, dimensions, or 3D printing; choose Blender if you want to create characters, game assets, scenes, or animation.
Do I Need Drawing Skills to Learn 3D Modeling?
No. You do not need drawing skills to start learning 3D modeling. Basic modeling and CAD rely more on spatial thinking, dimensions, and structure. Drawing skills become more helpful in artistic workflows such as digital sculpting, character creation, and organic modeling, where proportion, anatomy, and visual observation matter more. These skills can also be developed alongside 3D practice, so you do not need to master them before you begin.
Will AI Replace 3D Modelers?
AI is better suited to shortening concept exploration and initial model creation than replacing the full modeling process. Form evaluation, mesh cleanup, and final refinement still require human judgment. The role of a 3D modeler is more likely to combine generation, editing, and production-pipeline integration.
Do Beginners Need to Buy Paid 3D Software?
Free tools are usually enough for learning basic modeling. Consider a paid plan when you need commercial licensing, private files, professional features, or a specific industry workflow.