AI贴图(基于图像/文本)
2026年3月23日Triverse AI 的纹理贴图功能可将新的材质和风格赋予现有 3D 模型。
已经拥有很棒的模型?无需重新建模,即可将其转换为“冬季”、“沙漠”、“赛博朋克”或任何其他变体。
纹理制作技巧
好的纹理参考图或提示词能带来更佳效果。以下是一些思路。
操作指南(最佳实践) | 应避免的事项 |
✅ 使用清晰的参考图片:高对比度、光线充足的材质照片效果最佳 | ❌ 避免使用模糊或低对比度的参考内容 |
✅ 提示要具体(例如,布满青苔和泥土 优于 长满苔藓的) | ❌ 避免过于复杂的纹理 |
✅ 贴合比例:若为小型物体制作纹理,请使用特写纹理参考 | ❌ 避免一次性提供过多细节 (例如布满灰尘、潮湿、覆盖苔藓、带有金色装饰就过于复杂) |
✅ 纹理变体测试:生成多种纹理,找出最佳效果 | |
✅ 考虑使用场景:思考模型的使用场景(游戏、渲染、打印输出) |
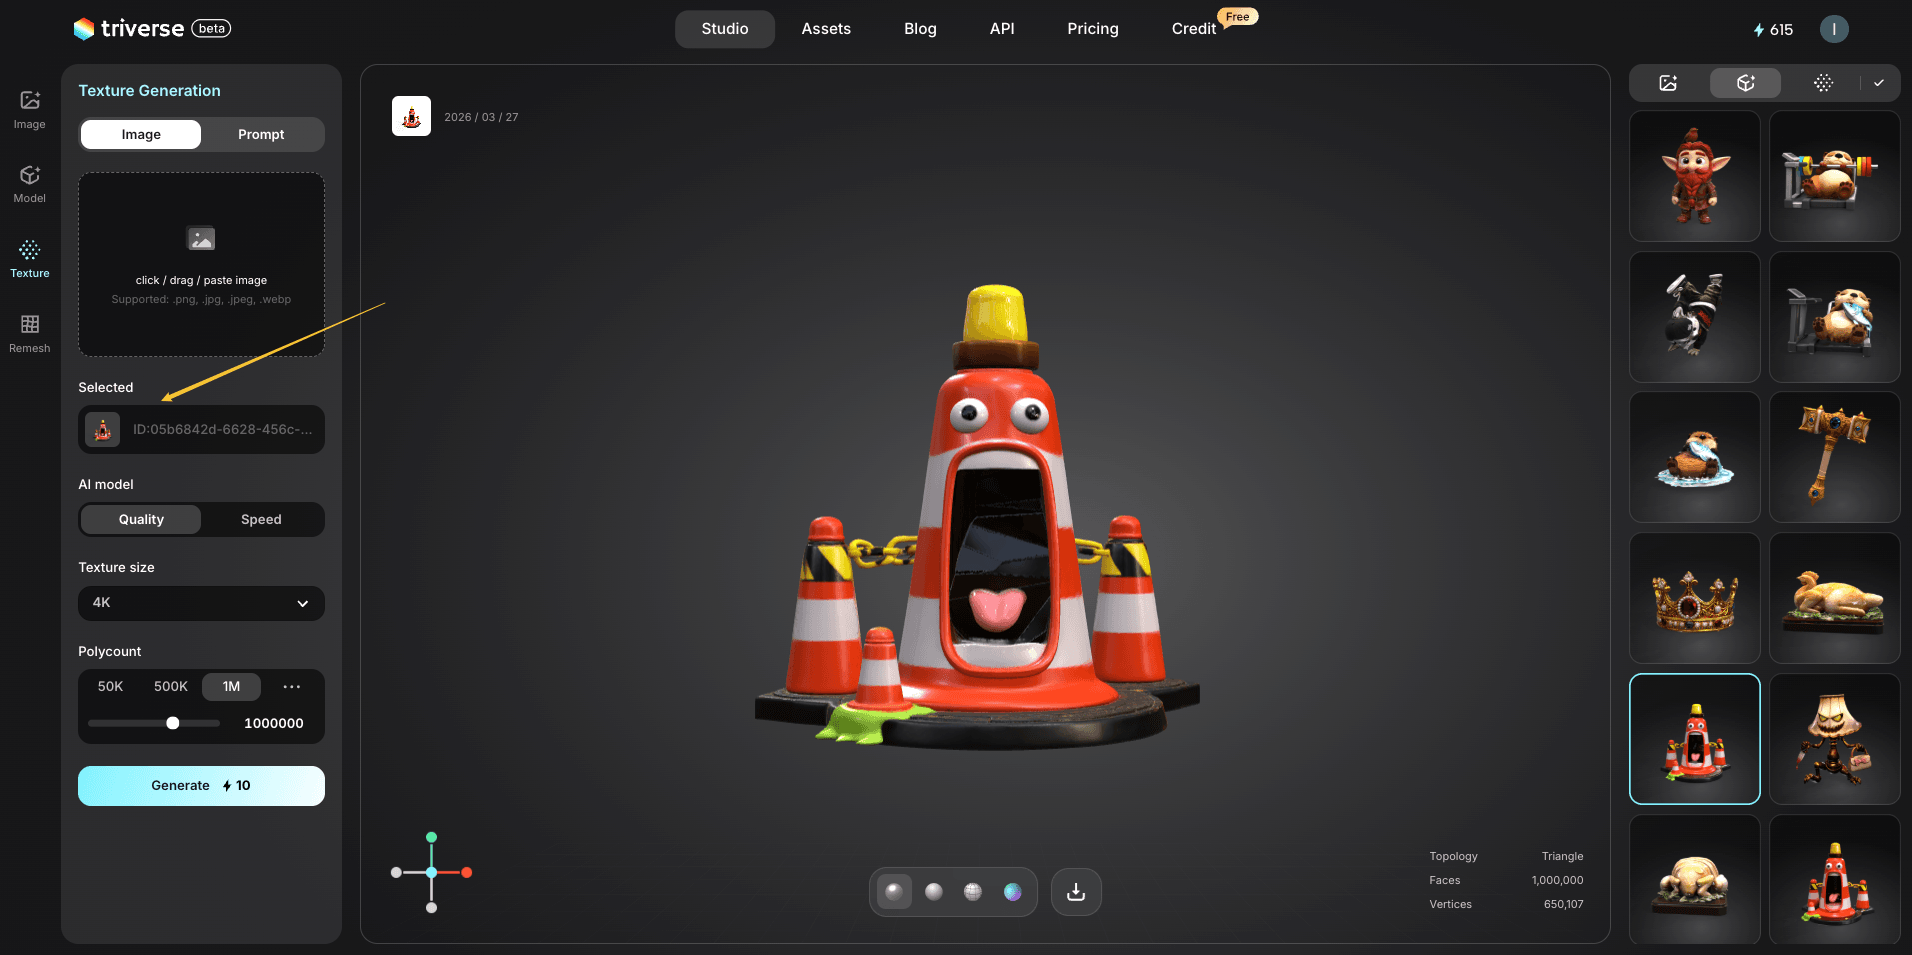
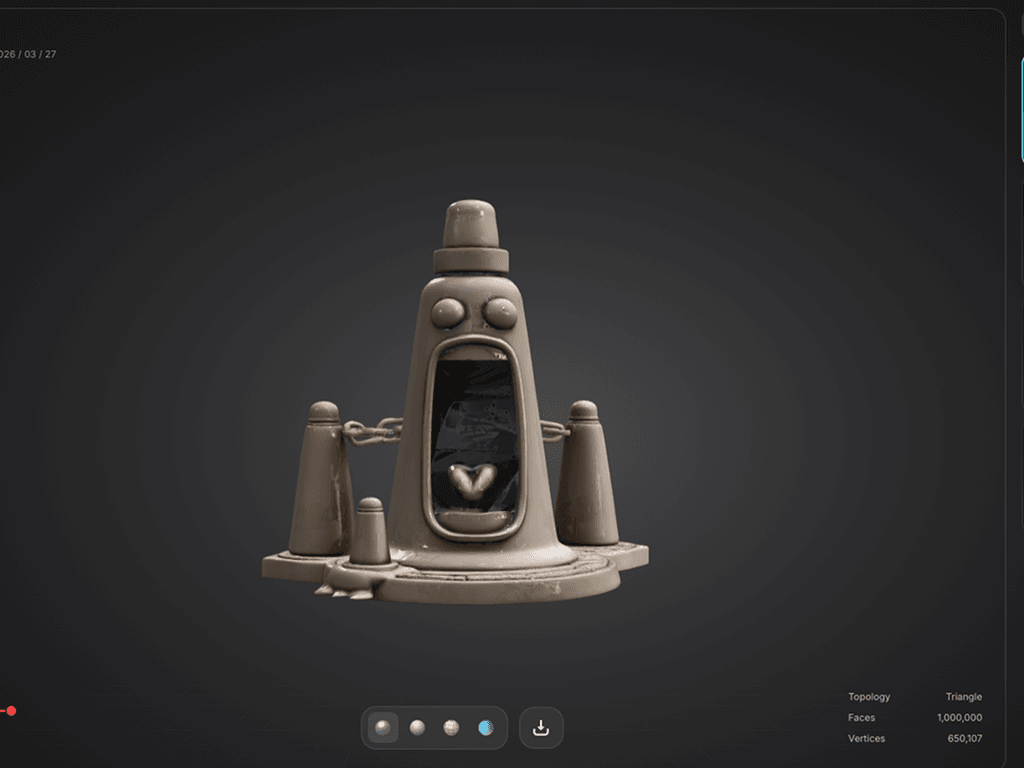
示例:创建锥形交通路标的纹理变体样式
让我们通过一个实际示例来展示:取一个基本交通锥模型,使用不同的参考图像生成多种纹理变体(彩虹、大理石、豹纹)。
步骤一:加载模型
打开 Triverse Studio,然后点击左侧面板中的 纹理 图标。
从您的资产库中选择交通锥筒模型,并将其加载到场景视图中。
第 2 步:选择您的输入方法
您有两个选项:
- 选项 A:文字提示
描述您想要的质感:“彩虹渐变条纹”、“大理石纹理”、“豹纹斑点”。
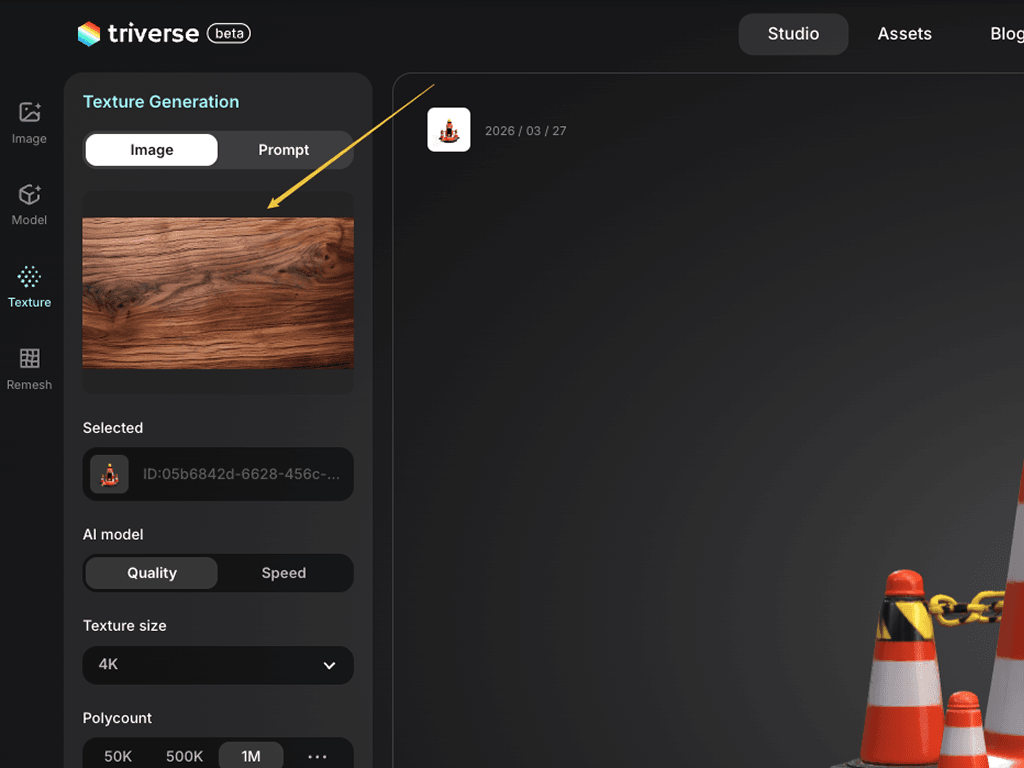
- 备选方案B:参考图片
上传您想要应用的纹理图片,例如:大理石瓷砖、豹纹、锈蚀纹理、织物等。
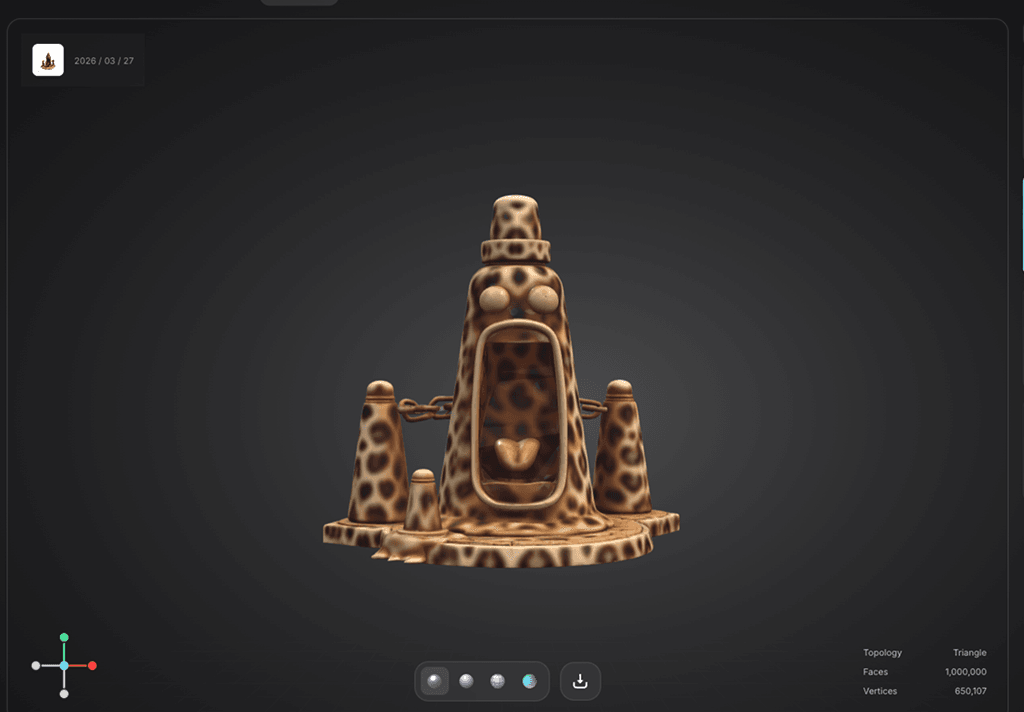
本例中,我们使用参考图片。
步骤 3:上传纹理参考图并生成纹理
上传您的第一张参考图片(如,大理石瓷砖图片)。
选择纹理清晰度(最高4K级别),然后点击Generate。
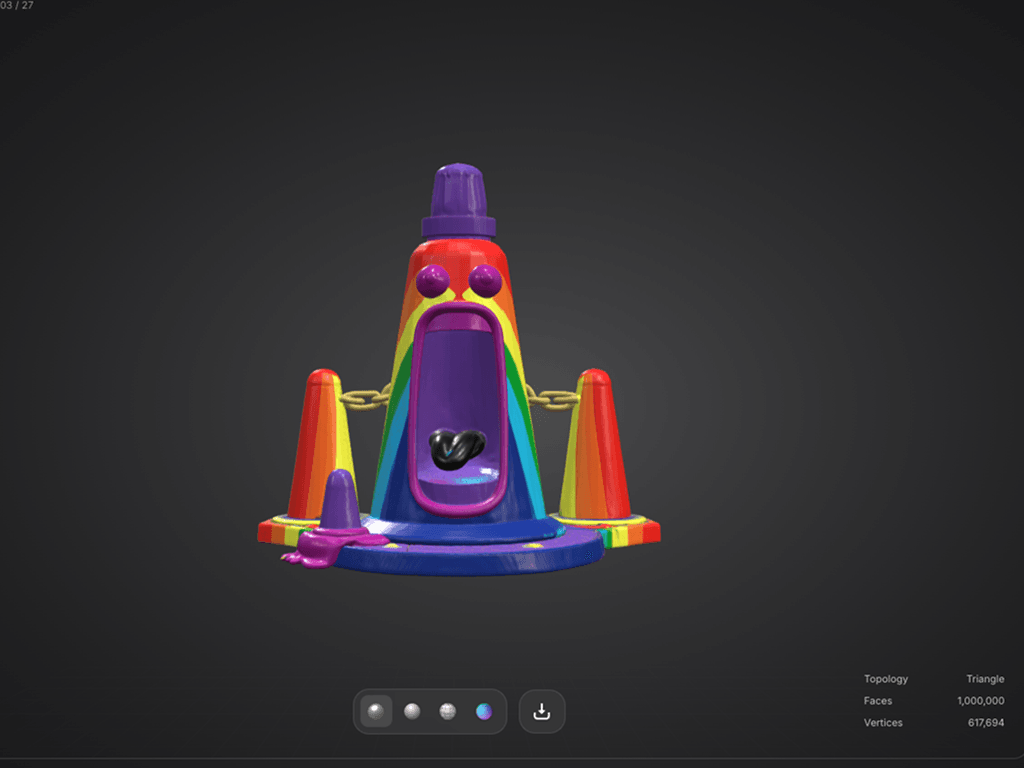
Triverse(三维软件)将大理石纹理应用到路锥上。模型的几何结构保持不变,只有表面外观改变。
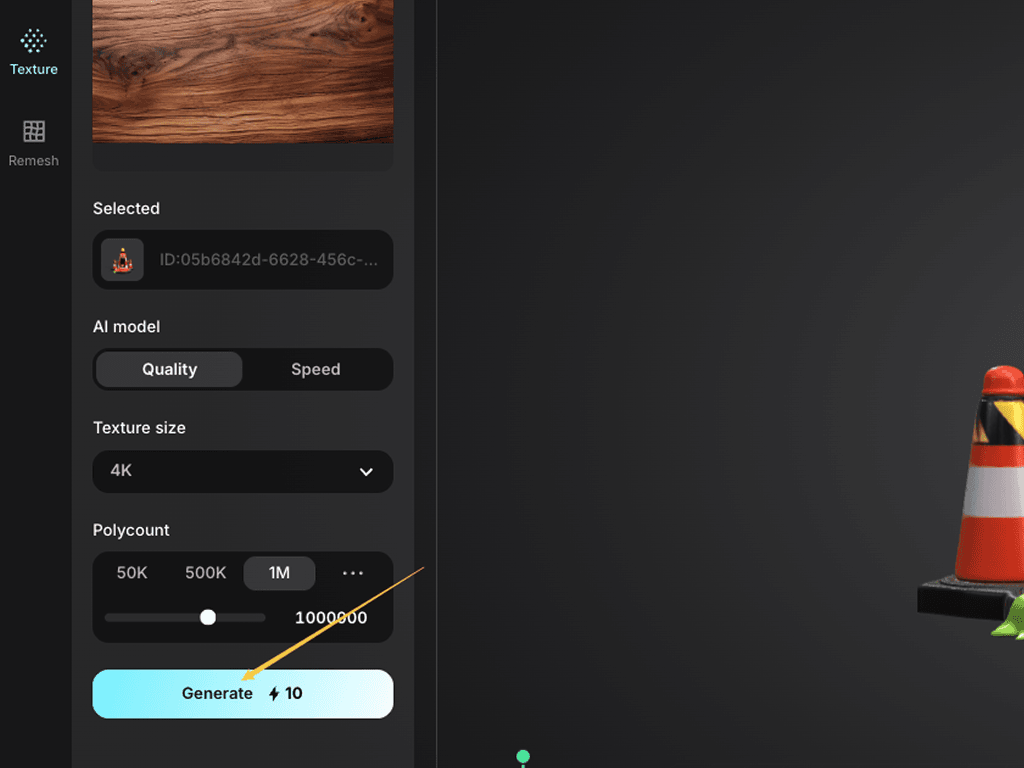
步骤 4:尝试多种风格
使用不同的参考图像重复该过程。
生成设置
既然你已经了解了完整的工作流程,以下是每项设置的实际用途及何时进行调整。
AI模型:质量与速度的权衡
质量 | 速度 | |
生成时间 | ~90秒 | 约60秒 |
网格精度 | 高 | 适中 |
最佳适用场景 | 英雄素材、角色 | 原型设计,背景道具 |
纹理分辨率:1K/2K/4K
纹理大小控制在近距离观察下表面细节呈现的清晰度
1K (1024×1024) | 2K分辨率 (2048×2048像素) | 4K分辨率 (4096×4096) | |
文件大小 | 小 | Medium平台 | 大尺寸 |
详情 | 较低 | Medium | 高级 |
最佳适用 | 移动设备,背景道具/装饰 | 通用 | 核心资源,近景渲染 |
多边形面数:50万-150万
多边形计数控制网格几何细节的多少。多边形越多,形状越精准,但性能消耗也越大。
50,000 | 50万 | 1百万 | |
性能 | 极轻 | 平衡型 | 沉重 |
形状准确性 | 低风险 | 非常好 | 高等级 |
最适用于 | 移动设备, 背景 | 通用 | 首屏素材、渲染 |
工作流:模型 → 贴图变体 → 导出
AI 纹理生成的核心优势在于,能够从单个模型创建多种资产变体。
步骤 1: 生成或导入您的基础 3D 模型
步骤 2: 应用材质变体 A(例如大理石)
步骤 3: 导出为 texture_marble.GLB / .OBJ / .STL / .3MF / .FBX / .USDZ
步骤 4: 应用材质变体 B(例如锈迹)
步骤 5: 导出为 texture_rust.GLB / .OBJ / .STL / .3MF / .FBX / .USDZ
步骤 6: 按需重复以上步骤
这节省了大量的建模时间——只需建模一次,即可应用多种风格的贴图。
典型应用场景
- 🎨 多样风格:为单个素材创建冰霜、火焰、剧毒或季节主题皮肤。
- 🔄 资产焕新:升级并重制贴图库中现有资产的低分辨率模型。
- ⚡️ 快速迭代:无需重新建模即可测试多种造型。
立即试用
前往Triverse Studio,立即免费生成你的三维模型!