Nano Banana Image to 3D: A 6-Step Triverse Workflow
Turn a Nano Banana image into a 3D model in six steps in Triverse: pick a model, write a clean prompt, build consistent views, convert, export GLB or STL.
Nano Banana makes images, not 3D models. This guide shows you the whole route to make your own 3D models in Triverse Studio. Pick a Nano Banana model, write one plain reference prompt, and generate consistent views. Then send them to Image to 3D and export the mesh. Six steps, one workspace, no file shuffling.
How to Turn Nano Banana Image to 3D in Triverse
Triverse puts both ends of the chain in one workspace. The Image to 3D feature page calls its image side the integrated AI Image Studio and describes the route as Input Prompt, Generate Picture, Convert to 3D. Open the Image Generation panel to start. If you already have a Nano Banana PNG from the Gemini app or AI Studio, skip Step 1 and upload it at Step 5. The conversion side is identical either way.
Step 1: Open Image Generation and Pick a Nano Banana Model
In Triverse Studio, choose Image in the left sidebar. The Image Generation panel has a prompt box and an AI model dropdown. That dropdown currently lists Nano Banana 2 and Nano Banana Pro alongside Seedream 4.5, Seedream 5.0 Lite, Seedream 5.0 Pro, and GPT Image 2. Pick a Nano Banana build, set Number of images to the count you need, and you are ready to write.
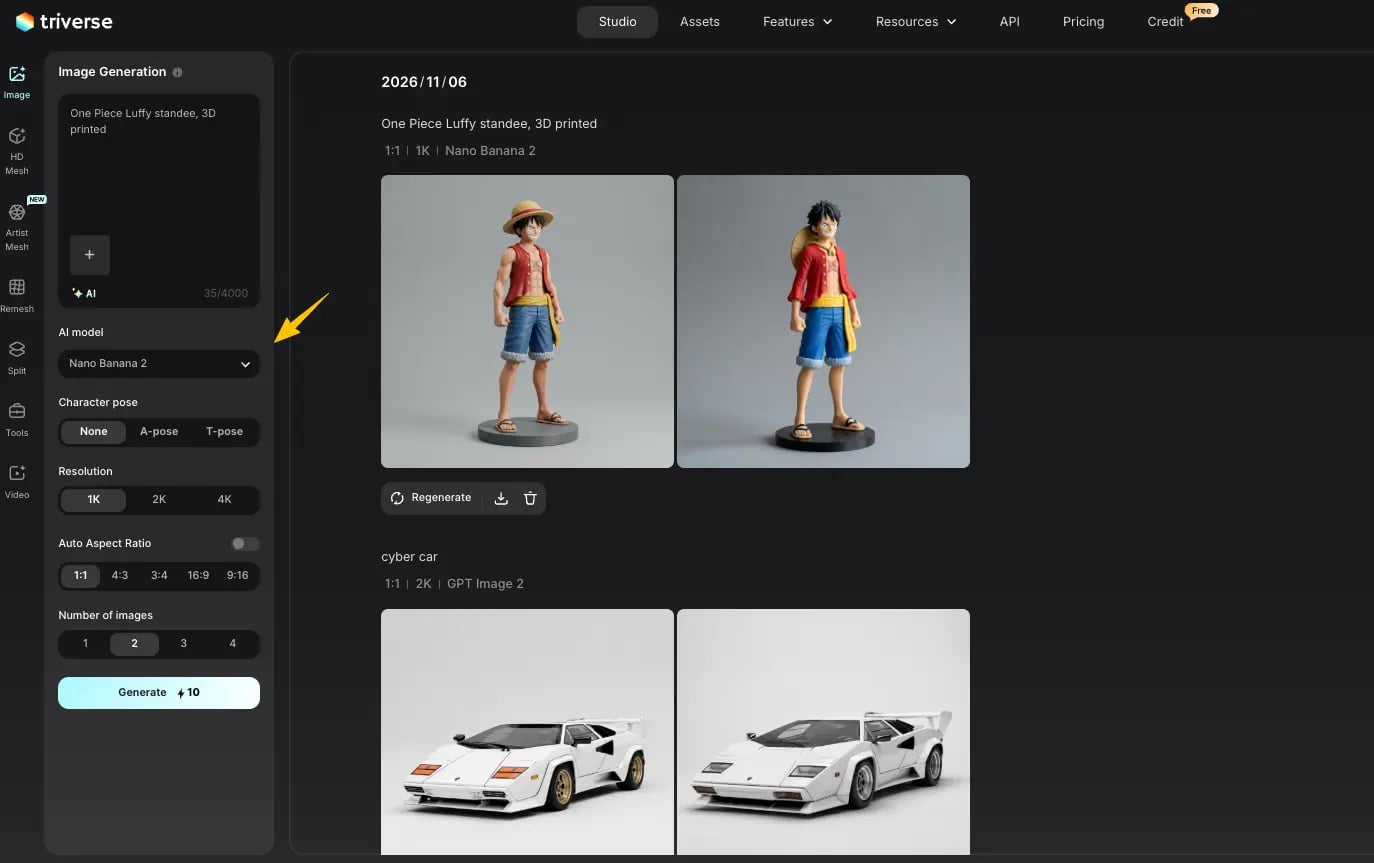
Nano Banana 2 is the faster route for iterating on a plain reference. Nano Banana Pro adds 2K and 4K output, legible text, and studio-grade creative controls, which are exactly the features Step 2 asks you to switch back off. For one clean front view, start with the speed tier. Google DeepMind's model page lists what each version is built for.
Step 2: Write a Nano Banana Prompt for a Reconstructible Base Image
This is the step that decides the model. Write the prompt for the converter, not for an audience. You want a single opaque object, evenly lit, fully in frame, on a plain background, with no lighting effects at all. It will look like a catalog photo from 2009. That is the point.
A starting template:
For characters, add "A-pose, arms separated from the torso, feet apart" and swap the three-quarter view for a straight front view. Overlapping limbs are one of the most common causes of fused geometry, and an A-pose costs you nothing at this stage.
Nano Banana Prompt Words to Avoid in an Image to 3D Workflow
Prompt word or phrase | What it does to the mesh |
dramatic rim light, golden hour, studio spotlight | Bakes a directional highlight into the diffuse map |
bokeh, shallow depth of field, soft focus | Blurs the silhouette the converter reads as shape |
cinematic grade, film grain, lens flare | Adds pixel variation with no geometric meaning |
on a desk, on an acrylic base, in a box | Adds objects that get fused into the main mesh |
isometric diorama, fisheye, low angle | Distorts proportions that reconstruction preserves |
with the title / logo / label printed | Turns lettering into raised relief detail |
Ask for "flat even lighting" and "matte materials" instead. Those two phrases prevent more regeneration cycles than any setting downstream.
Step 3: Generate Consistent Multi-View Nano Banana Images
Set Number of images to the views you need, or keep the conversation open in Gemini and work from one anchor image. Ask for the same subject from the back, then the left, then the right, at the same height, scale, and lighting. Google lists "Conversational inputs" as a core capability, with the note that you can "keep the conversation going to refine what the model generates". That is the mechanism doing the consistency work.
Four views is the practical ceiling. Triverse accepts up to four: a required front plus optional back, left, and right. Check all four side by side before converting. If the belt moves or a strap disappears, regenerate that view from the same anchor instead of hoping the converter averages it out.
Do not use four views when a single clean front shot already works. More inputs help with ambiguous silhouettes, vehicles, armor, and creatures. They add failure modes for a simple mug.
Step 4: Check the Image Before Any Image to 3D Conversion
This is the step people skip. Keep the generated image, or export it as PNG if you made it elsewhere, then check five things. The background should be solid or transparent. There is no cast shadow under the object and no blown highlight on one side. Edges are sharp and fully in frame. The long side sits between 1024 and 2048 pixels.
If a shadow survived, ask for one more edit pass rather than opening an image editor: "Remove the cast shadow on the ground and flatten the lighting. Keep the object's shape, proportions, colors, and every detail exactly the same." Conversational editing is good at this. It is also capable of quietly shifting the silhouette, so compare before and after at the same zoom. Transparent PNGs are worth the extra minute because they remove the background cutout problem entirely.
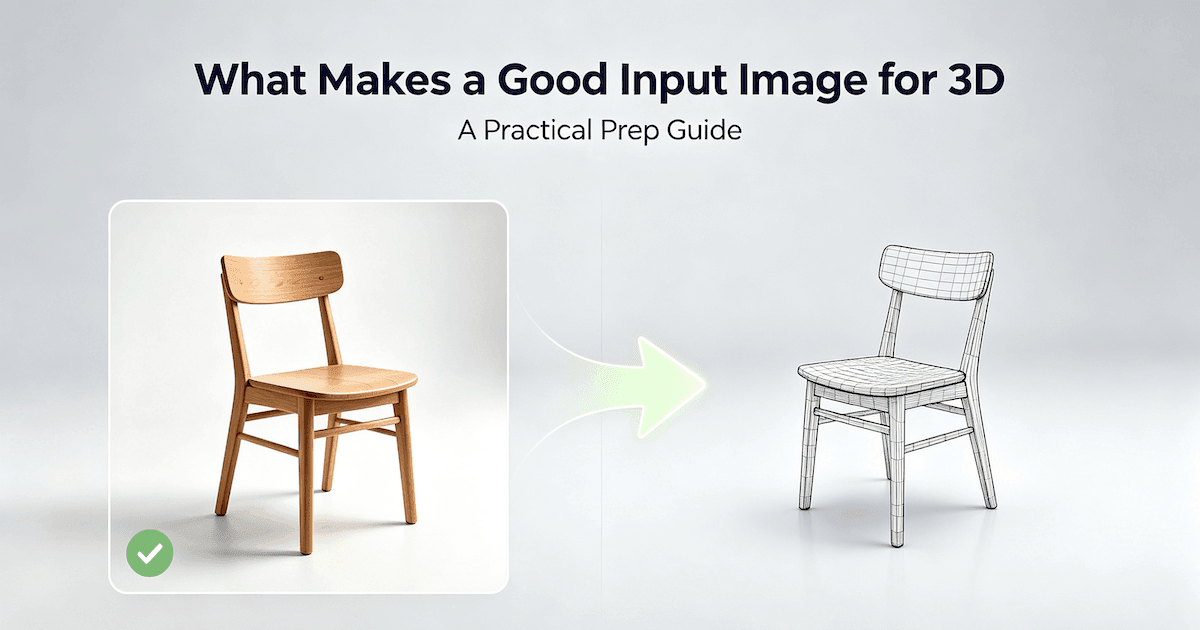
Our longer piece on what makes a good input image for 3D covers the full checklist, so I will not repeat it here. The goal is a picture a converter can parse, not a picture you would post.
Step 5: Run the Nano Banana Image to 3D Conversion and Check Every Angle
Move to Model Generation, Image to 3D, and send the prepared image in. If you made multiple views, enable Multi View Upload and feed the front shot plus the consistent back and side views from Step 3. Keep them at similar scale and height, with matching lighting and background. Do not mix poses. The generator fuses all perspectives into one coherent model instead of guessing the hidden side.
The Image to 3D tutorial documents the rest of the controls. Quality mode takes roughly 90 seconds; Speed takes about 60. Texture size runs from 1K to 4K, and polycount from 50K up to 1.5M, with 1M as the default. You can also batch up to six images at once. Defaults are a reasonable starting point for a hero asset. For a set of background props, drop the polycount and run a batch.
Then rotate the result. Check the back, the base, the gaps between limbs, and anywhere the reference could not see. A single image always involves inference about the hidden side, so this inspection is not optional. When something is wrong, go back to the image before you start turning dials. A missing back is an input problem. A melted silhouette is usually a lighting or focus problem. Changing polycount will not fix either one.
Step 6: Pick a Generation Mode and Export the Nano Banana 3D Model
Two modes are available for the conversion. Artist Mesh returns clean, quad-friendly low-poly geometry in about 20 seconds. HD Mesh carries more surface detail and a full 1K to 4K PBR map stack, and it needs a retopo pass before animation. The full comparison sits a few sections below.
Then export. GLB for an engine, STL for a single-color print, 3MF when the color matters. The next two sections cover both branches and the full format list.
Why a Boring Base Image Makes a Better Nano Banana 3D Model
The prompt in Step 2 looks fussy. Here is why every exclusion is there. Google's launch post for Nano Banana Pro sells the model on creative control, and the exact wording is worth reading if you plan to convert the output:
"Select, refine and transform any part of an image with improved localized editing. Adjust camera angles, change the focus and apply sophisticated color grading, or even transform scene lighting (e.g. changing day to night or creating a bokeh effect)."
Every clause in that sentence is a feature for a designer and a liability for a reconstruction model. A mesh generator is not a viewer. It estimates depth, edges, and material from where pixels change. Anything that changes pixels without changing shape is noise. The ranking pages for this keyword tend to stop at "use a clean background", which is why their example images still come back with ridges where a shadow used to be.
Why Studio Lighting Bakes Shadows Into Your Nano Banana 3D Model
Scene lighting is the biggest offender. A hard cast shadow reads as geometry: the shadow edge becomes a ridge, and the dark half of the object reads as a hole or a step. Triverse's Image to 3D guide puts "Avoid strong or heavy shadows, as they may be baked into the texture or mistaken for geometry" in its don'ts list for exactly this reason.
Baked lighting is subtler and more annoying. The highlight on the left cheek is painted into the diffuse map. Rotate the finished model under a light from the right and the highlight stays on the left, because it is no longer lighting. It is a color. Delighting, either in the prompt or as a cleanup pass, is cheaper than repainting a texture by hand.
Bokeh and Camera Angles Blur the Image to 3D Silhouette
"Change the focus" is a great feature until the converter needs the exact outline of a shoulder. Soft edges give it a range of possible boundaries instead of one. Extreme angles are worse. A fisheye or top-down shot distorts proportions, and the reconstruction keeps the distortion as if it were the object's real shape.
The useful range is narrow. A three-quarter view, roughly 12 to 60 degrees off front, shows the front and one side at once and gives the model real depth to work with. A dead-flat front shot shows one plane. A cinematic low angle shows a hero, which is not what you are building here.
Legible Text and 4K Detail Add Noise to Nano Banana to 3D
Google calls Nano Banana Pro "the best model for creating images with correctly rendered and legible text directly in the image". For posters, that is a breakthrough. For a figurine box in a reference image, it means crisp lettering that the converter dutifully turns into relief detail. Watermarks, UI chrome, and logos behave the same way.
Resolution has a similar trap. The launch post confirms "available 2K and 4K resolution", and bigger sounds better for 3D. It usually is not. Most converters want 1024 to 2048 pixels on the long side. A 4K frame adds upload weight and gives the model more pixels of baked shadow to interpret, with no new information about shape. Downscale before you convert.
None of this means Nano Banana Pro is a bad tool for 3D work. It means the default aesthetic of a great image model and the input spec of a reconstruction model point in opposite directions. Once you see that, the fix is mostly subtraction.
What Nano Banana Pro's 14-Image Consistency Gets Right for Multi-View Image to 3D
One Pro capability cuts the other way, and it is the most underused part of any Nano Banana image to 3D workflow. Google says you can blend "up to 14 images and maintain the consistency and resemblance of up to 5 people" in a single composition.
Multi-view reconstruction has always had a boring, hard prerequisite: every angle must show the same object. Generate four "similar" images independently and you get four slightly different characters, with different belt buckles and different hair. Feed those to a converter and the geometry averages them into mush. Triverse's multi-view documentation states the constraint plainly: "All views must be of the same object. Mixed references (different poses or sizes) will confuse the AI." That is the check you ran in Step 3. Our guide to converting multiple images to 3D models goes deeper on how the views get fused.
Can Nano Banana Make 3D Models? The Short Answer
No. Google DeepMind describes the Nano Banana family as "State-of-the-art image generation and editing models, built on Gemini". The word in that sentence is image. Every version outputs pixels, and the official model page lists no GLB, OBJ, or STL export.
That surprises people because the pictures look three-dimensional. A rendered figurine with a base and a shadow has depth cues, but it has no depth data. Open the PNG in Blender and you get a plane. Rotate it and there is nothing behind it. The back of the character, the underside of the base, the space between the arms: all of it was never in the file.
So a Nano Banana to 3D workflow has two jobs, not one. Nano Banana produces the reference in Step 1 through Step 3. An image to 3D model generator predicts the geometry and texture from it in Step 5. The two run back to back in the same workspace, but they are still two jobs, and the first one sets the ceiling for the second.
What Nano Banana Is, and Which Version You Are Actually Using
The name started as a throwaway. Google's account of how Nano Banana got its name traces it to product manager Naina Raisinghani, who needed an anonymous label for a model submitted to LMArena in early August. She combined two nicknames, "Naina Banana" and "Nano", and the codename outlived the test. The model behind it was officially Gemini 2.5 Flash Image.
That is where a lot of the current tutorials stop, including the two ranking pages for this keyword. The family has moved on. The official model page now lists three tiers:
Brand name | Official model | What the official page says |
Nano Banana Pro | Gemini 3 Pro Image | "Create and edit images with studio-quality levels of precision and control" |
Nano Banana 2 | Gemini 3.1 Flash Image | "Pro-level image generation and editing, at Flash speed" |
Nano Banana 2 Lite | Gemini 3.1 Flash-Lite Image | "Our fastest, most efficient Gemini Image model" |
Nano Banana Pro launched on November 20, 2025, built on Gemini 3 Pro. You reach these models through Google's own apps and API, and through studios that have integrated them. Free-tier quotas on Google's side are limited. Google says free users revert to the original Nano Banana model once the quota runs out, so the version producing your reference image may not be the one you think it is.
Why a Nano Banana 3D Figurine Is Still a Flat PNG
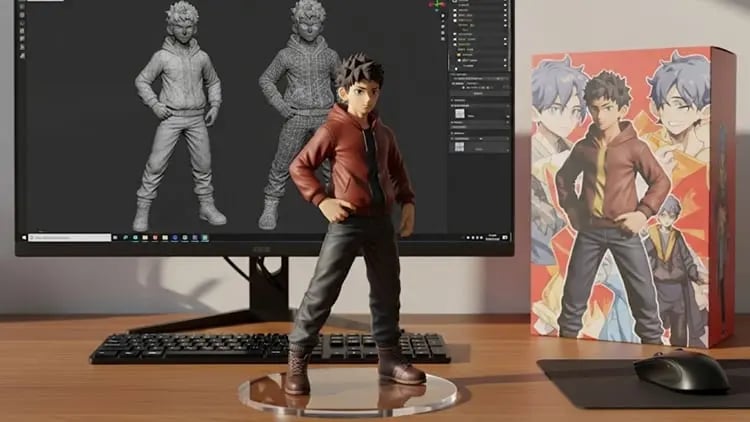
The viral figurine format is a good example of how a beautiful source becomes a bad input. Those images usually contain four things that are not the character: an acrylic base, a printed box, text, and a cast shadow on a desk. A converter sees four more objects to build. It will fuse the base into the feet, turn the lettering into raised geometry, and read the desk shadow as a step in the surface.
None of this is a bug in the converter. It is doing exactly what a single-image reconstruction does, which is treat every edge in the frame as evidence about shape. The figurine trend optimizes for a scroll-stopping image. The Nano Banana image to 3D step needs a measuring instrument.
Nano Banana vs Nano Banana Pro vs Nano Banana 2 for 3D Work
For reconstruction work, the version matters less than the settings you switch off. That said, the differences are worth knowing:
- Original Nano Banana is the fast, fun editor. Fine for quick shape tests, and it is what free-tier users fall back to.
- Nano Banana Pro adds 2K and 4K output, accurate legible text, and studio-grade creative controls. Those are the features most likely to hurt a mesh, so they need to be prompted away.
- Nano Banana 2 trades some of that ceiling for speed. For iterating on a clean reference sheet, speed is usually more useful than resolution.
The one Pro feature that genuinely helps 3D work is consistency, and it is covered above.
Nano Banana to 3D for Printing vs Games: Two Different Endings
Step 6 is where the shared route splits, and picking the wrong branch is an easy way to waste an afternoon.
Nano Banana for 3D Printing: STL, 3MF, and Where the Color Goes
STL stores geometry. That is all it has ever stored, so the colors you spent three prompts perfecting disappear the moment you export. If the figurine's paint matters, use 3MF. The 3MF Consortium describes the format as "an open, XML-based standard for full-fidelity 3D model transfer", with materials, color, and print settings inside a single file, plus full-fidelity color, multi-material, and texture definitions. It was adopted as ISO/IEC 25422:2025, and the core spec is watertight by default. That removes a repair step before slicing.
Printing also asks for a different mesh. Fine surface detail is worth more than clean edge flow, so a dense model is fine here. You will still scale it, hollow it, and add supports in the slicer. Our breakdown of STL vs OBJ vs 3MF covers which format carries what, and the miniature printing guide covers the physical side. If the subject is a tabletop character, the D&D miniatures workflow picks up from the same point.
Nano Banana to 3D for Games: GLB, Polycount, and Topology
For a game engine, color travels with the mesh and triangle count matters. The Khronos glTF 2.0 specification calls glTF "an open interoperable 3D asset 'transmission' format that is compact, and efficient to process and render at runtime". It also states that "glTF uses the metallic-roughness material model". The GLB container packs the JSON and the binary buffer into a single .glb file. That is why it is the usual choice for web, AR, and engine import.
Polycount should follow the object's screen time. A background prop on mobile can live at 50K faces. A hero asset in a close-up render can use 1M. Guessing high everywhere just moves the cost into LOD authoring later. Our game-ready model checklist and the quads vs triangles retopology guide cover what happens between export and import.
Choosing an Export Format After the Image to 3D Step
Destination | Format | Reason |
Web, AR, Unity, Unreal | GLB | One file, PBR materials, runtime-efficient |
DCC exchange, further modeling | FBX or OBJ | Broad support, easy to edit |
Monochrome 3D print | STL | Universal slicer support, geometry only |
Full-color 3D print | 3MF | Carries color, materials, print settings |
Apple AR quick look | USDZ | Native to that ecosystem |
Triverse exports all six of these from the same generation, so the format decision can wait until you have rotated the mesh. That is a small thing, but it removes the temptation to regenerate an asset just to change a file extension.
Artist Mesh vs HD Mesh After a Nano Banana Image to 3D Conversion
Artist Mesh | HD Mesh | |
Generation speed | ~20 seconds | ~3 to 5 minutes |
Topology | "Clean, structured, quad-friendly" | "Dense, unstructured triangle soup" |
Polycount | Optimized low-poly | 50K to 1.5M faces, user controlled |
Retopo work | "Minimal. Primary mesh ready for export." | "Required before rigging/animation" |
Best for | Props, prototypes, real-time games, mobile, VR | Cinematic shots, close-up renders, sculpting base, printing |
For studios without a retopo artist on standby, that fourth row is the whole decision. Artist Mesh takes a PNG, JPG, or WebP, offers 1K, 2K, or 4K vertex presets with triangle or quad output, and returns four clean variations in one run. HD Mesh carries more surface detail and a full 1K to 4K PBR map stack, which is what you want for a printed figurine or a normal-map bake.
The honest framing: a Nano Banana image to 3D conversion produces a source mesh. It does not produce a shipped asset. Which mode you pick decides how much of the remaining work is yours.
What Triverse Does Not Do in a Nano Banana to 3D Pipeline
The image models in the Step 1 dropdown are third-party models Triverse integrates, not models it trains. Versions, availability, and feature changes come from their providers, so check the dropdown before you build a long pipeline around one specific Nano Banana build.
Triverse also does not rig the result, create LODs, or set up engine materials for you. Dense HD output still needs a retopo pass before animation, and that is stated on the comparison page rather than buried in a footnote. For the downstream work, the Blender cleanup walkthrough, the rigging guide, and the AI generation troubleshooting notes pick up where conversion stops.
What stays in your hands is the part that matters most: the prompt that produces the base image. The dropdown gives you the model and the settings give you the mesh, but neither one can rescue a reference with a baked shadow or a fused silhouette.
Common Nano Banana Image to 3D Failures and Fixes
Symptom | Likely cause | Fix before regenerating |
Melted, lumpy silhouette | Multiple inconsistent reference views | Regenerate views from one anchored conversation |
Ridge or hole where a shadow was | Hard cast shadow read as geometry | Ask for a delighting pass, keep shape identical |
Base, box, or desk fused into the model | Figurine framing in the source | Remove base and packaging in the prompt |
Highlight stays when you rotate the model | Baked lighting in the diffuse map | Regenerate with flat even lighting, matte materials |
Blank or collapsed back | Single image with no rear information | Add a consistent back view |
Limbs welded together | Action pose, overlapping parts | Use an A-pose or T-pose for characters |
Text appearing as raised relief | Legible lettering in the reference | Strip all text, logos, and watermarks |
Glass or chrome reads as a solid blob | Reflective or transparent surface | Prompt for matte, opaque materials |
Eight failures, and seven of them are fixed in the image. That ratio is the argument for spending two extra prompts in Step 2 before you spend a generation credit.
Bottom Line
Six steps, and Step 2 does most of the work. A Nano Banana image to 3D conversion inherits everything the base image got right, and everything it got wrong.
Write the boring prompt, keep the views consistent, strip the shadows, and check the back of the mesh. Then choose the format for where the model is going: GLB with PBR materials for an engine, STL for a quick print, 3MF when the color matters. That sequence holds regardless of which Gemini Image version Google ships next, and whether you make the reference in Gemini or in Triverse Studio.
Start with one boring prompt in Triverse Studio, then compare Artist Mesh against HD Mesh on the same image. One careful reference will tell you more about your pipeline than another round of polycount tweaking.
Frequently Asked Questions about Nano Banana Image to 3D
Can Nano Banana generate 3D models directly?
No. The official model page describes Nano Banana as an image generation and editing family and lists no 3D file export. Even the pictures that look like rendered figurines are flat PNGs. A separate image to 3D model generator has to reconstruct the geometry from them.
What is the best Nano Banana image to 3D workflow?
Work through the six steps above. Pick a Nano Banana model in Triverse Studio and write a deliberately plain reference prompt. Generate consistent multi-view angles from that single anchor, clean the images, then convert. Rotate the result to check the back and base. Fix any geometry problem in the image first, because polycount and quality settings cannot repair a bad silhouette.
Can I generate Nano Banana images inside Triverse?
Yes. The Image Generation panel in Triverse Studio lists Nano Banana 2 and Nano Banana Pro in its AI model dropdown, and you can generate one to four images per run. The Image to 3D guide also points to the built-in Text to Image option for when you have no reference yet. From there the image goes straight into conversion, or you can export it and bring it back later.
Is Nano Banana free, and does converting to 3D cost extra?
Google offers limited free-tier quotas for Nano Banana Pro in the Gemini app, and free users revert to the original Nano Banana model when the quota runs out. Higher quotas come with Google AI Plus, Pro, and Ultra subscriptions. Generating the image through Triverse Studio is a separate route with its own account allowance, and the 3D conversion is a separate step with its own usage limits. Check both before budgeting a large batch.
Can I 3D print a Nano Banana image?
Not directly. Convert the image to a mesh first, then export STL for a single-color print or 3MF if you need the colors and materials to survive. STL carries geometry only. Scale, hollow, and add supports in your slicer before printing.
How many views do I need for a Nano Banana to 3D conversion?
One clean front image is enough to start. Use up to four views, front plus back, left, and right, when the silhouette is ambiguous or the hidden side matters. All views must show the same object at a similar scale and lighting. Google's multi-image consistency feature in Nano Banana Pro is useful for producing them.
Why does my Nano Banana 3D model have baked-in shadows?
Because the reference had directional lighting. A converter projects visible highlights and shadows onto the texture, so they stay fixed when the model rotates under a different light. Ask for flat, even lighting and matte materials in the prompt, or run a delighting edit pass on the image before conversion.
Does Nano Banana Pro work better than Nano Banana 2 for 3D?
For consistency across multiple views, Pro has the edge: Google documents up to 14 input images with resemblance maintained across up to 5 people. For iterating quickly on one clean reference, the speed tier is usually enough. In both cases, the studio lighting, focus, and color-grading controls need to be turned off in the prompt.

Dennis Kirk is an AI 3D specialist and game developer with more than 5 years of industry experience, mastering production workflows across Unity, Unreal Engine, and Godot. He focuses on demystifying next-generation 3D workflows for creators of all skill levels. His writing spans hands-on technical walkthroughs, asset optimization strategies, and in-depth software reviews, helping developers build faster and smarter.